> ## Documentation Index
> Fetch the complete documentation index at: https://docs.encord.com/llms.txt
> Use this file to discover all available pages before exploring further.
# Cloudflare
The following steps outline how to create an Cloudflare integration in Encord.
## 1. Configure Cloudflare
1. Log into Cloudflare.
The Cloudflare dashboard appears.
2. Click the account where your bucket is located.
The *Account home* page appears.
3. Click **R2 object storage** from the left hand navigation.
The *Overview R2 Object Storage* page appears.
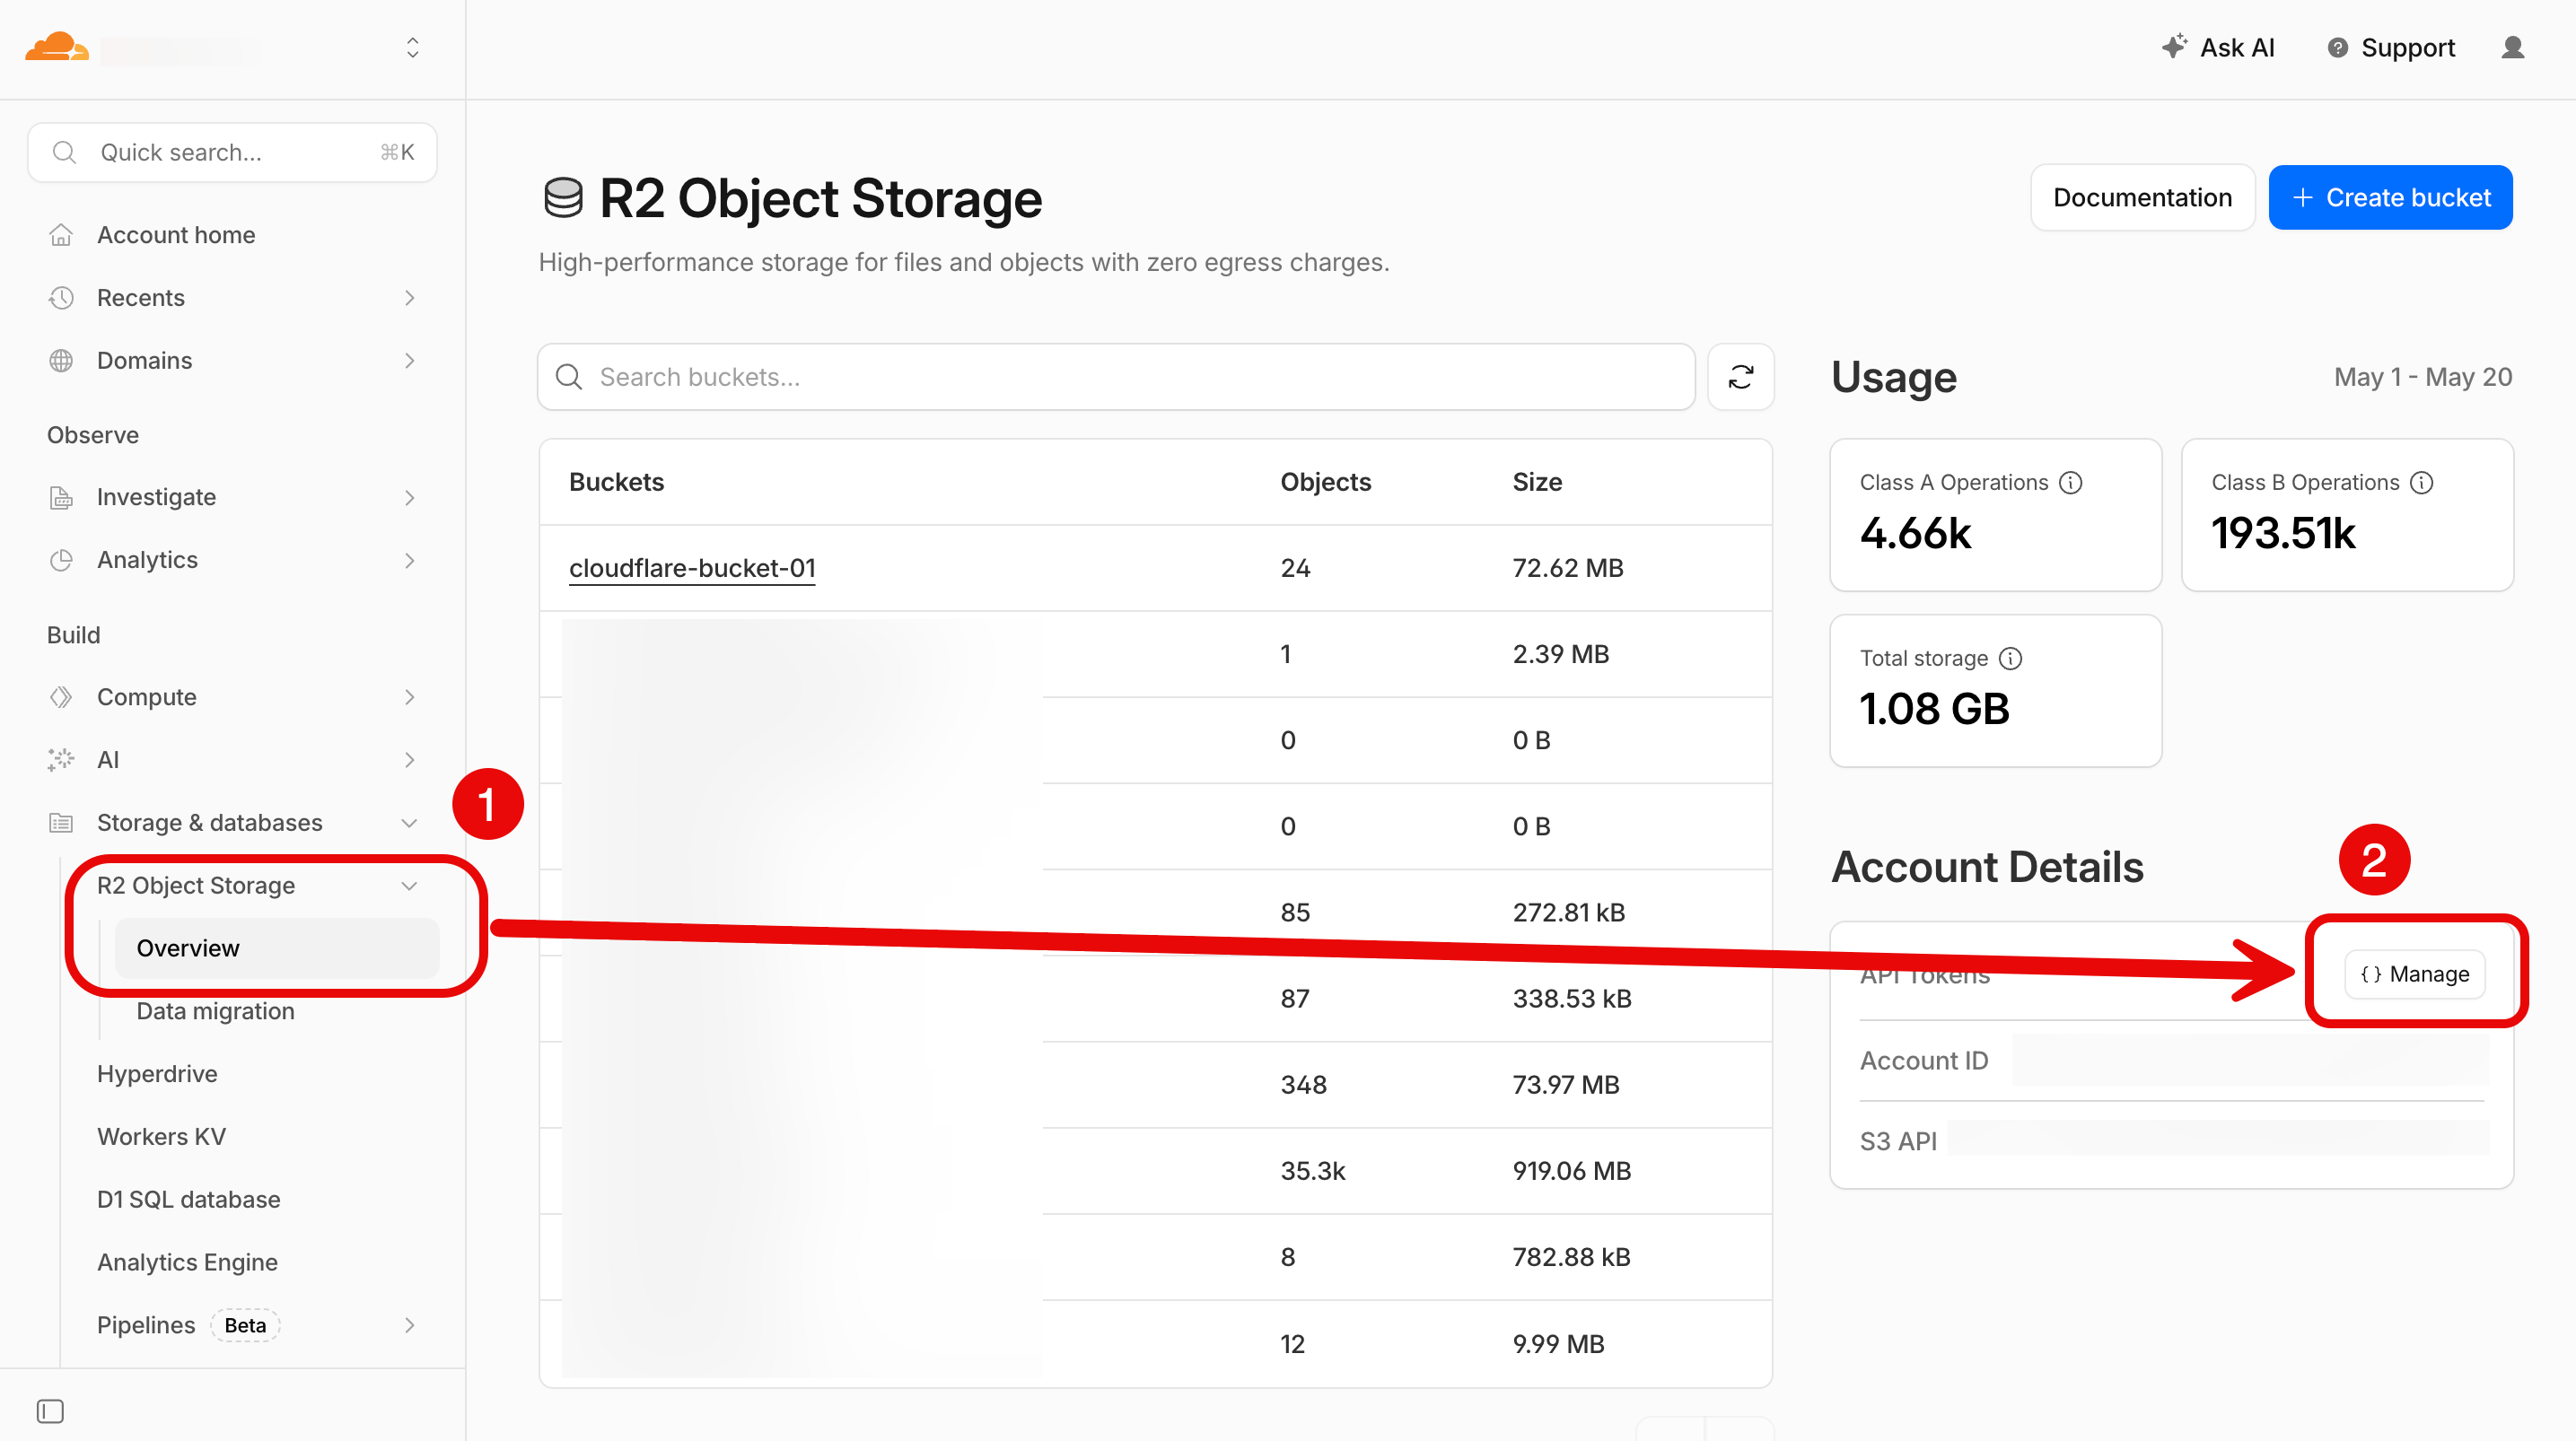
4. Click **Manage**.
The *API tokens* page appears.
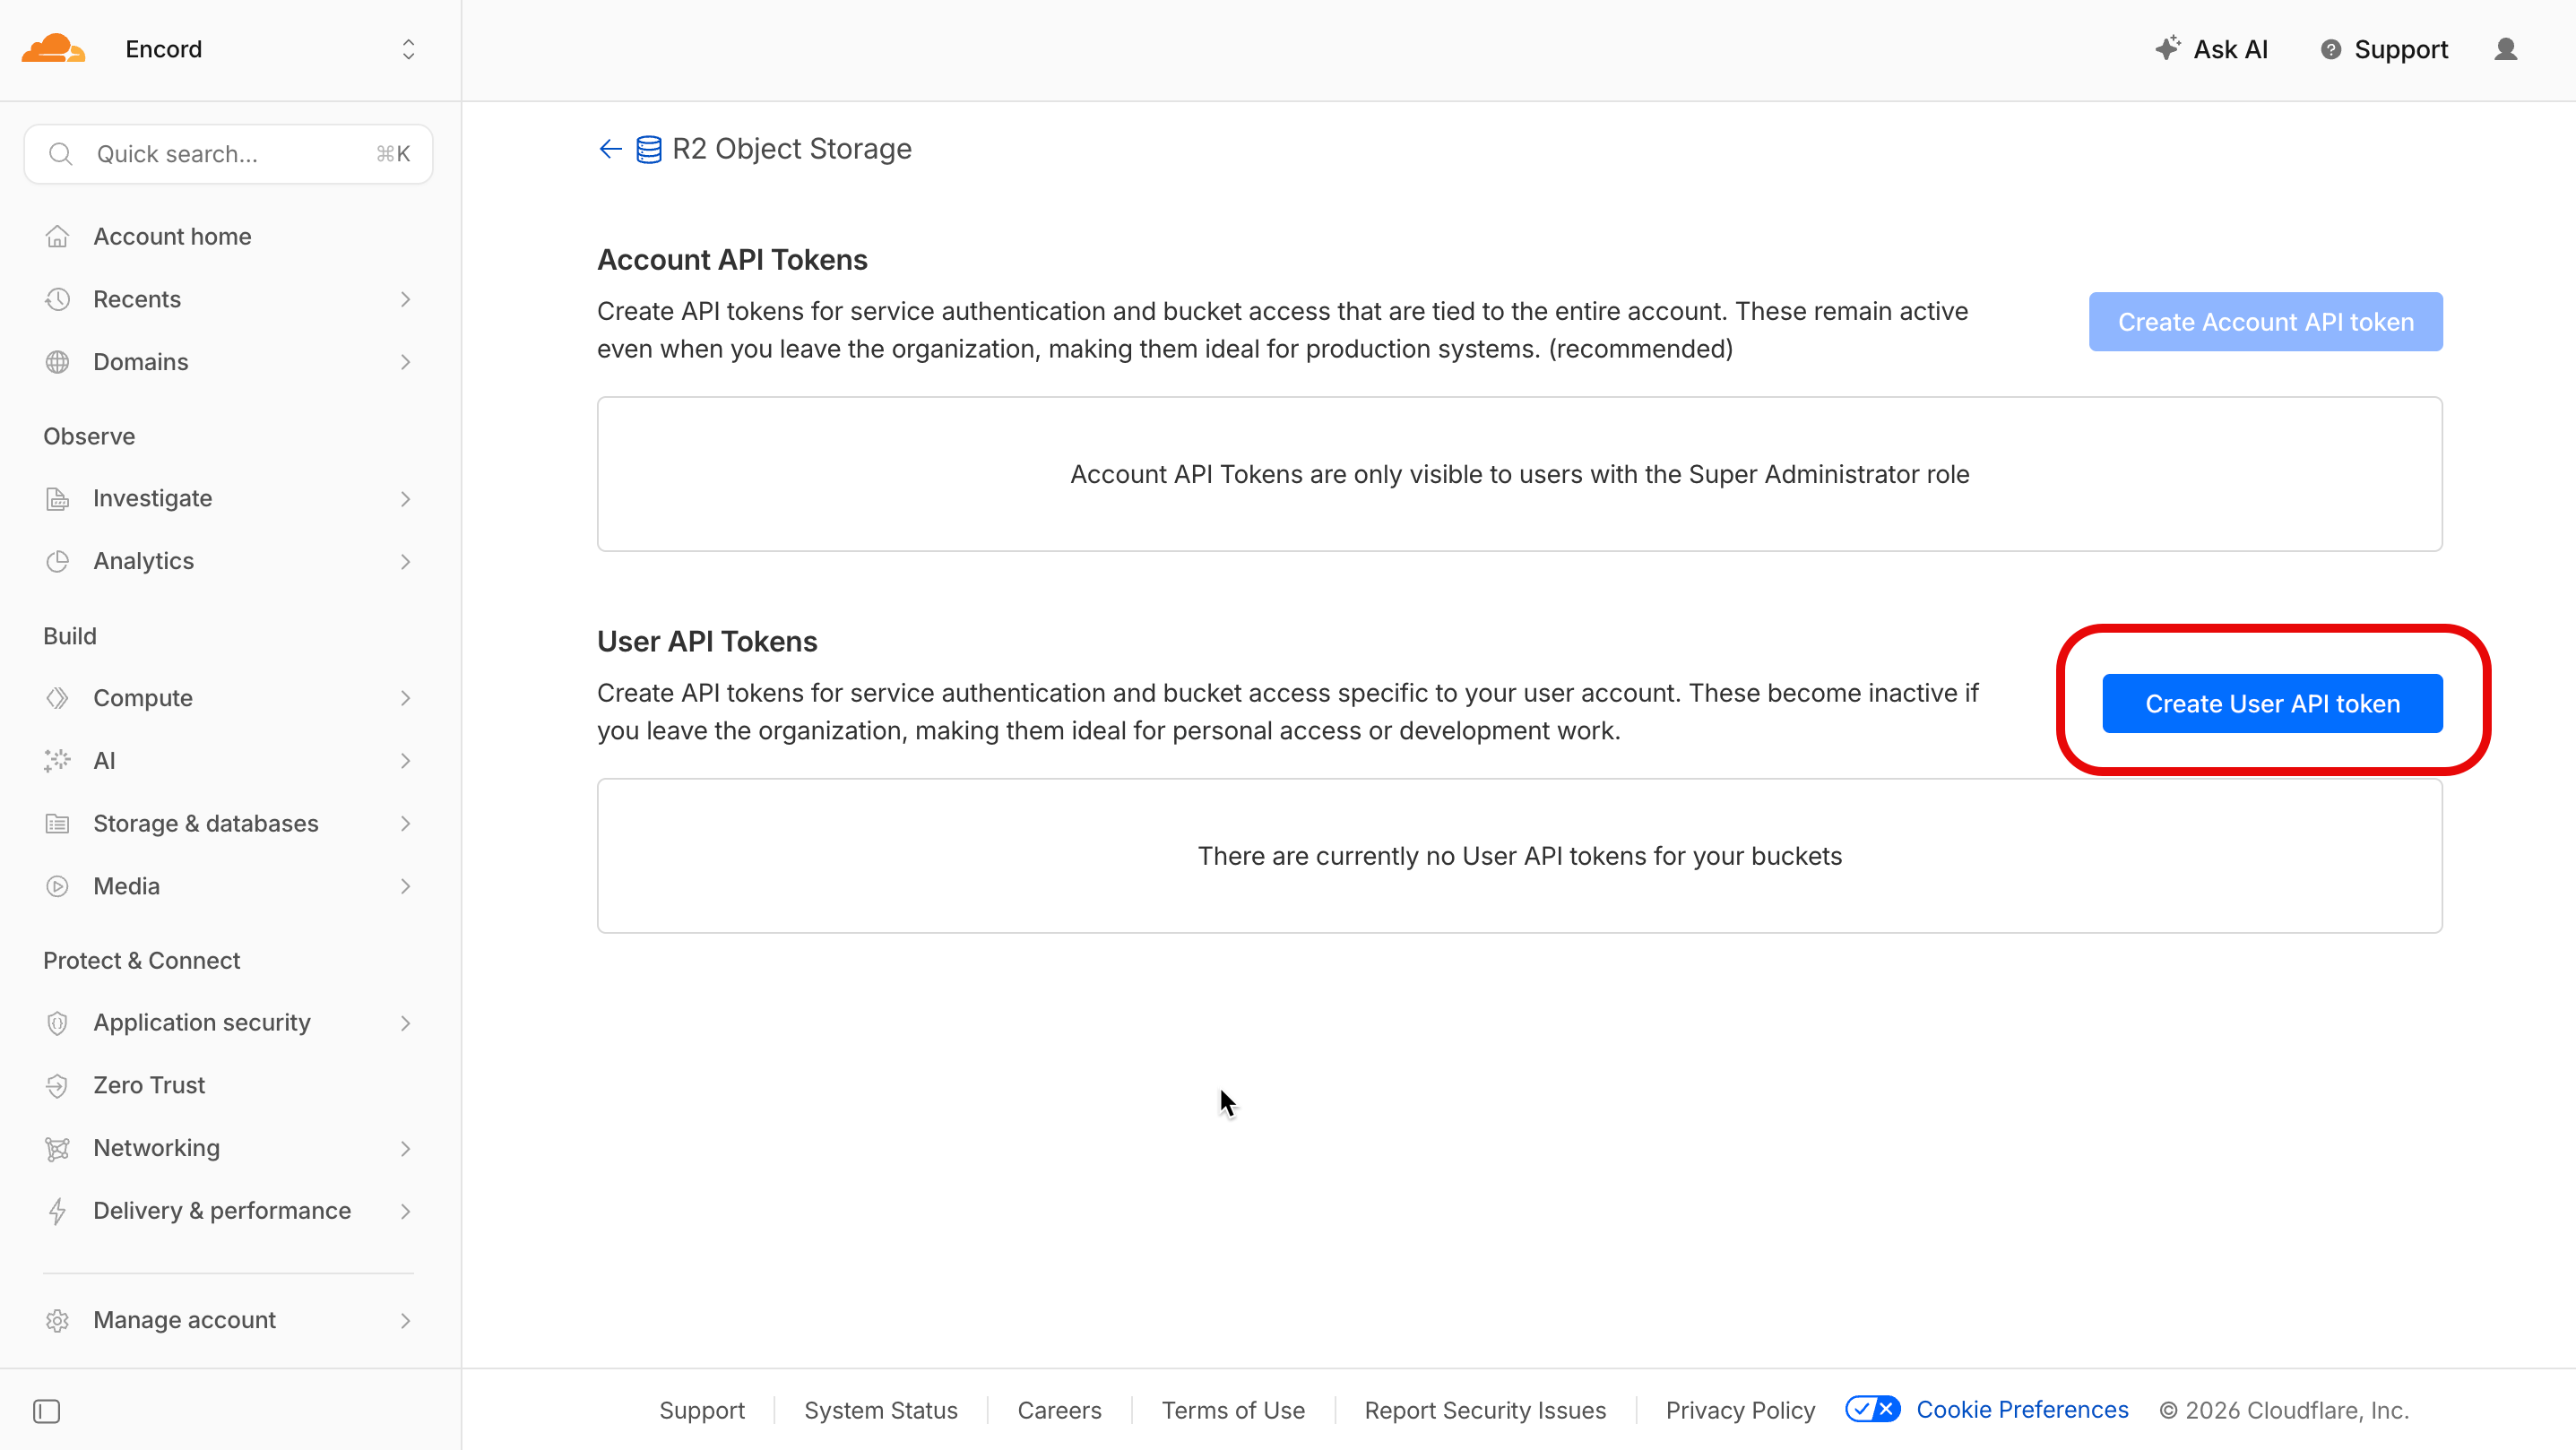
5. Click **Create Account API token** or **Create User API token** depending on your Cloudflare account privileges.
The *Create User API Token* page appears.
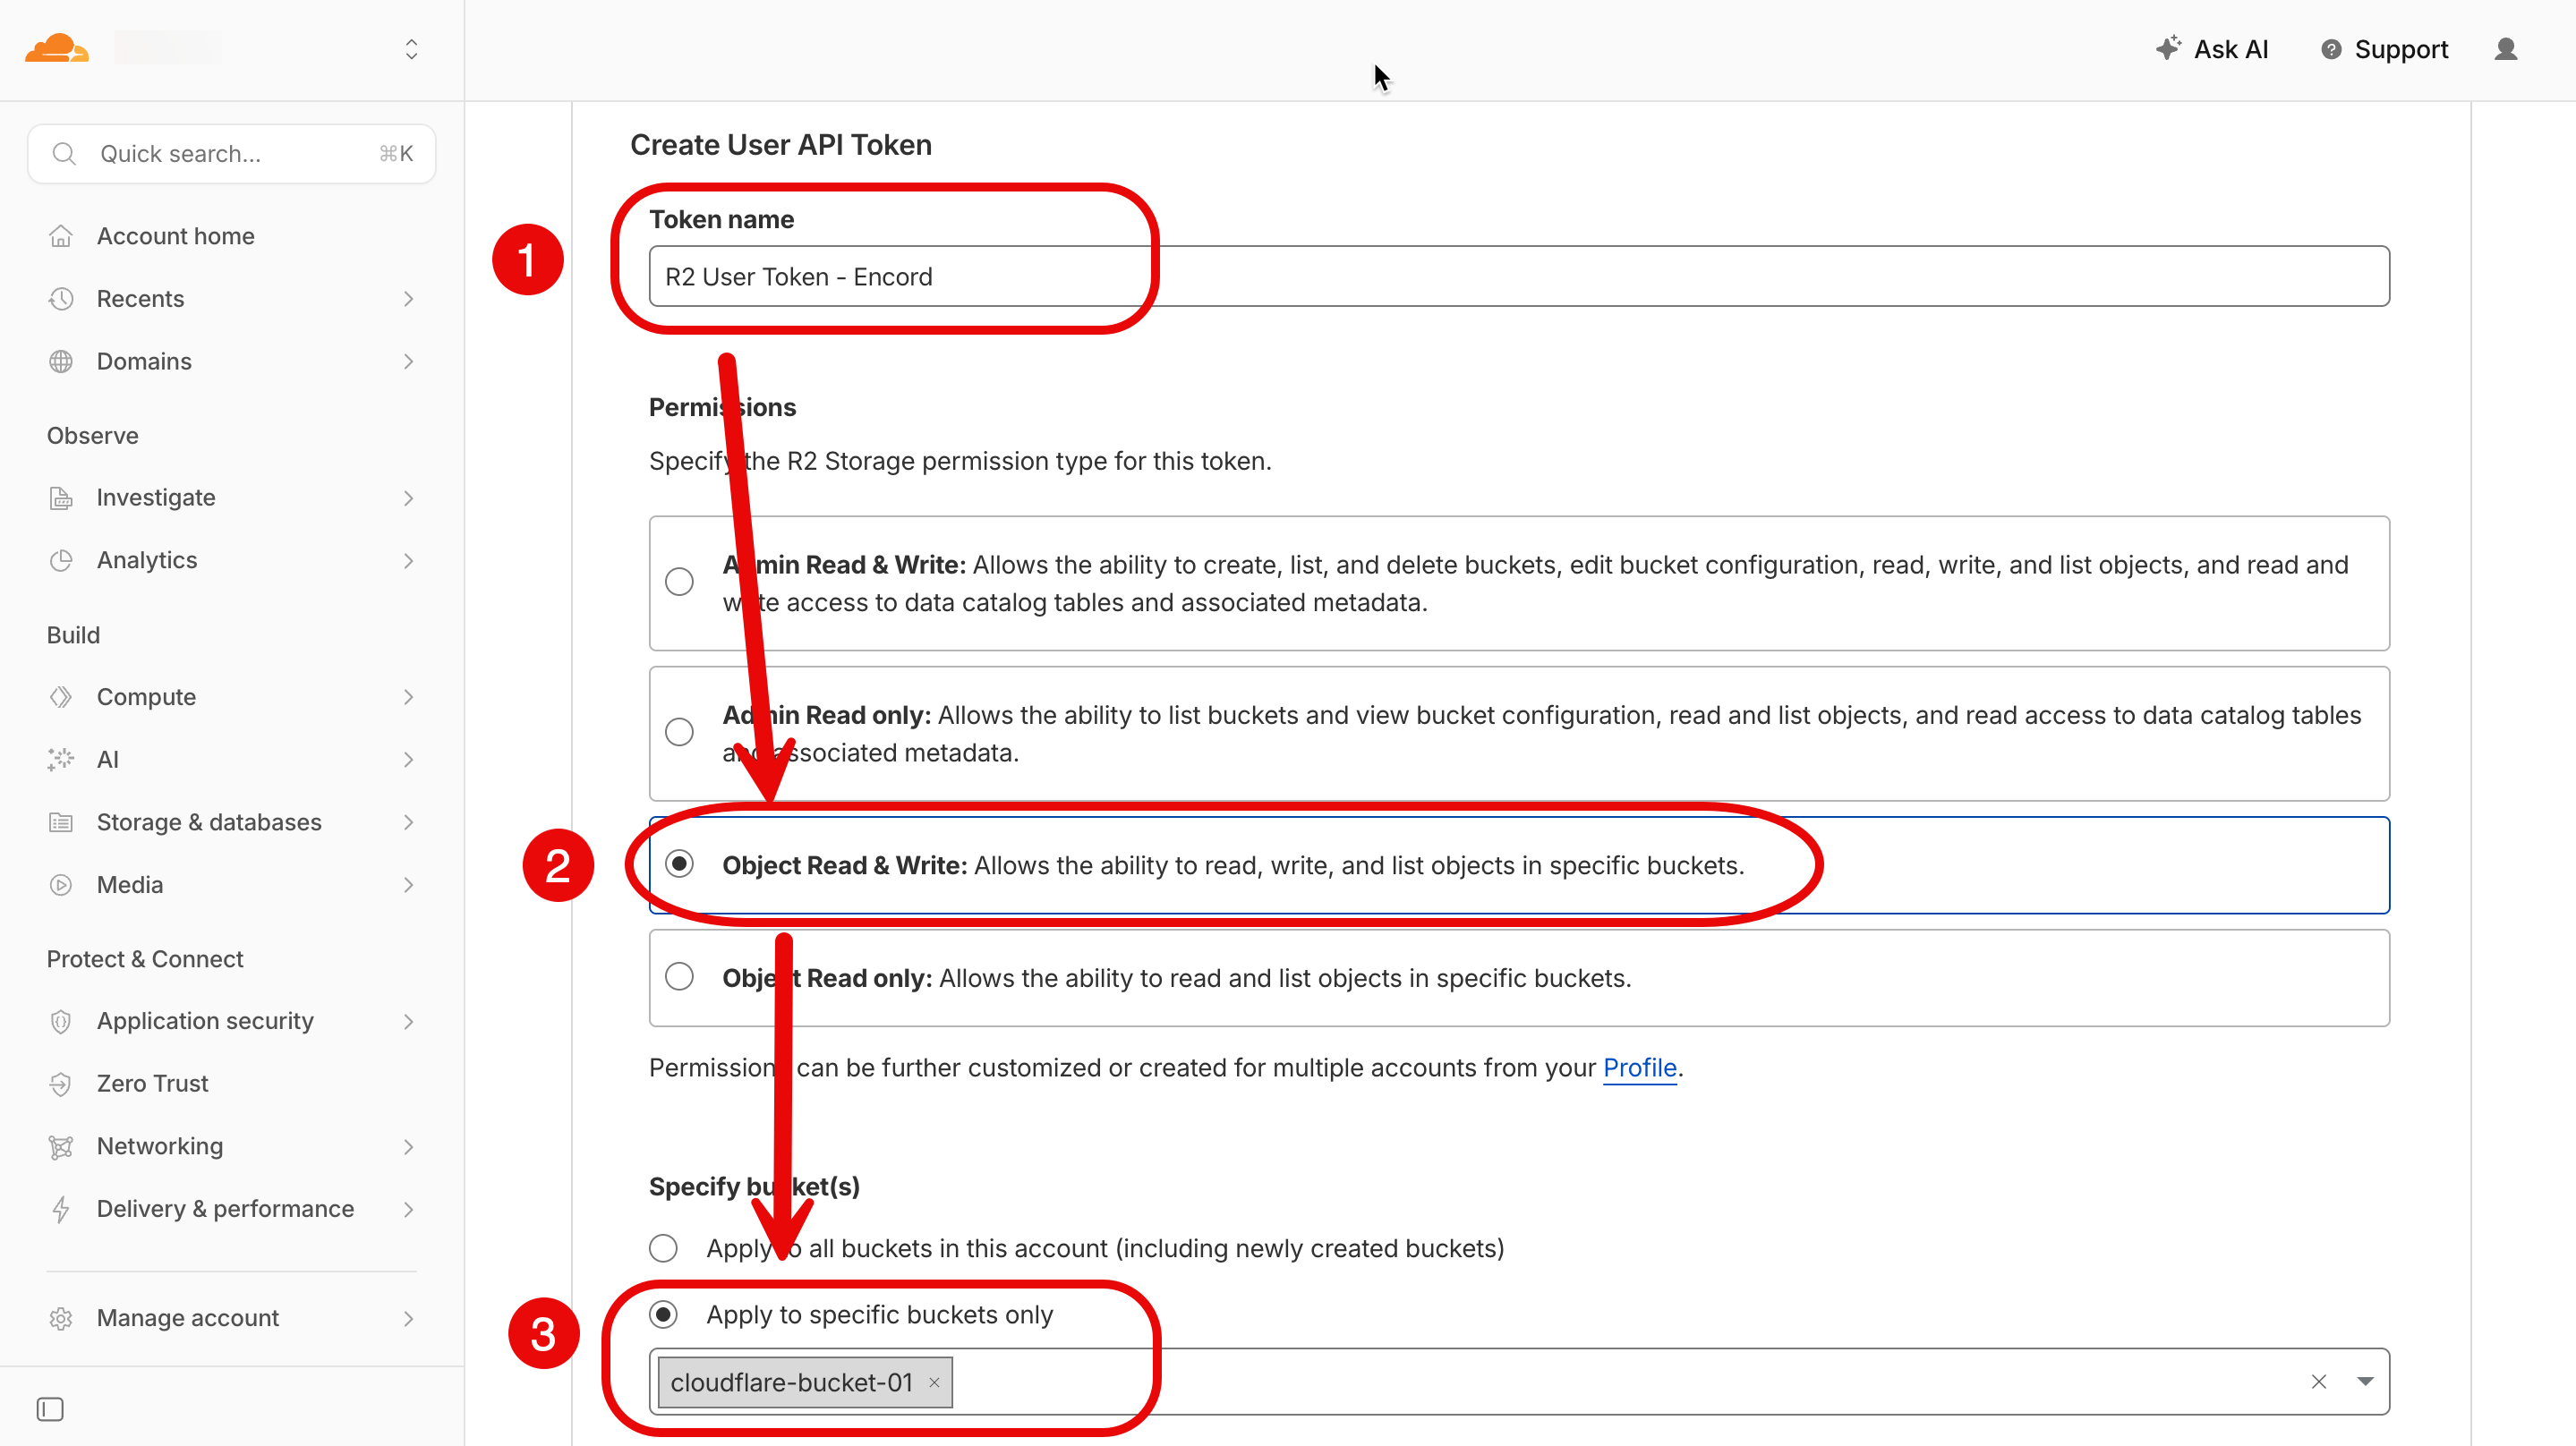
6. Specify permissions on one or more storage buckets:
* **Permissions:**
* For functionality: Select **Object Read & Write**
* For limited functionality: Select **Object Read only**
* **Buckets**
* For simplicity: Select **Apply to all buckets in this account**
* For Security: Select **Apply to specific buckets only**
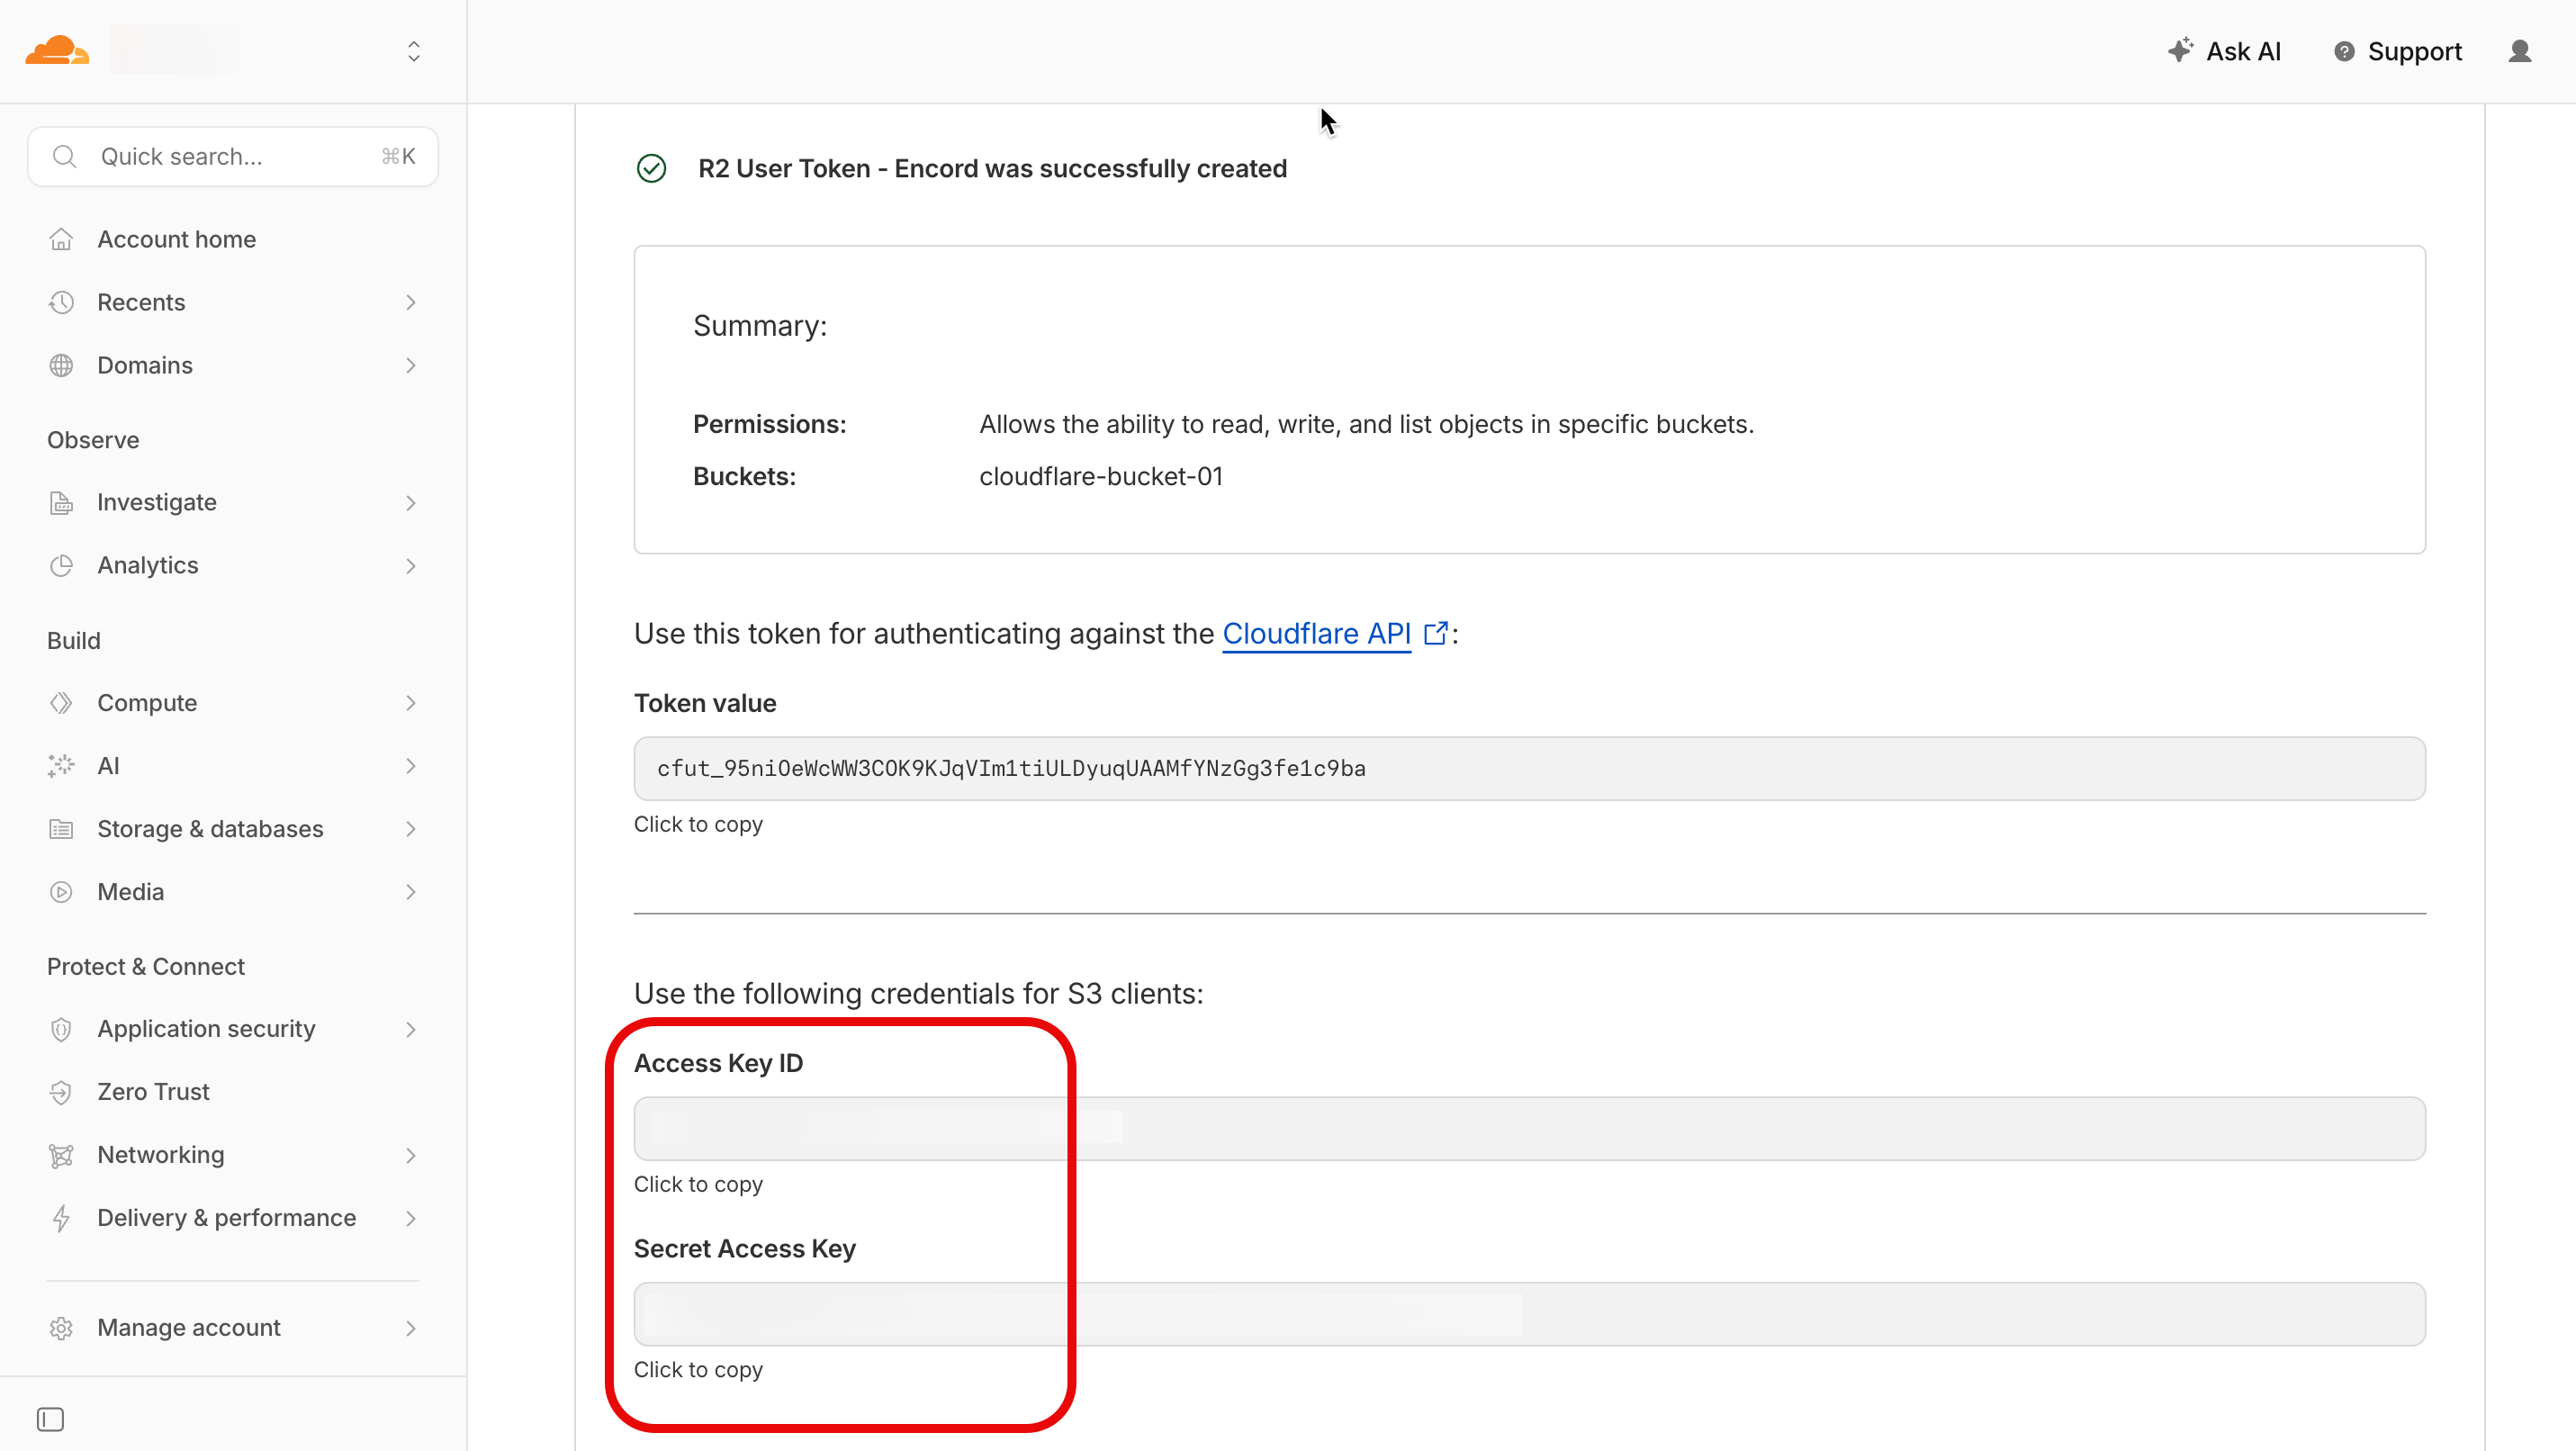
7. Click **Create Account/User API token**.
The *Summary* page for the API token appears.
8. Record the `Access Key ID` and `Secret Access Key`.
9. Click **Finish**.
10. Return to the *R2 object storage Overview* page.
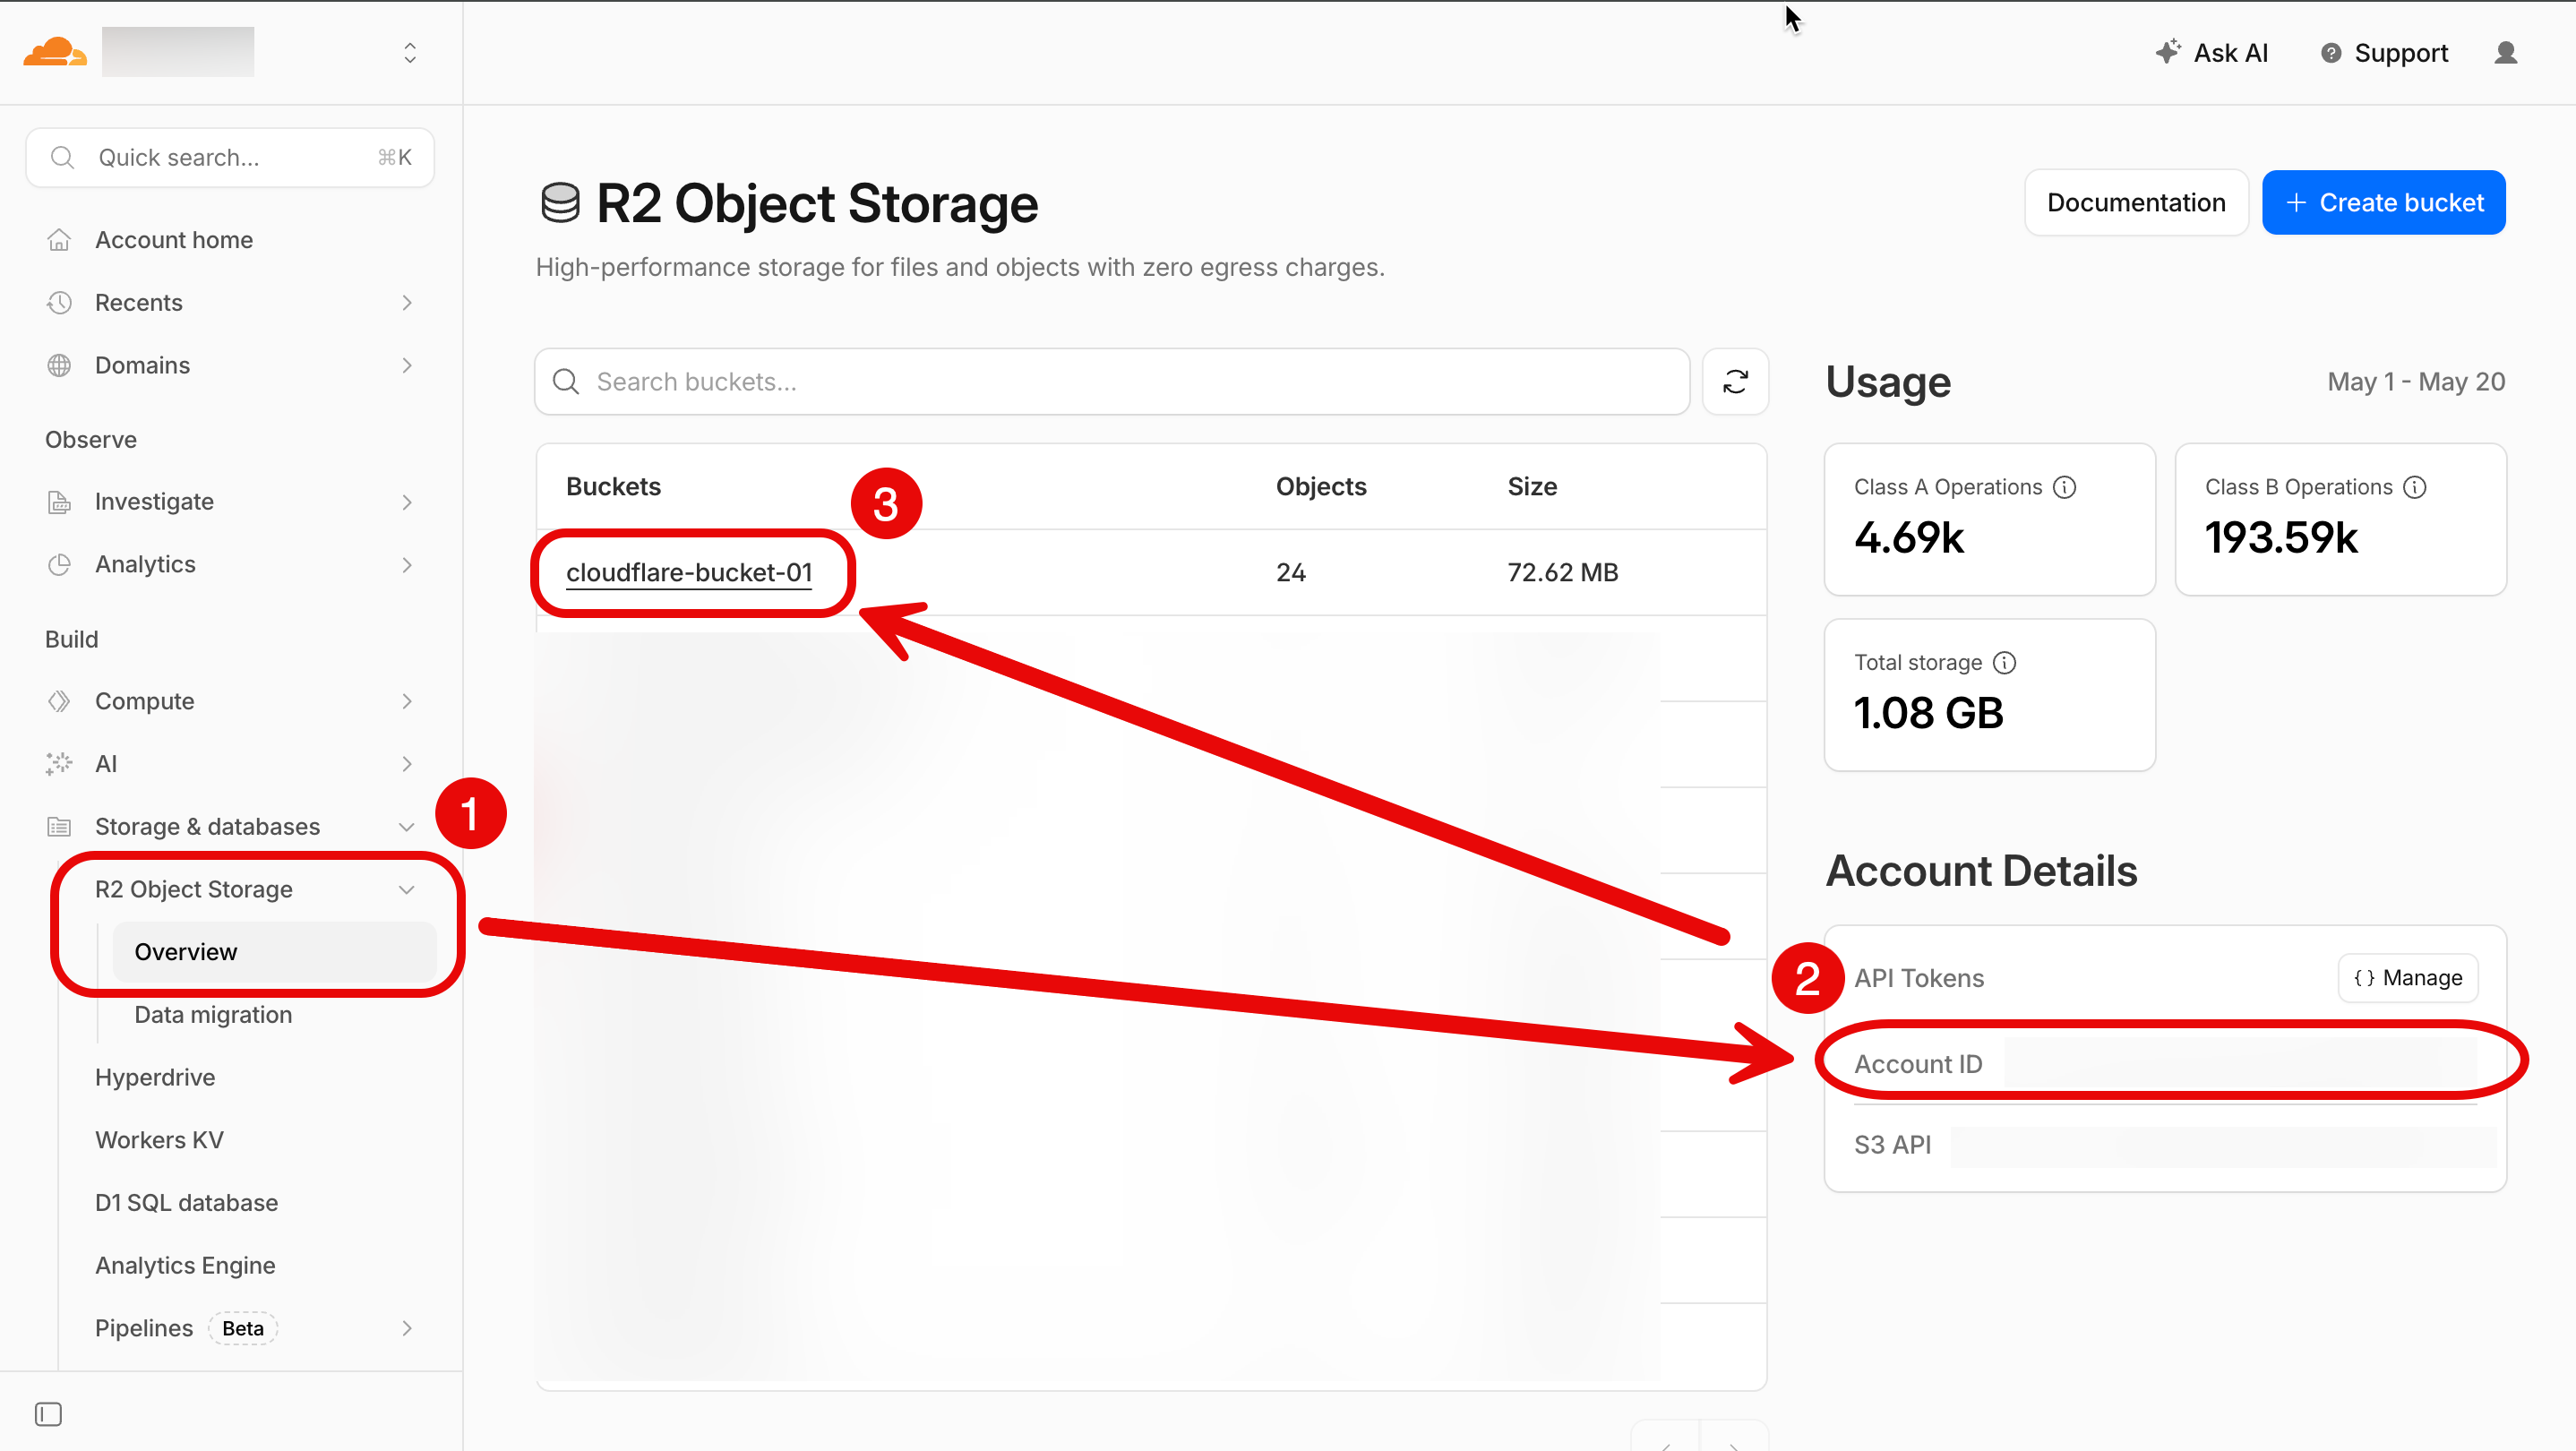
11. Record the `Account ID`.
12. (OPTIONAL: CORS Policy) Click the bucket the API token is applied to.
The *Objects* page for the bucket appears.
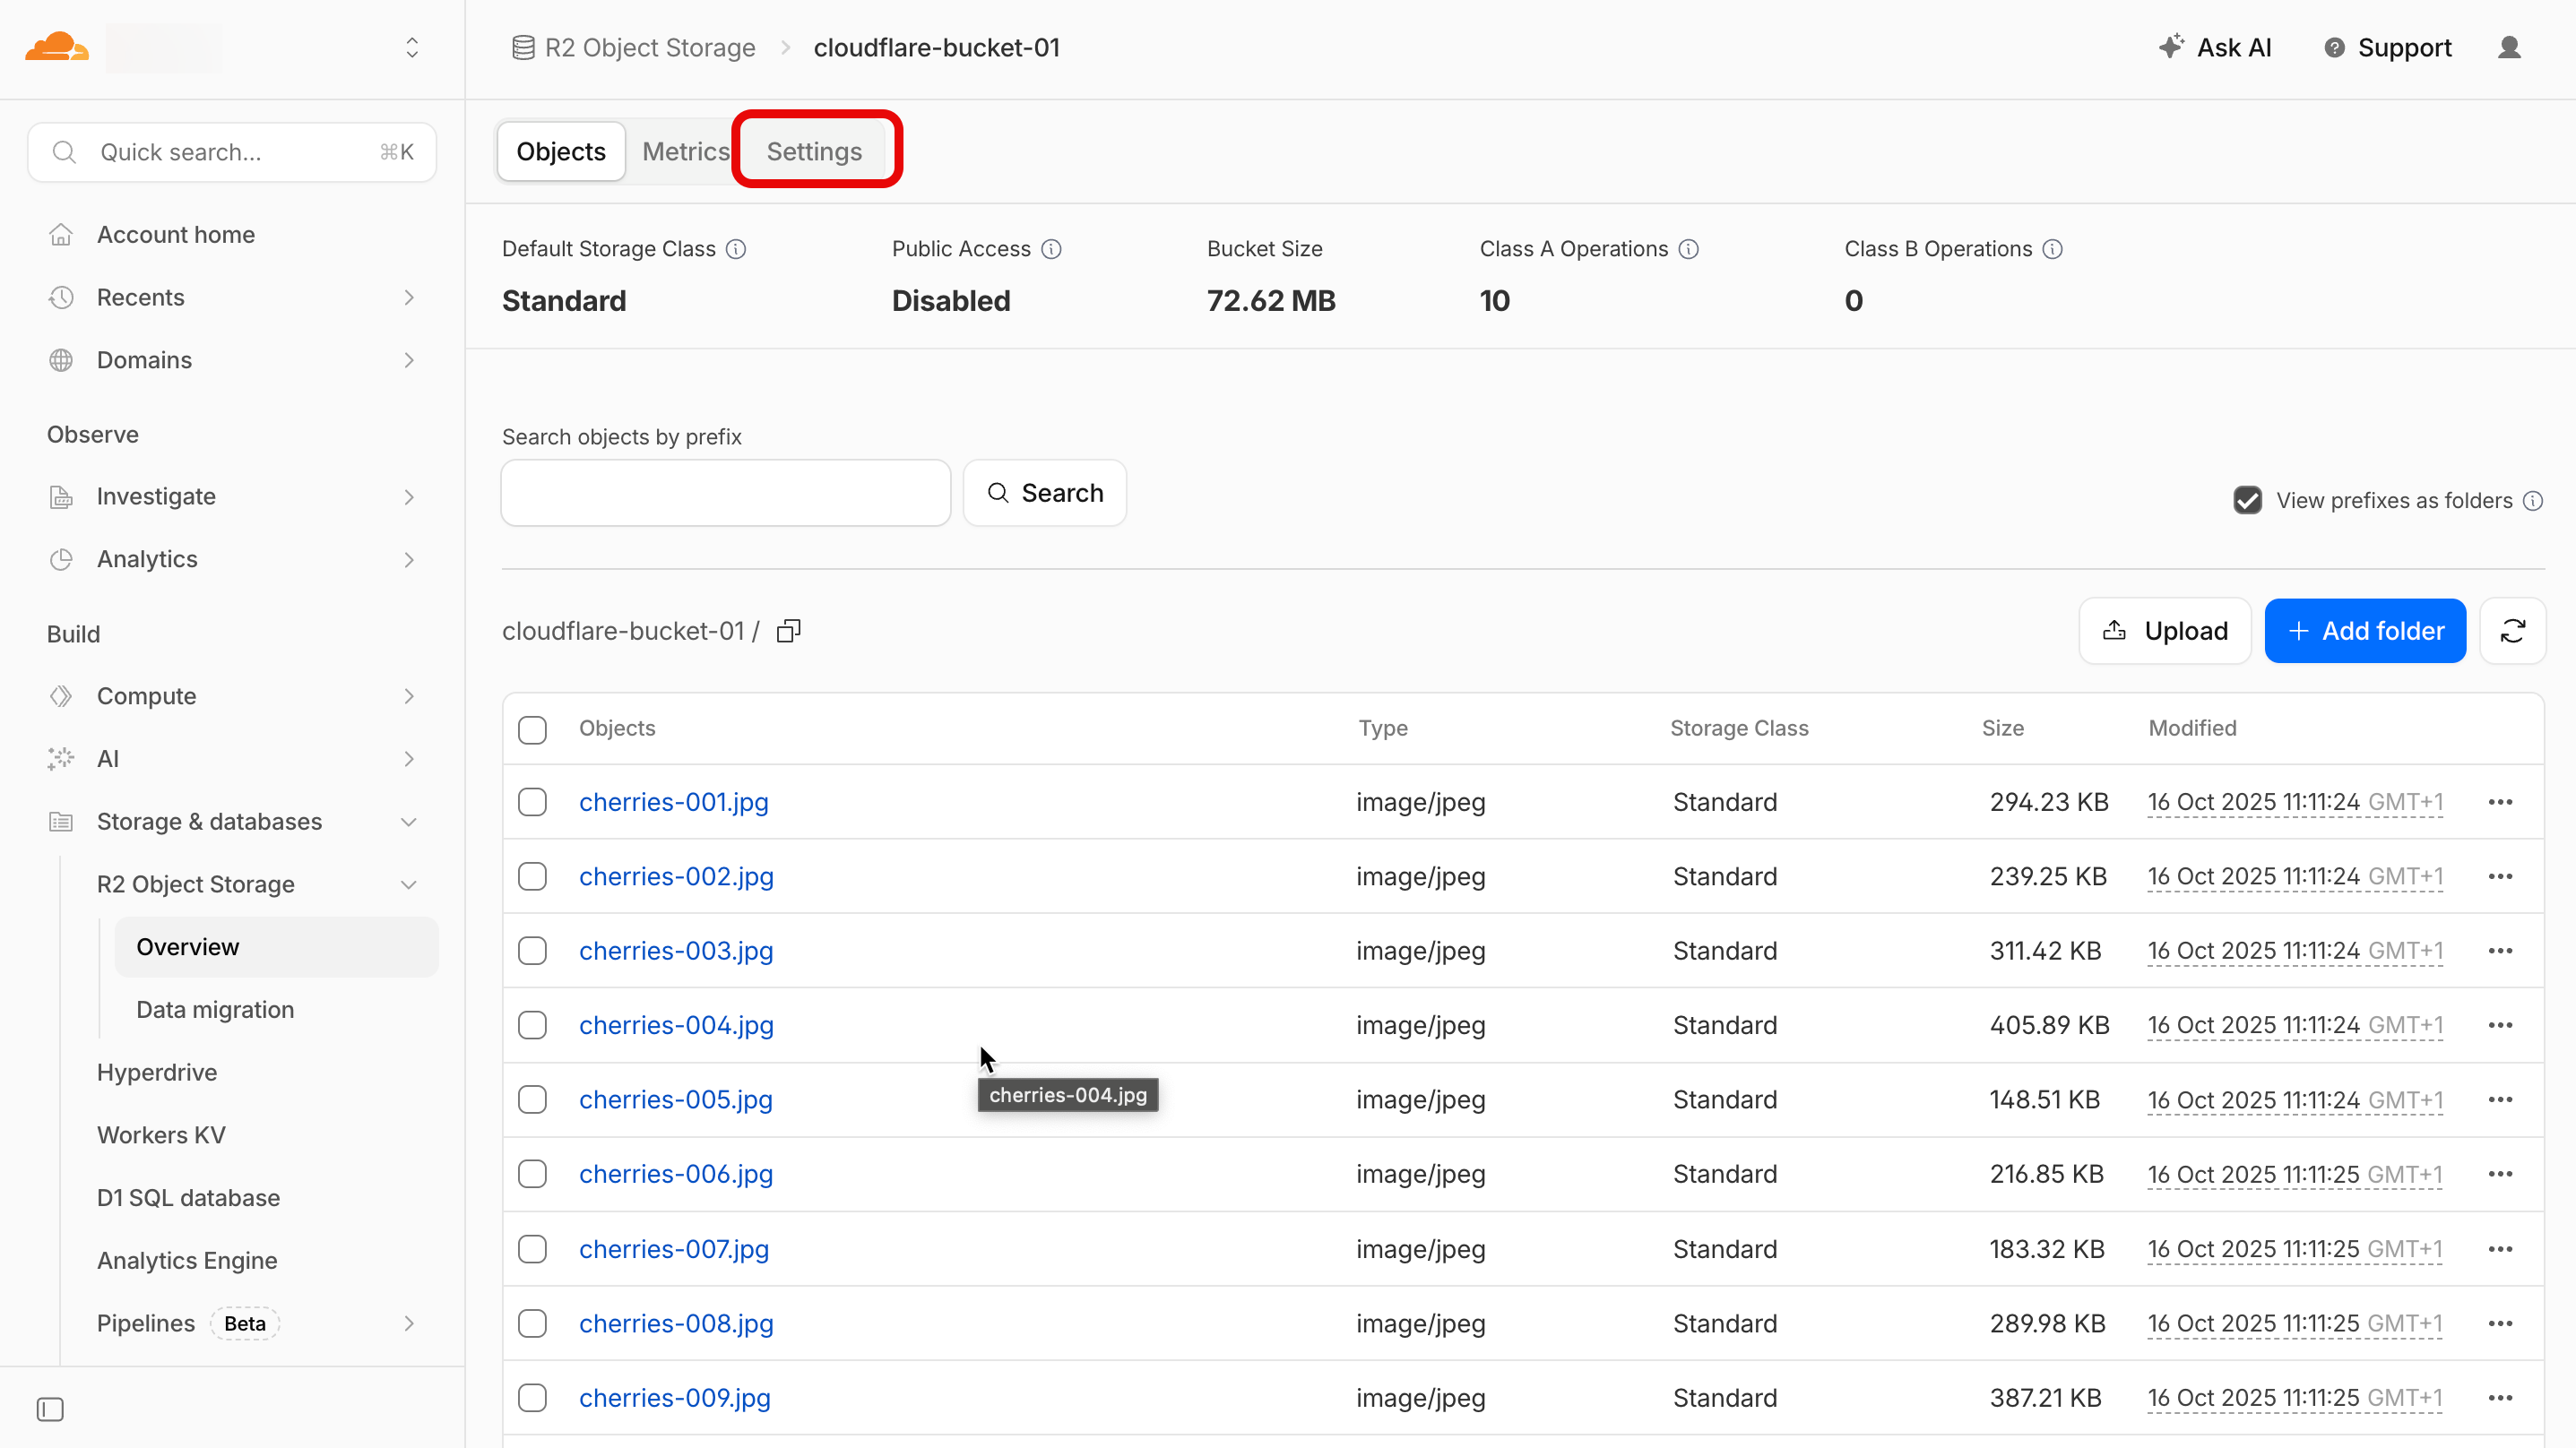
13. Click **Settings**.
The *Settings* page for the bucket appears.
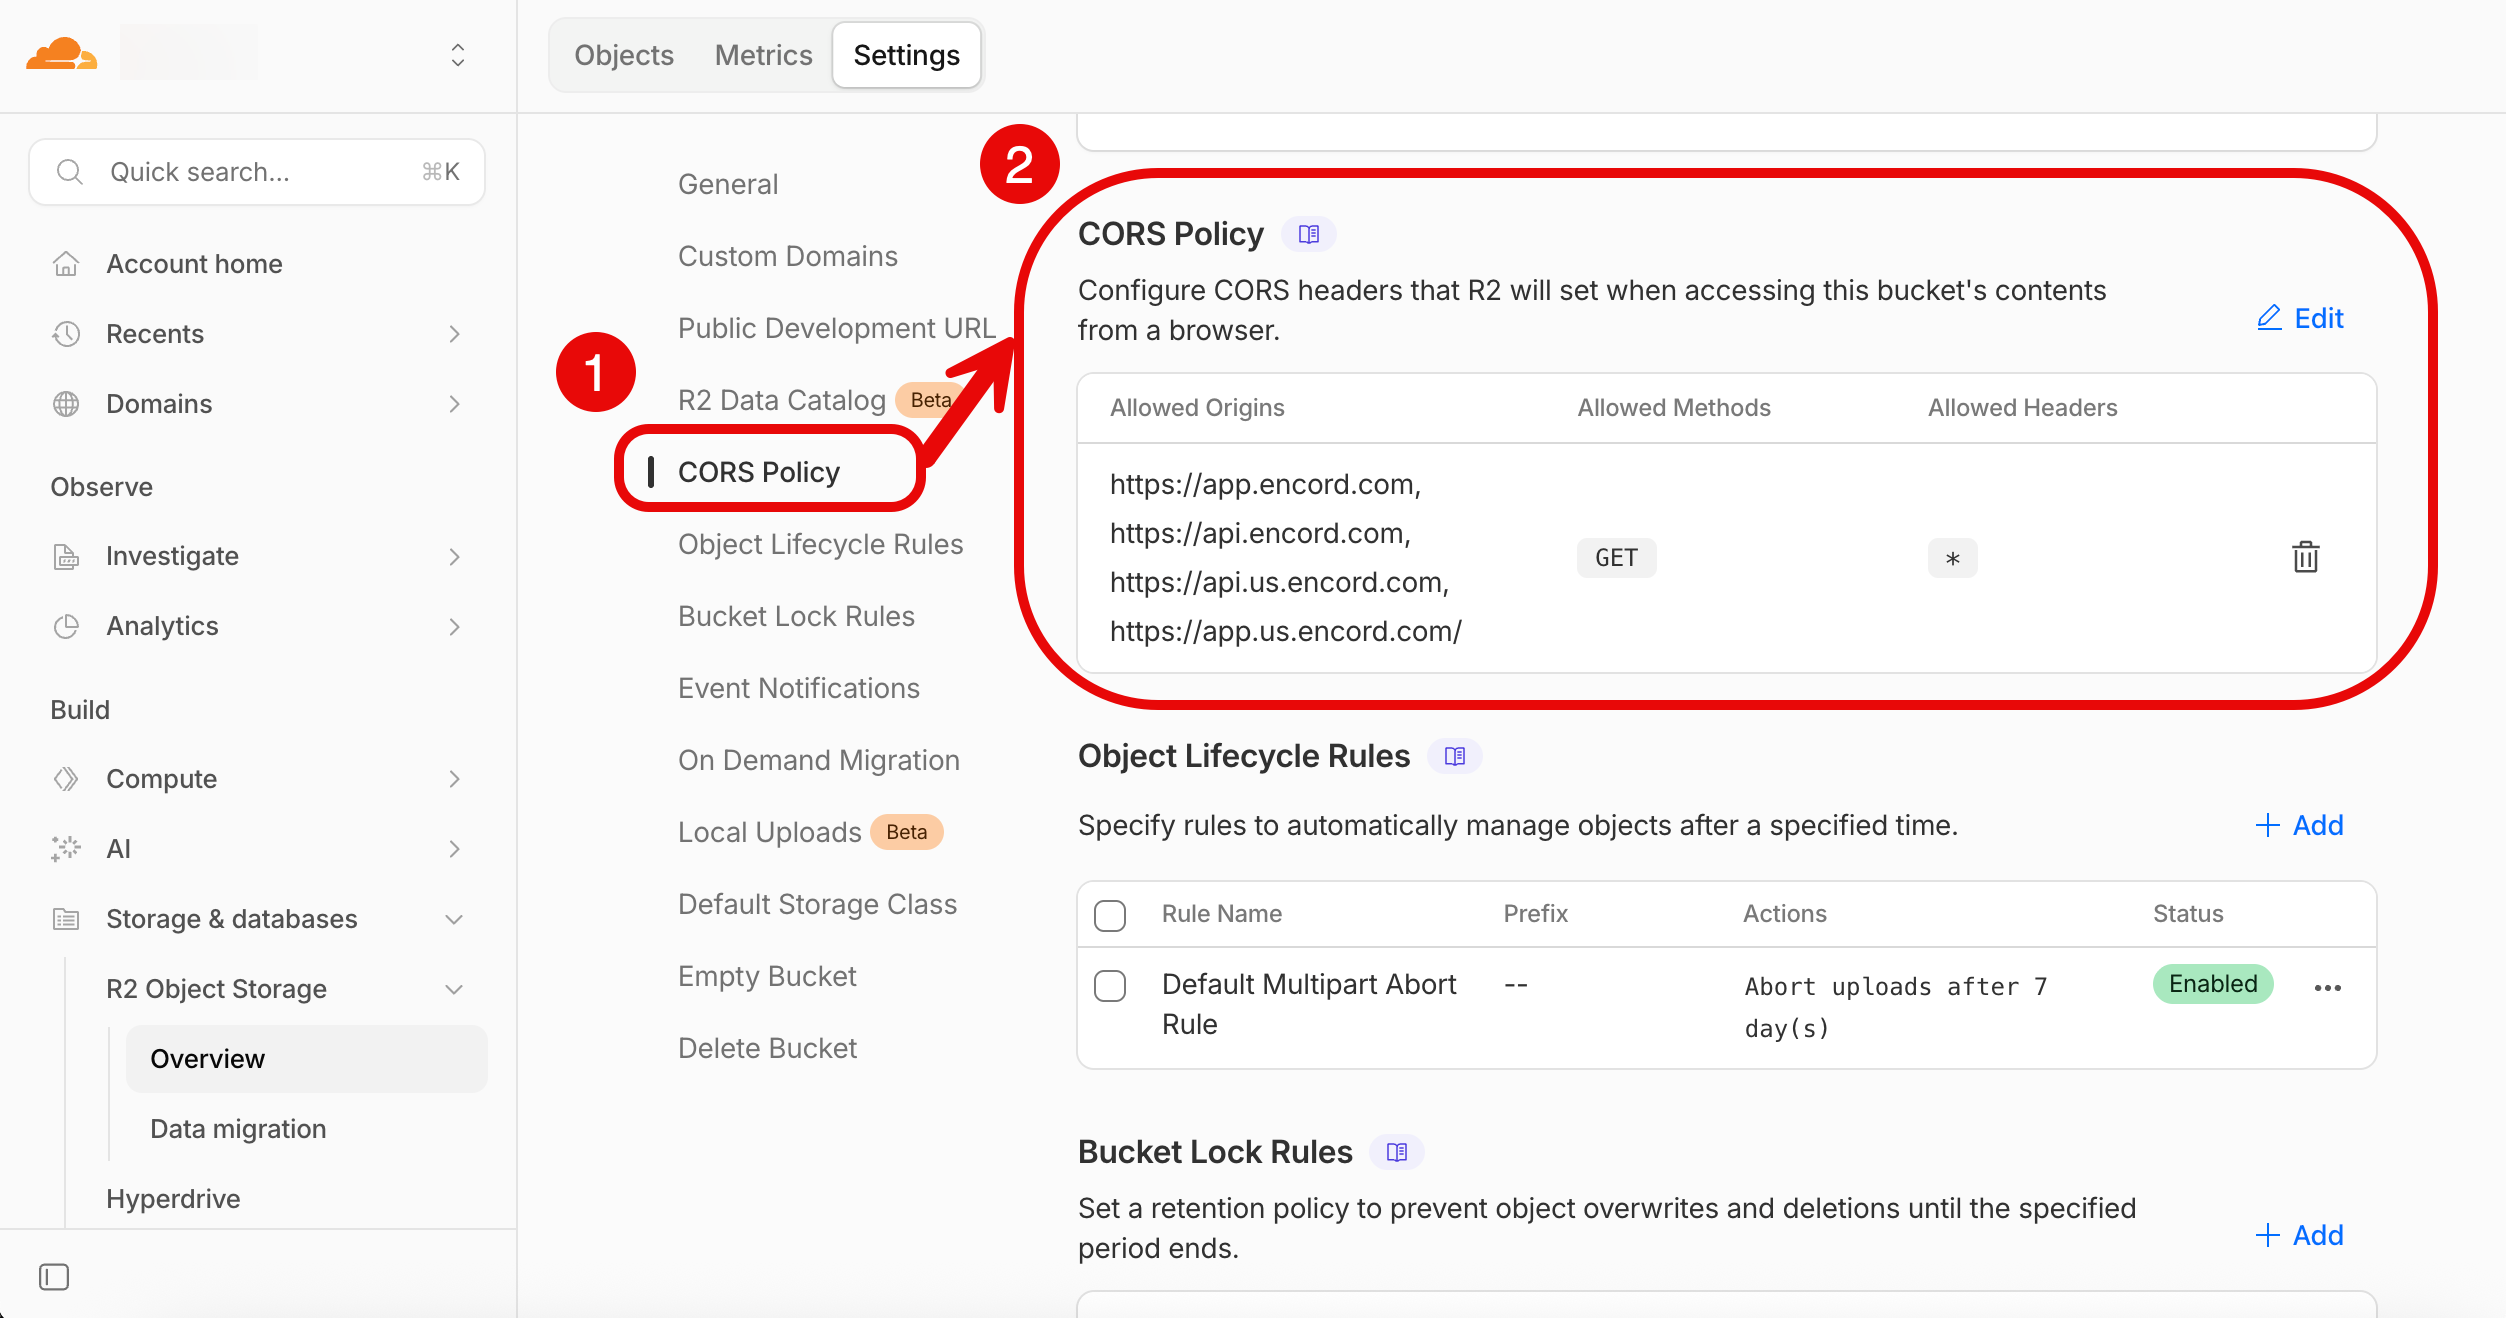
14. Click **CORS Policy**.
The *Settings* page moves to the *CORS Policy* section.
Applying Encord required CORS settings may overwrite existing configurations on your cloud storage bucket. If your bucket already has CORS settings, make sure to append Encord’s required settings instead of replacing them.
15. Click **+ Add**.
The *CORS Policy* panel appears.
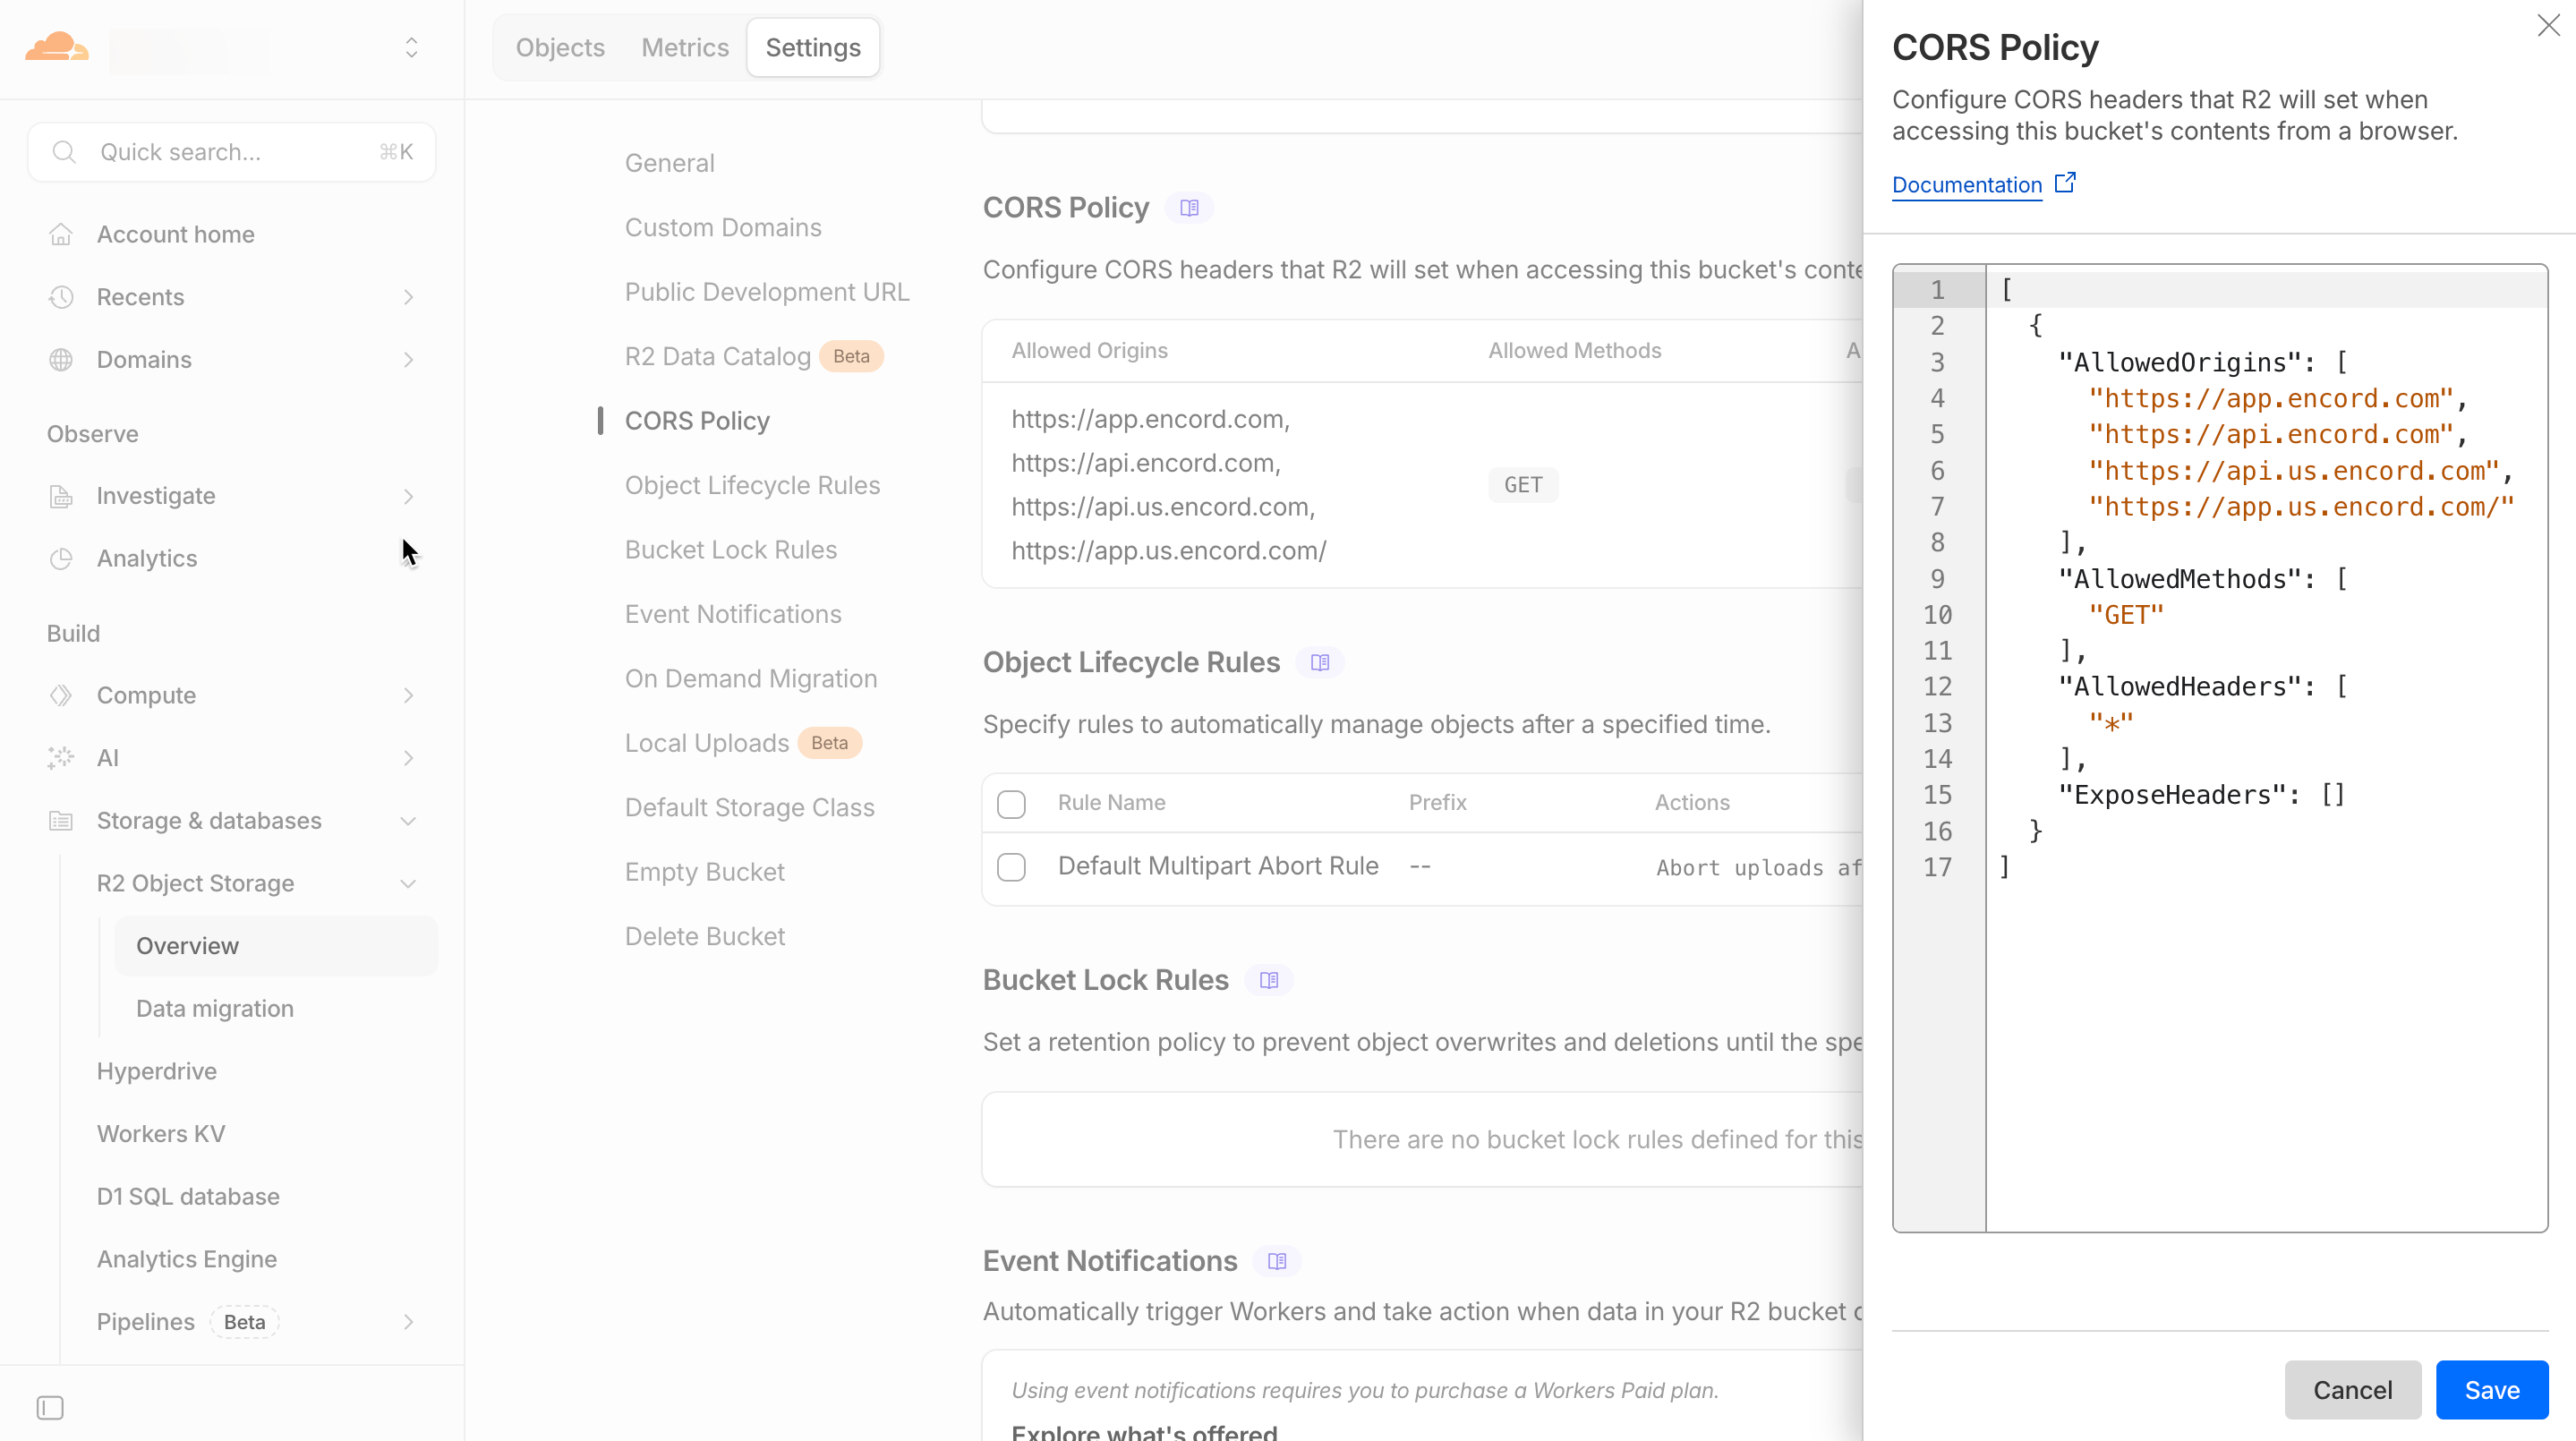
16. Copy the following into the workspace:
```json Global theme={"dark"}
[
{
"AllowedHeaders": [
"*"
],
"AllowedMethods": [
"GET"
],
"AllowedOrigins": [
"https://app.encord.com",
"https://api.encord.com",
"https://api.us.encord.com",
"https://app.us.encord.com"
],
"ExposeHeaders": []
}
]
```
```json EU theme={"dark"}
[
{
"AllowedHeaders": [
"*"
],
"AllowedMethods": [
"GET"
],
"AllowedOrigins": [
"https://app.encord.com",
"https://api.encord.com",
],
"ExposeHeaders": []
}
]
```
```json US theme={"dark"}
[
{
"AllowedHeaders": [
"*"
],
"AllowedMethods": [
"GET"
],
"AllowedOrigins": [
"https://api.us.encord.com",
"https://app.us.encord.com"
],
"ExposeHeaders": []
}
]
```
16. Click **Save**.
You are now ready to proceed to *STEP 2: Encord Configuration*.
## 2. Encord Configuration
1. Navigate to [Workspace Settings](/platform-documentation/General/general-workspace-settings#workspace-settings) > Cloud Buckets and click **+New integration** to create a new integration.
The integration dialog appears.
2. Select *Cloudflare* in the integration dialog.

3. Provide a meaningful name for the integration.

4. Paste the following, from Cloudflare, into step 3:
* `Account ID`
* `Access Key ID`
* `Secret Access Key`

5. Specify **Advanced settings** for tighter security if required.

6. Click **Create**.
The integration appears in the *Integrations* list.
