> ## Documentation Index
> Fetch the complete documentation index at: https://docs.encord.com/llms.txt
> Use this file to discover all available pages before exploring further.
# Open Telekom Cloud
In order to integrate with Open Telecom Cloud, you must:
1. Create the account to access data in the Object Storage Service.
2. Give the account read access to the desired buckets by:
* Creating a Custom Bucket Policy.
* (Optional) If you have *Cross-origin resource sharing (CORS)* configured on your buckets, make sure that `*.encord.com` is given read access.
3. Create the integration.
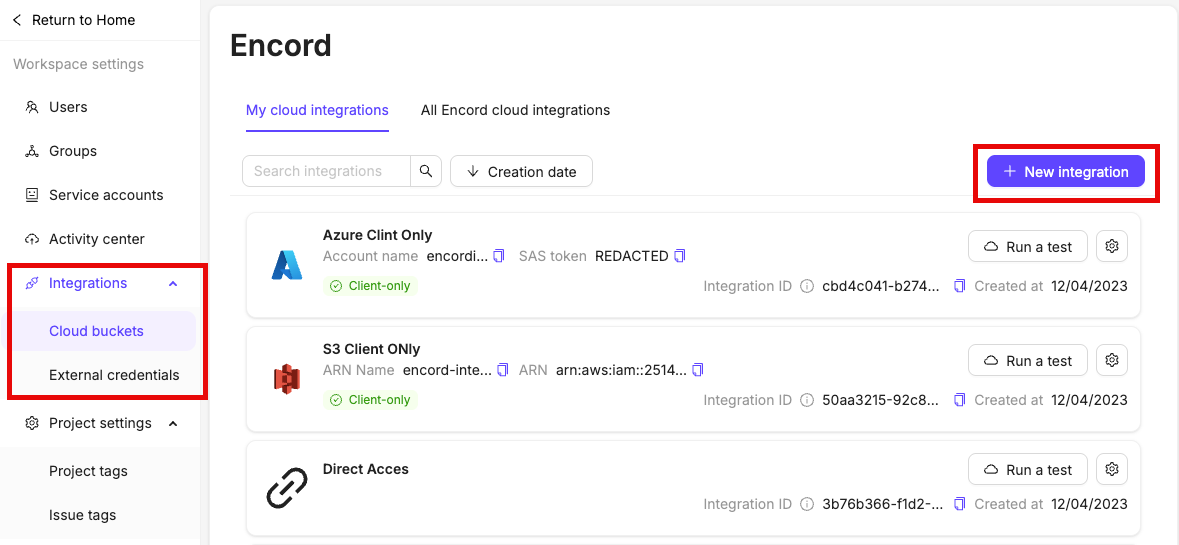
## 1. Start Setting up the Integration
1. To create an Open Telekom Cloud integration, click the **+ Add integration** button in the [Integrations tab](/platform-documentation/General/annotate-data-integrations). Select *OTC*.
2. Give the integration a meaningful name
## 2. Create an Account for Encord IAM
1. Log in to the OTC console and navigate to the Identity and Access Management (IAM) dashboard.
2. Create a new user with *Programmatic access*.
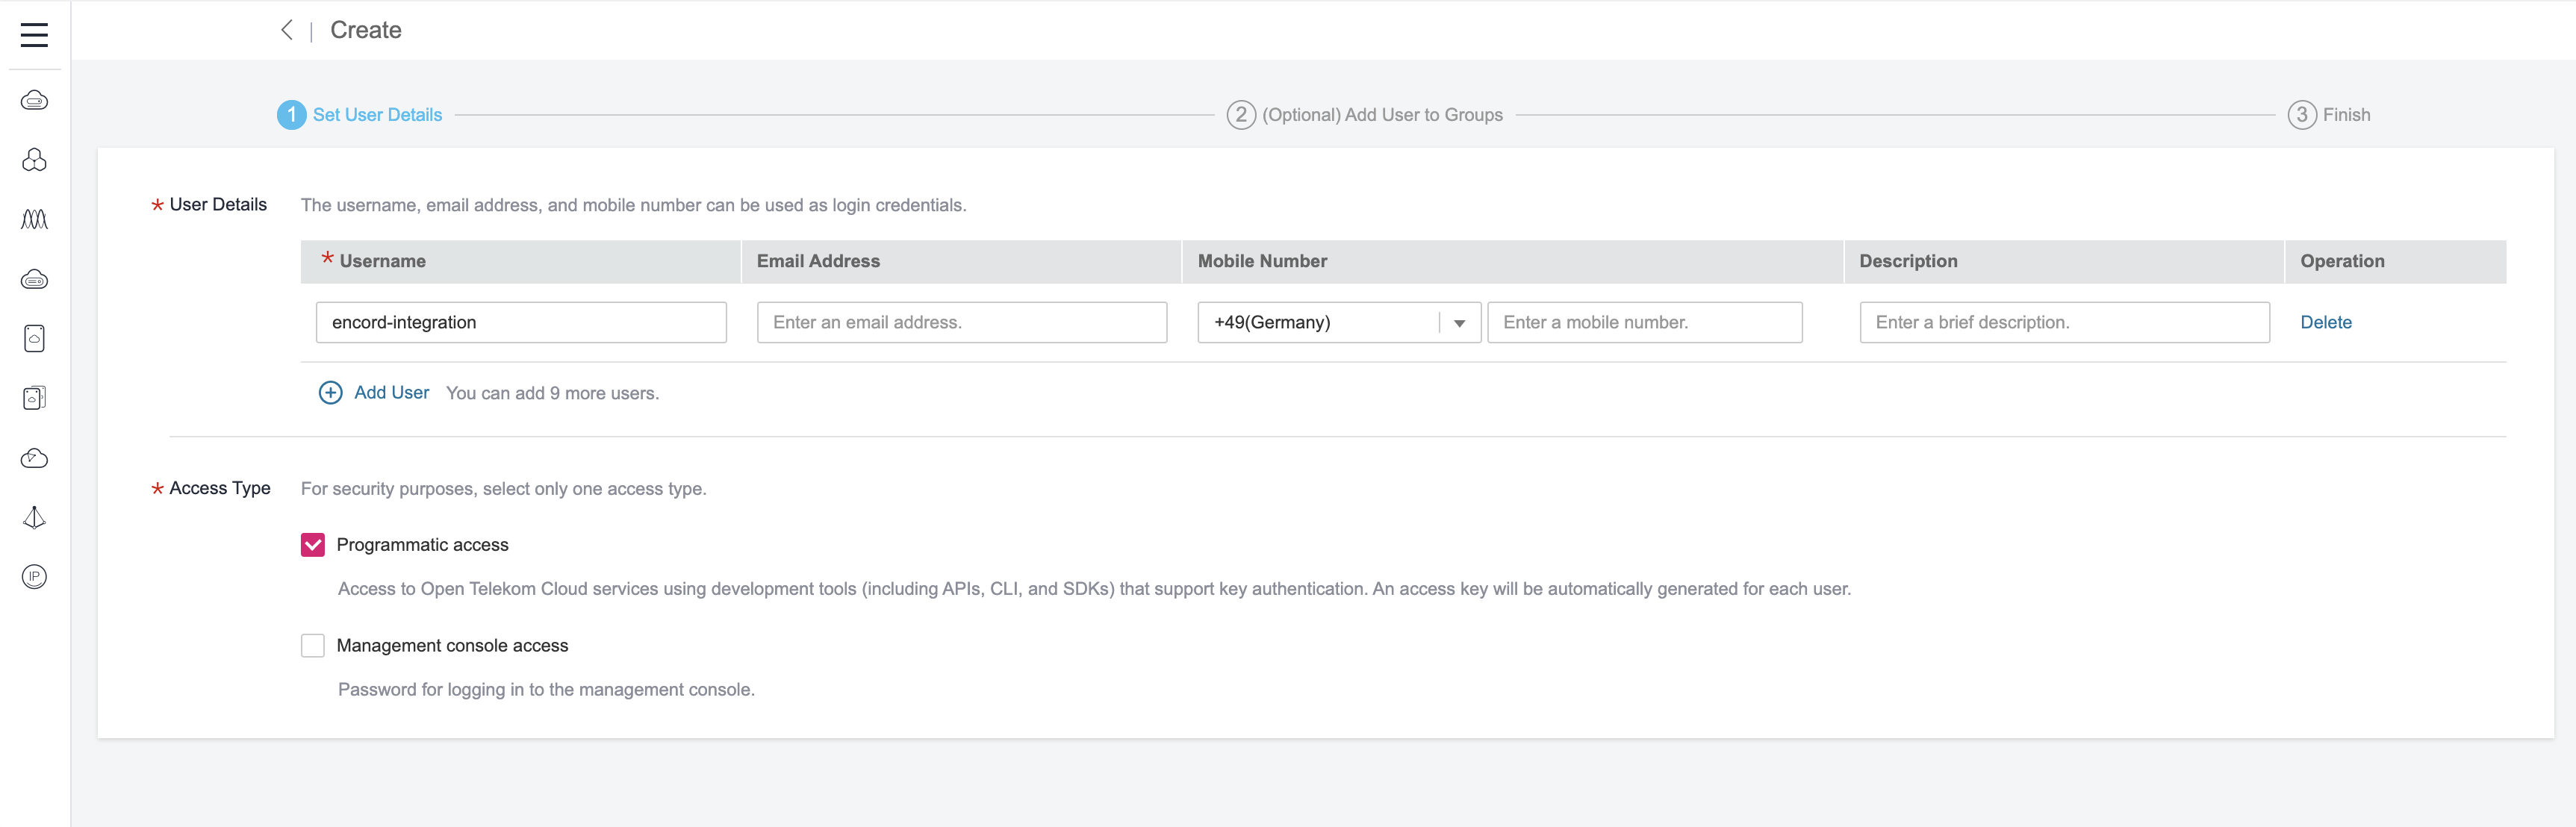 3. Download the access key.
 4. Paste the `OTC account access ID` and the `Secret access key` into Step 2 of the OTC integration window in Encord.
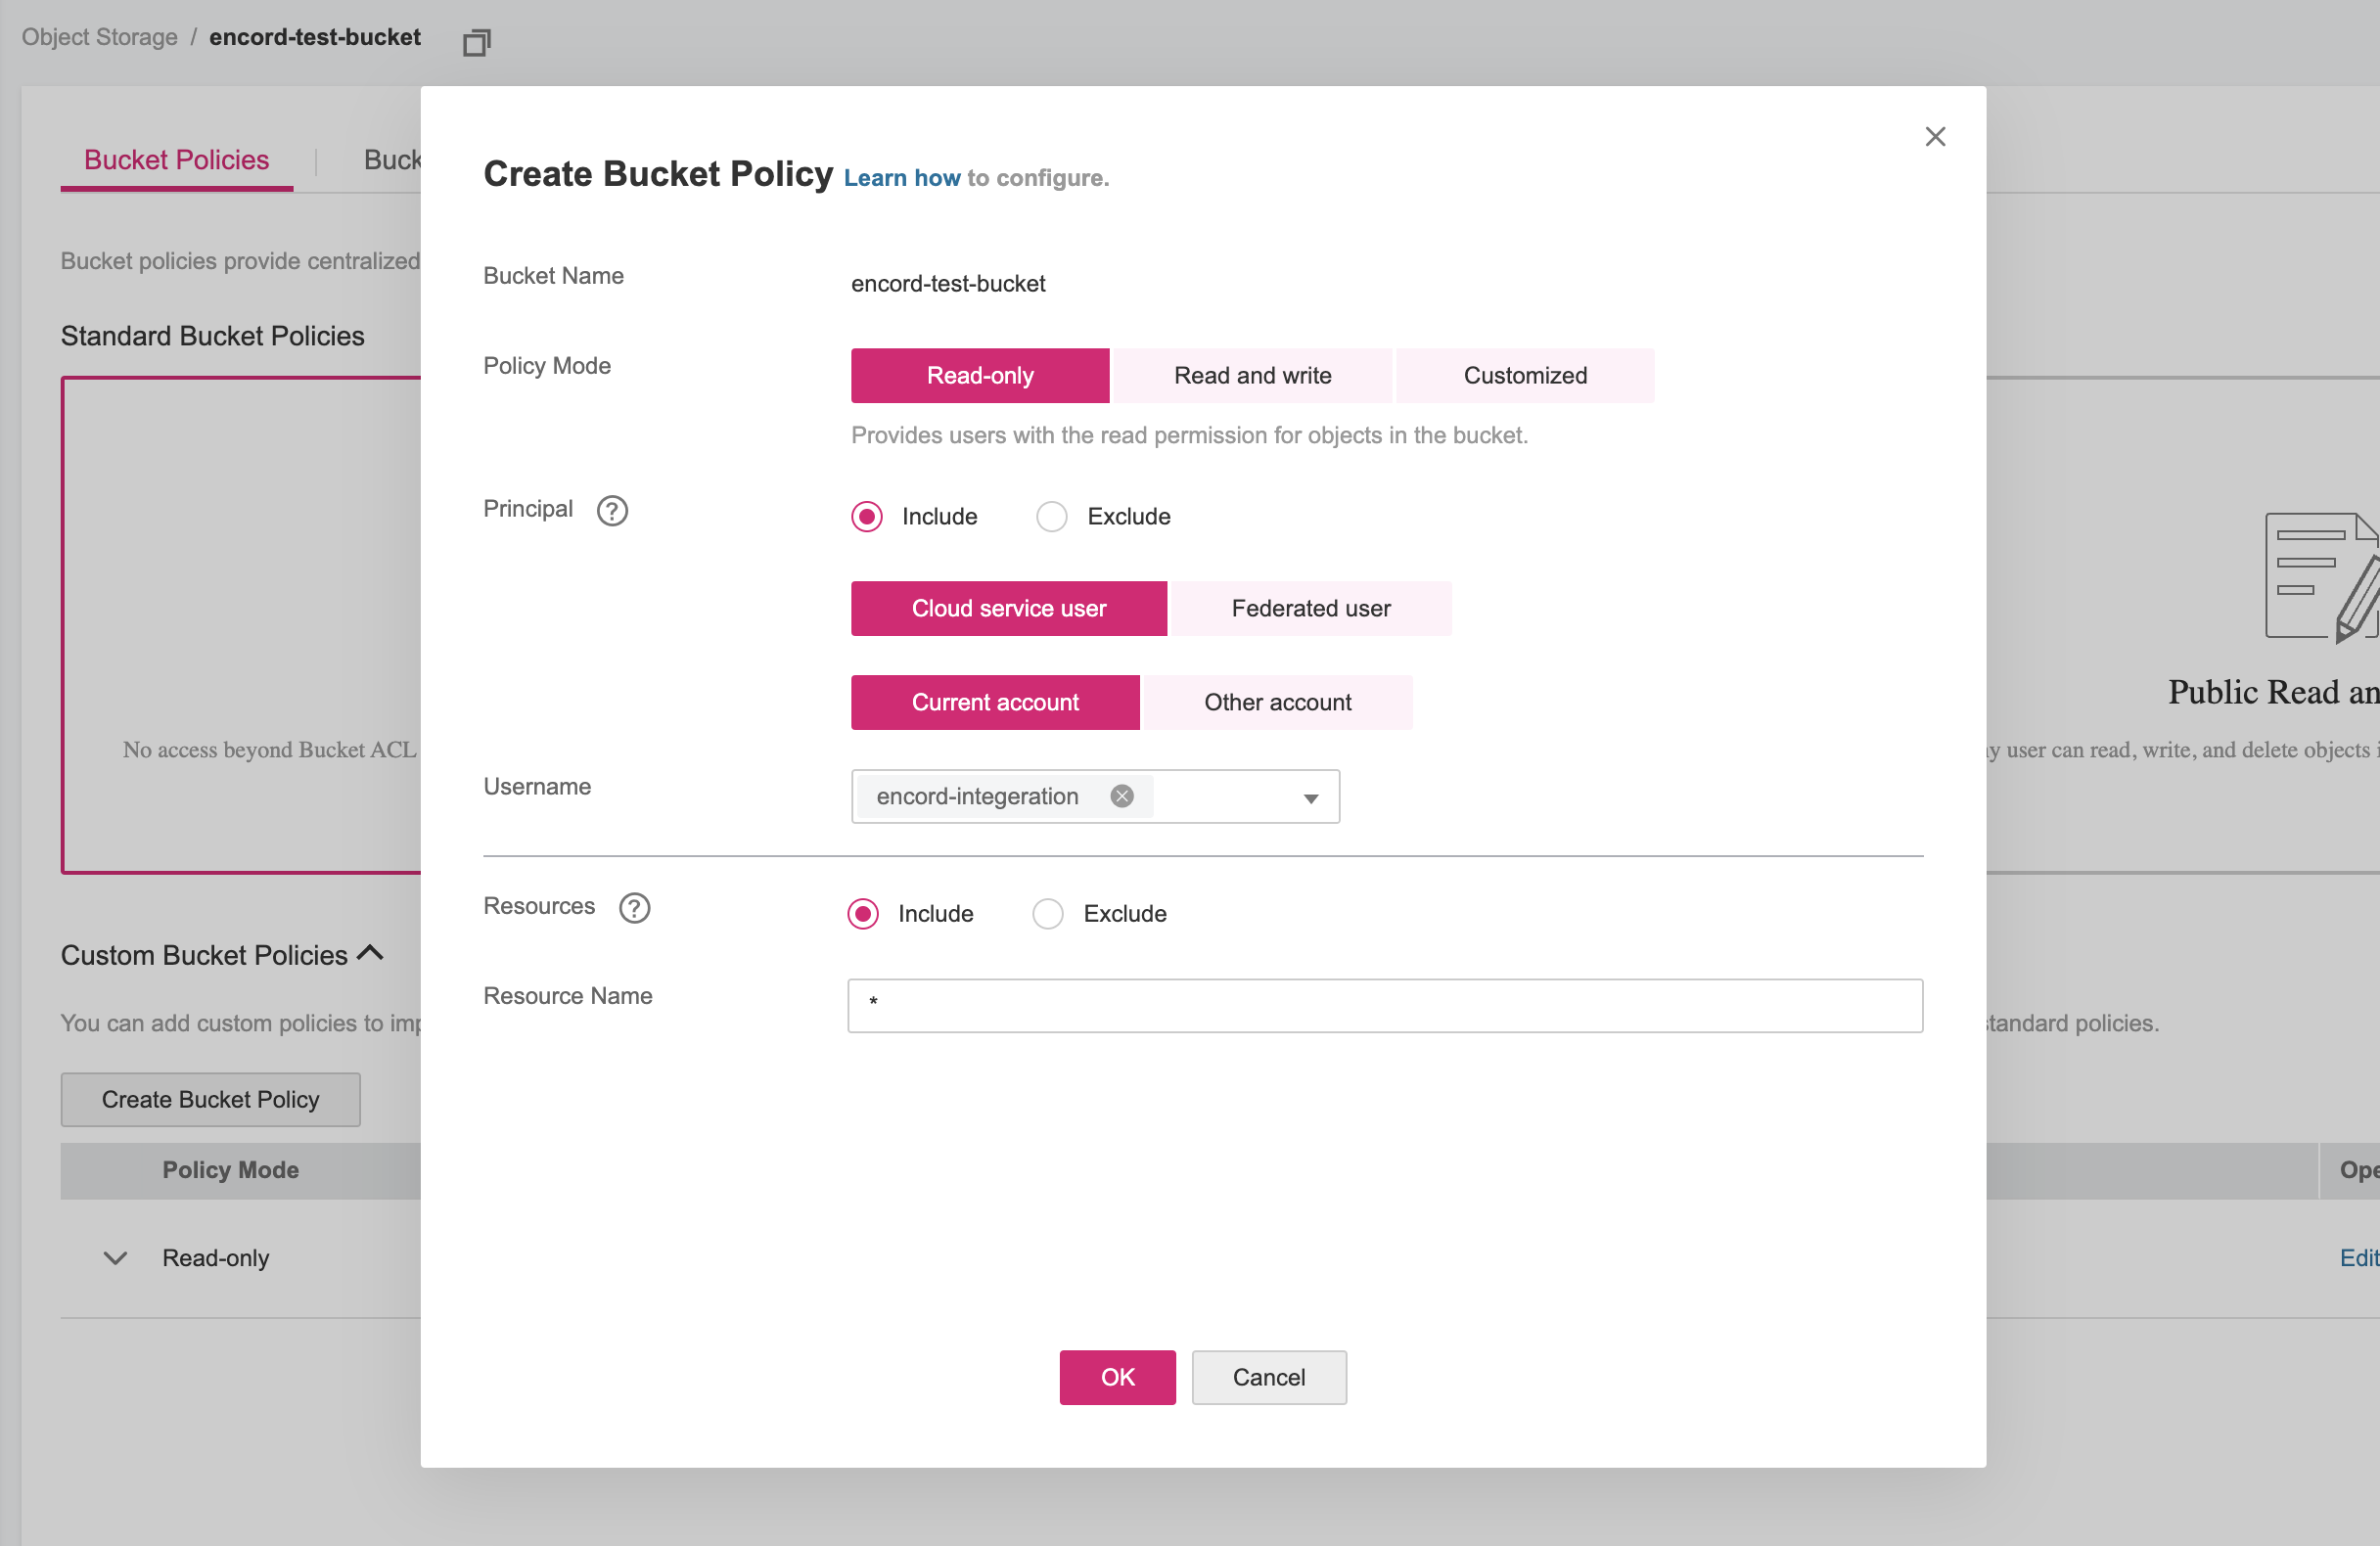
## 3. Give the Account Read Access to Your Buckets
1. In OTC, navigate to the bucket and click the **Create Bucket Policy** button.
2. Click **OK** to create the custom bucket policy.
4. Paste the `OTC account access ID` and the `Secret access key` into Step 2 of the OTC integration window in Encord.
## 3. Give the Account Read Access to Your Buckets
1. In OTC, navigate to the bucket and click the **Create Bucket Policy** button.
2. Click **OK** to create the custom bucket policy.
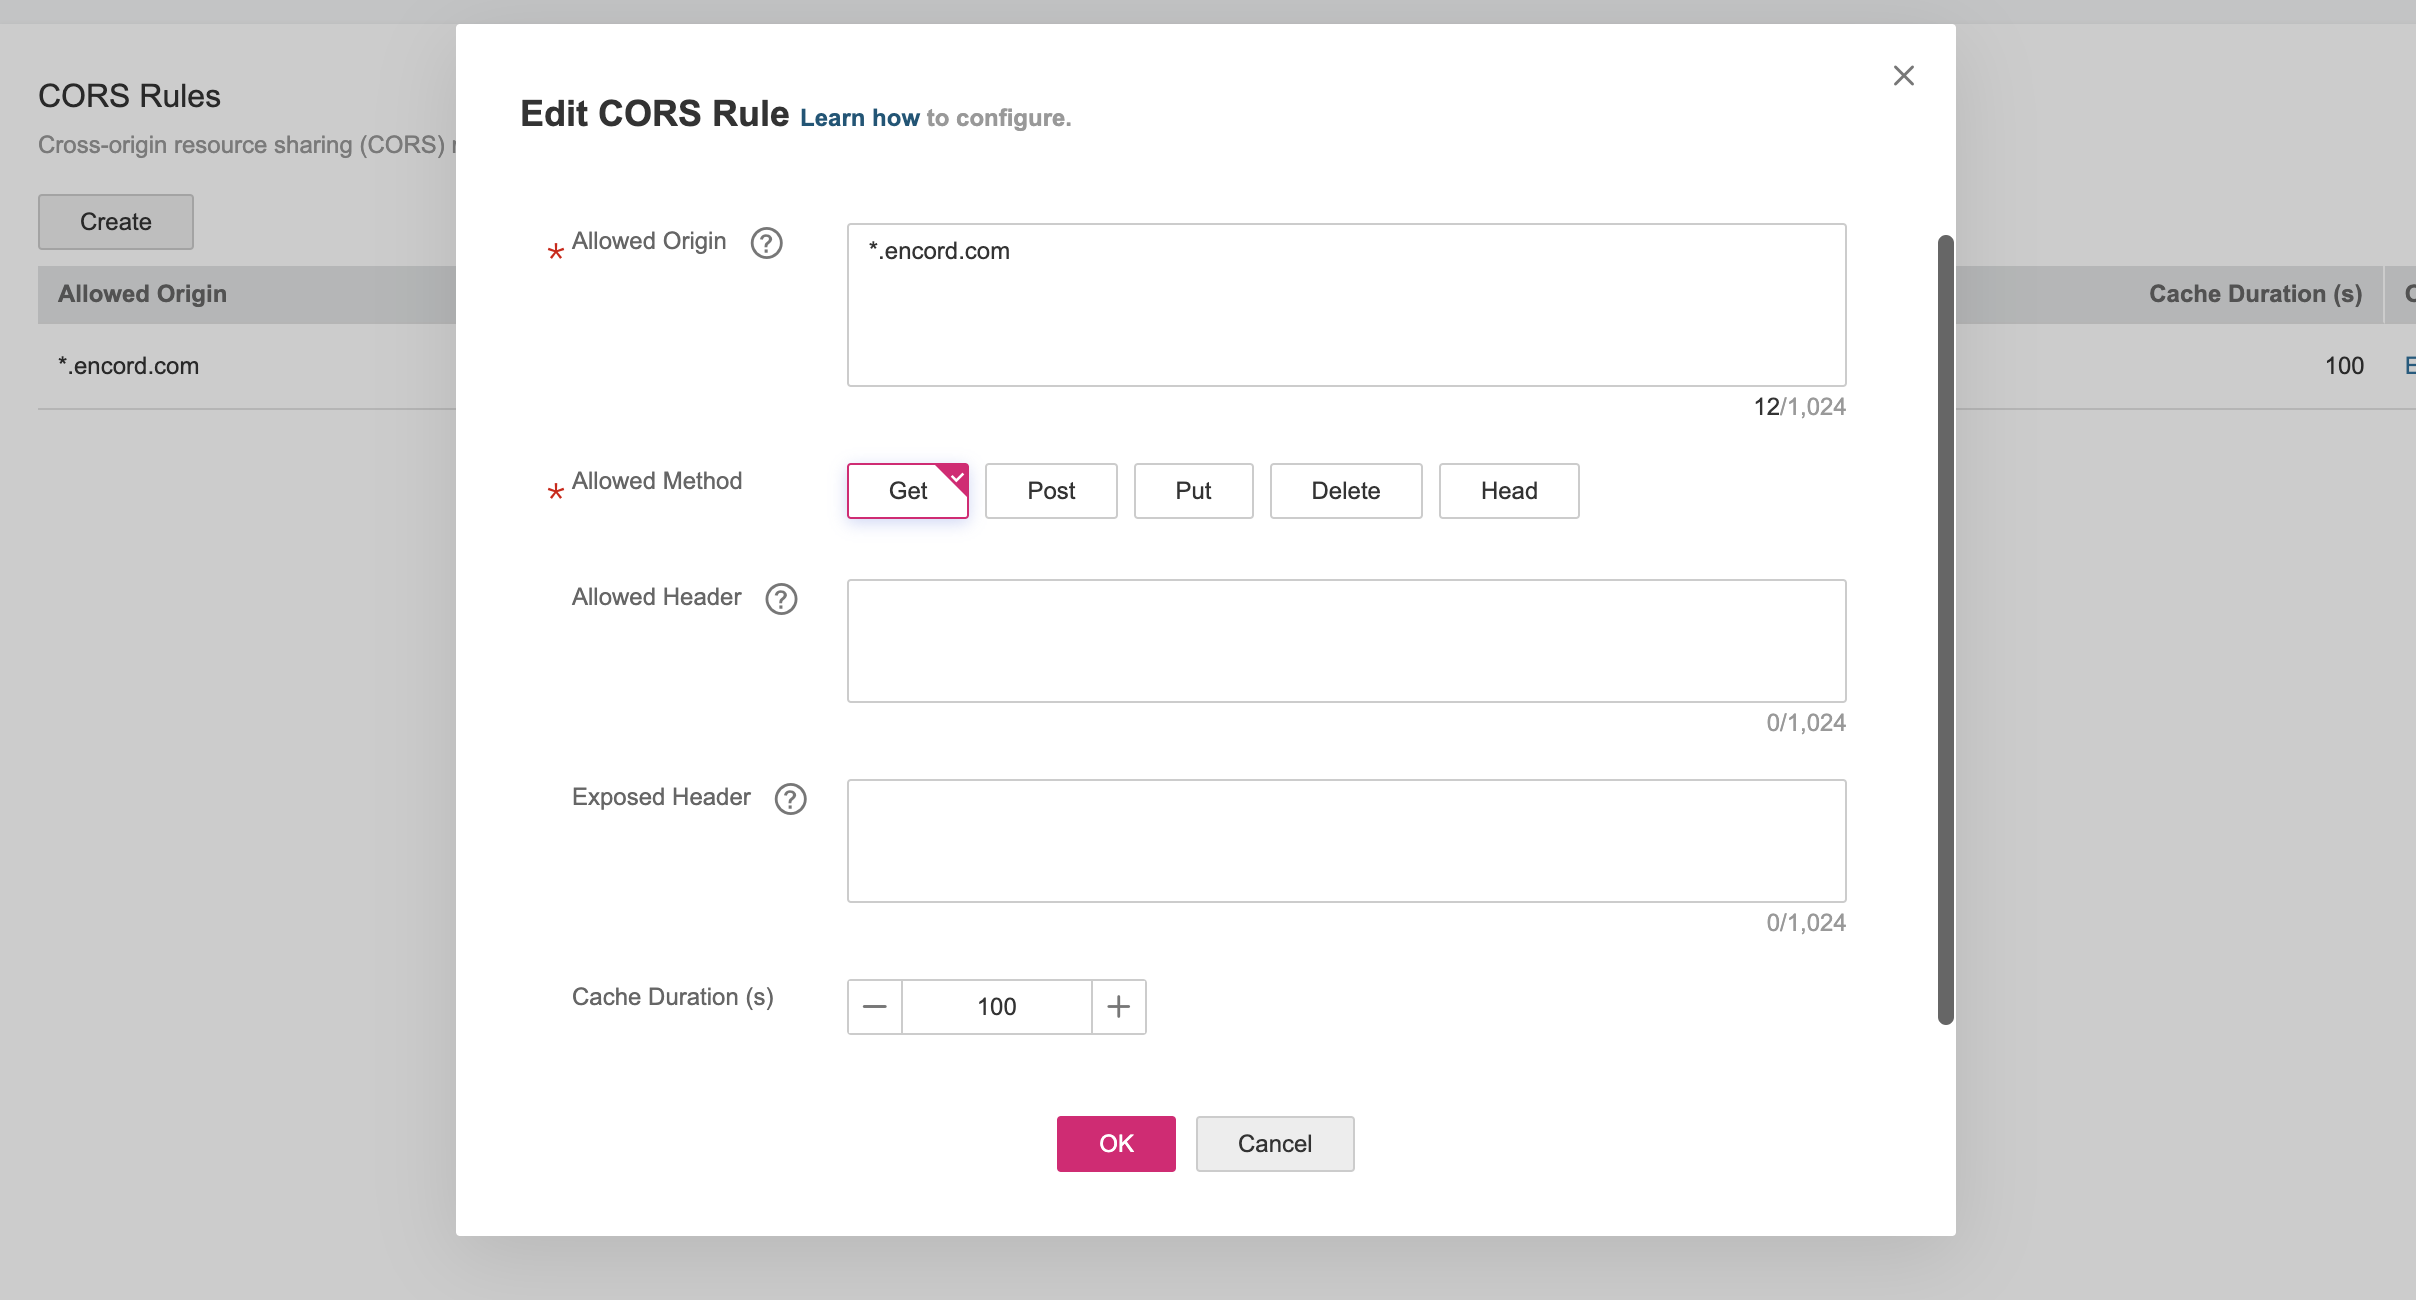
 ## 4. Configuring CORS
If you use Infrastructure as Code tools like Terraform, they can overwrite your manual CORS settings. To prevent this, always include the correct CORS policy in your Terraform configuration file.
If your bucket has a configured CORS policy, make sure it permits access from `*.encord.com`.
## 4. Configuring CORS
If you use Infrastructure as Code tools like Terraform, they can overwrite your manual CORS settings. To prevent this, always include the correct CORS policy in your Terraform configuration file.
If your bucket has a configured CORS policy, make sure it permits access from `*.encord.com`.
 ## 5. Create the Integration
In Encord, click the **Create** button at the bottom of the integration pop-up. The integration now appears in the list of integrations.
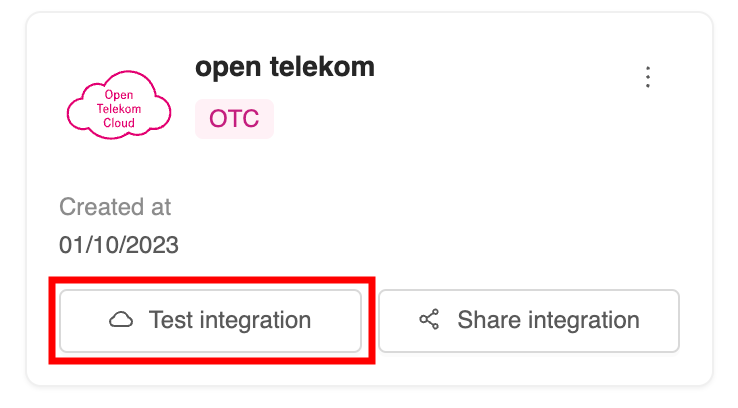
## 6. Testing the Integration
1. Click the **Run a test** button to test the integration.
2. Paste the URL of any object in the bucket and click **Check Encord can access this URI**. If the test is successful a green tick appears next to *Encord infrastructure* and *This machine*.
***
## Register OTC Data
Navigate to the [Register cloud data](/platform-documentation/Curate/add-files/index-register-cloud-data) page for guidance on how to register data stored in OTC to Encord.
## 5. Create the Integration
In Encord, click the **Create** button at the bottom of the integration pop-up. The integration now appears in the list of integrations.
## 6. Testing the Integration
1. Click the **Run a test** button to test the integration.
2. Paste the URL of any object in the bucket and click **Check Encord can access this URI**. If the test is successful a green tick appears next to *Encord infrastructure* and *This machine*.
***
## Register OTC Data
Navigate to the [Register cloud data](/platform-documentation/Curate/add-files/index-register-cloud-data) page for guidance on how to register data stored in OTC to Encord.