

You can use Data Groups in non-Consensus Projects and Consensus Projects with Review & Refine nodes. Determine Consensus nodes are not yet supported.
Data Group Layouts
The order of data units in a Data Group determines how they are arranged in the Label Editor. Encord supports the following:- Grid (default)
- Carousel
- Custom Layouts
- Grid Layout
- Carousel Layout
- Custom Layout

Create Data Groups
All layouts (grid, carousel, custom) are limited to 50 data units. Attempting to create a data group with more than 50 data units results in an error.
Manually Create Data Groups
- Go to Files > [select a Folder].
- Select the files you want to add to a Data Group.
- Right click your selection.

- Hover over Data group.
-
Select the Data Group layout you want the group to have. The following grid layout options are available:
- Row grid layout: Files are shown side by side in a grid.
- Column grid layout: Files are stacked vertically in a grid.
- Encord automatically names Data Groups.
- Data Groups appear in the same folder as its component files.
- Click the View details icon, to see a preview of how the Data Group appears to Annotators and Reviewers.
Auto Data Groups
Auto Data Groups automatically organize files into groups, based on grouping keys you define. Any files sharing the same key are combined into a single data group, so there’s no need to manually predefine or maintain groups.The Auto Data Group feature runs automatically as new data is added to a Cloud-synced Folder. Only new data is grouped. Existing groups remain as they are.
- Navigate to Data > Files & Folders.
- Click + New folder.
- Select Auto Data Groups.
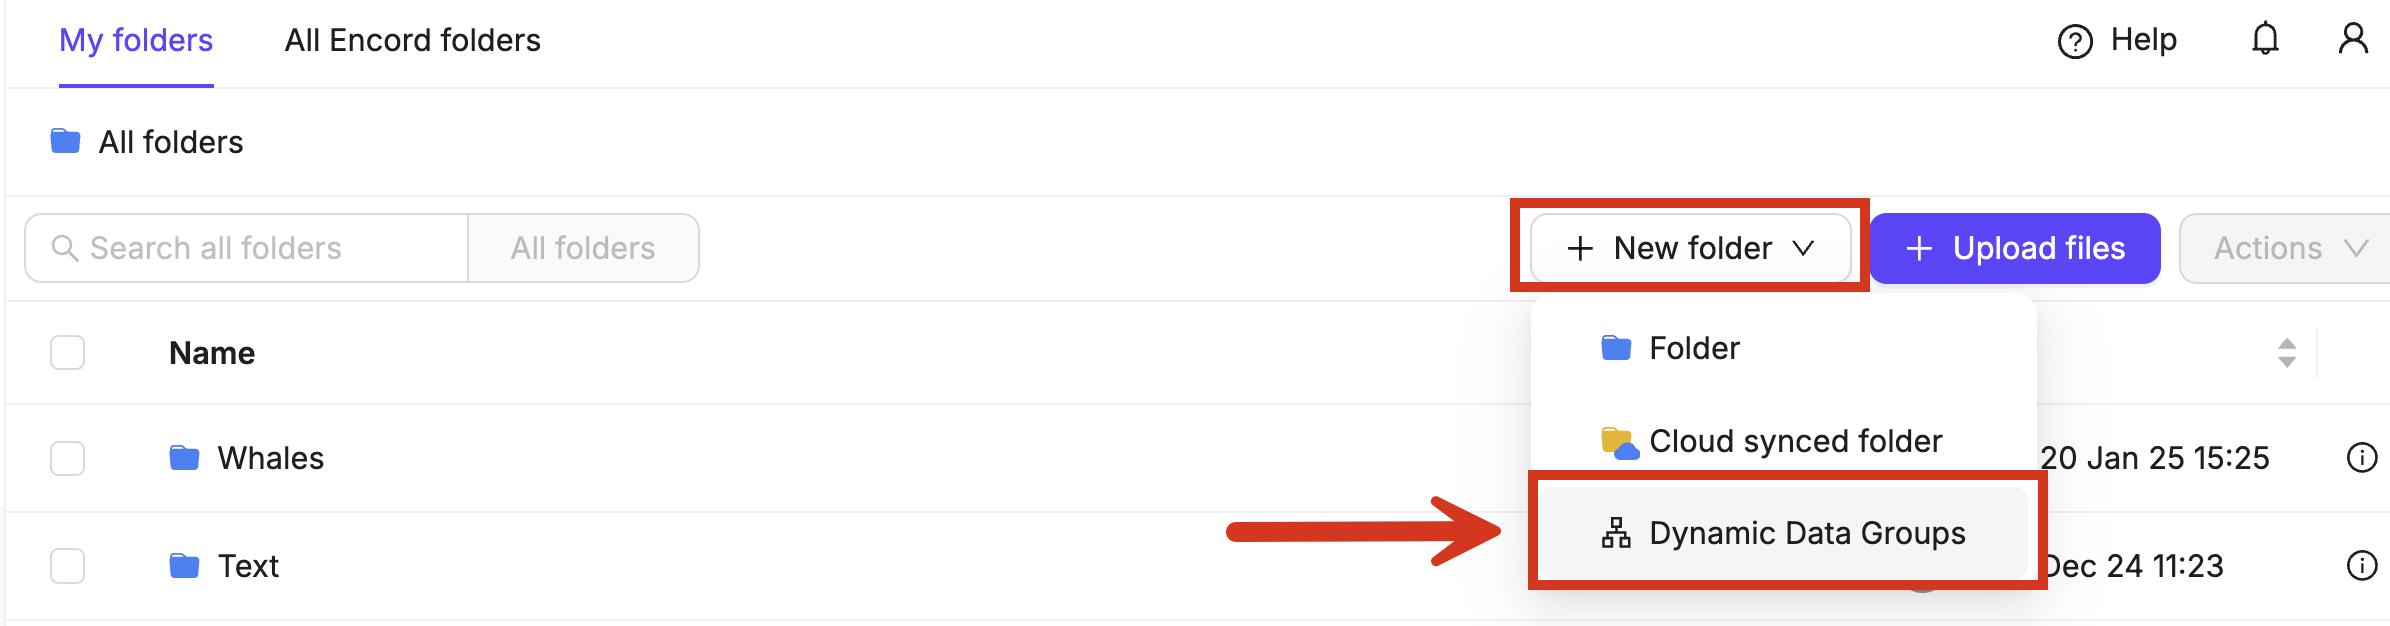
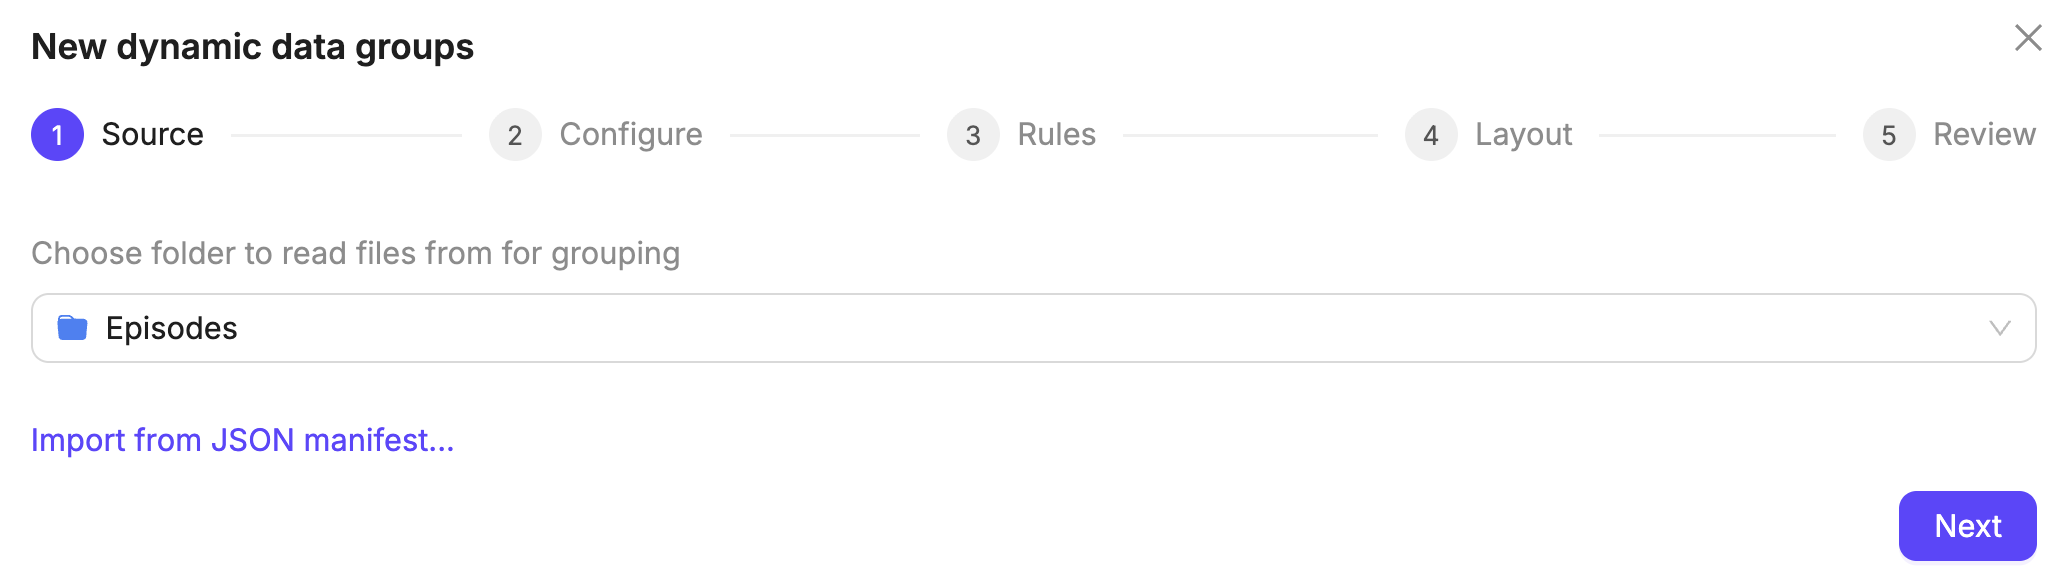
- Select a source folder whose files you want to organize into Data Groups. Each folder supports only one grouping configuration. If the selected folder already has one, it is loaded for you to review and edit.
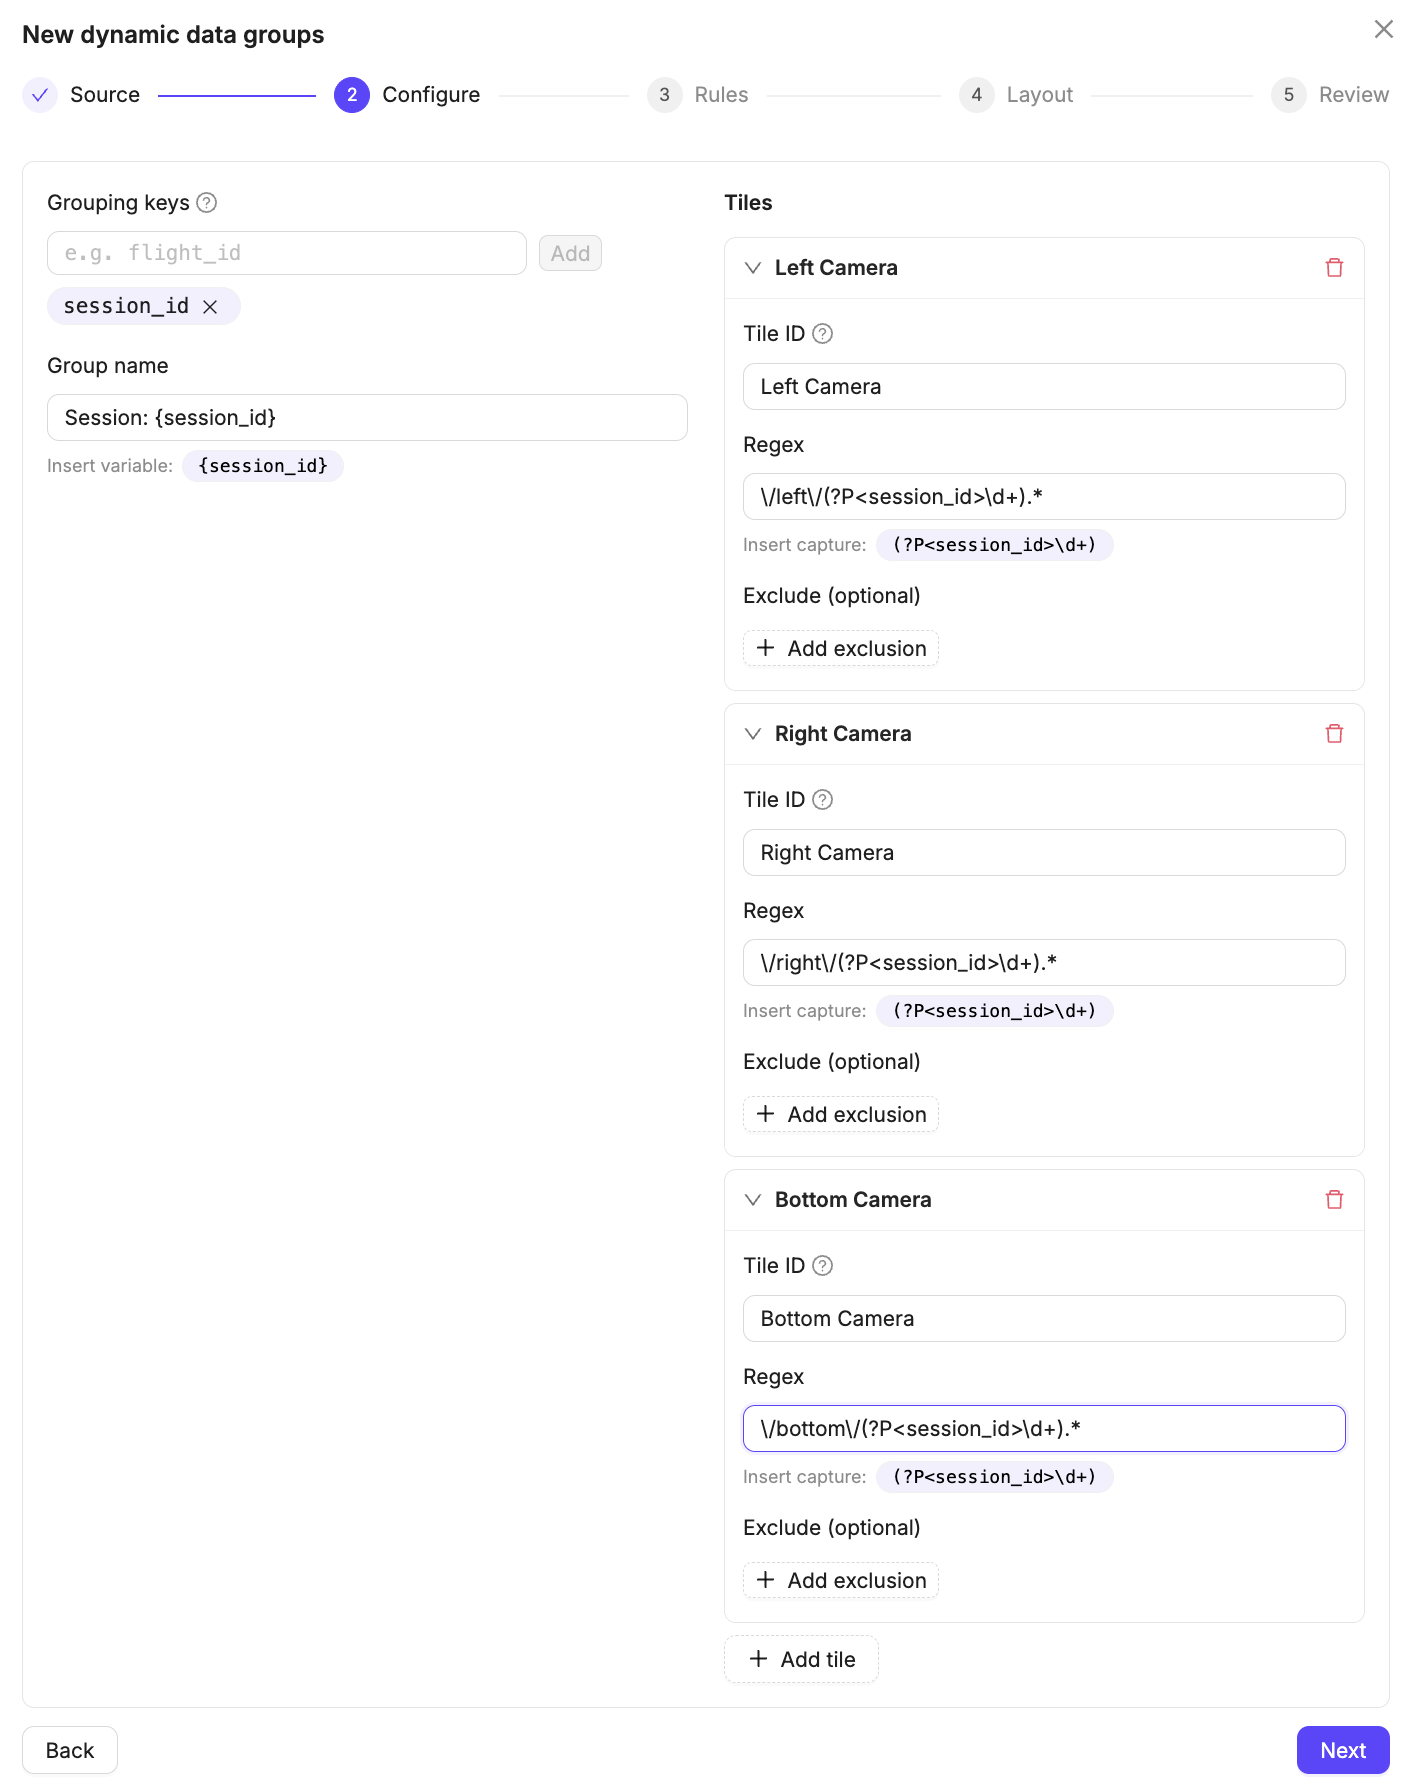
- Encord suggests a configuration based on your file naming patterns. You can adjust it by entering:
- Grouping keys: Part of the filename used to identify which files belong together. For example, if you have files named
session-0878-camera-left.mp4andsession-0878-camera-right.mp4the grouping key would besession-0878. - Group name: The name of each Data Group. Grouping keys can be referenced as part of the name.
- Tiles: The contents of each tile in the Data Group. Defined using a Regex pattern that matches the filenames you want to include in each tile position. The pattern must include a capture group that matches the grouping key you defined — for example,
(session-\d+)-camera-left\.mp4where(session-\d+)captures the grouping key. - Exclude rules (optional): Regex patterns to filter out unwanted files, such as excluding any files containing “thumbnail” in the name.
- Read-only (optional): When enabled, annotators cannot add labels to that tile. Enable this for reference or context tiles that should be visible but not annotatable. The Read-only toggle appears only after you select a layout type for the group. Encord preserves the read-only setting when you rename a tile, removes it cleanly when you delete a tile, and round-trips it correctly through manifest import and export. AI-suggested configurations also reflect any read-only flags present in the manifest.
- Grouping keys: Part of the filename used to identify which files belong together. For example, if you have files named
The Read-only toggle appears in the tile member editor only after you select a layout type (Grid, List, or Custom) for the group. If no layout type is set, the toggle is not visible. Only dataset managers and admins can configure the read-only setting — annotators cannot change it.
- Optionally, preview the configured grouping by clicking Run preview.

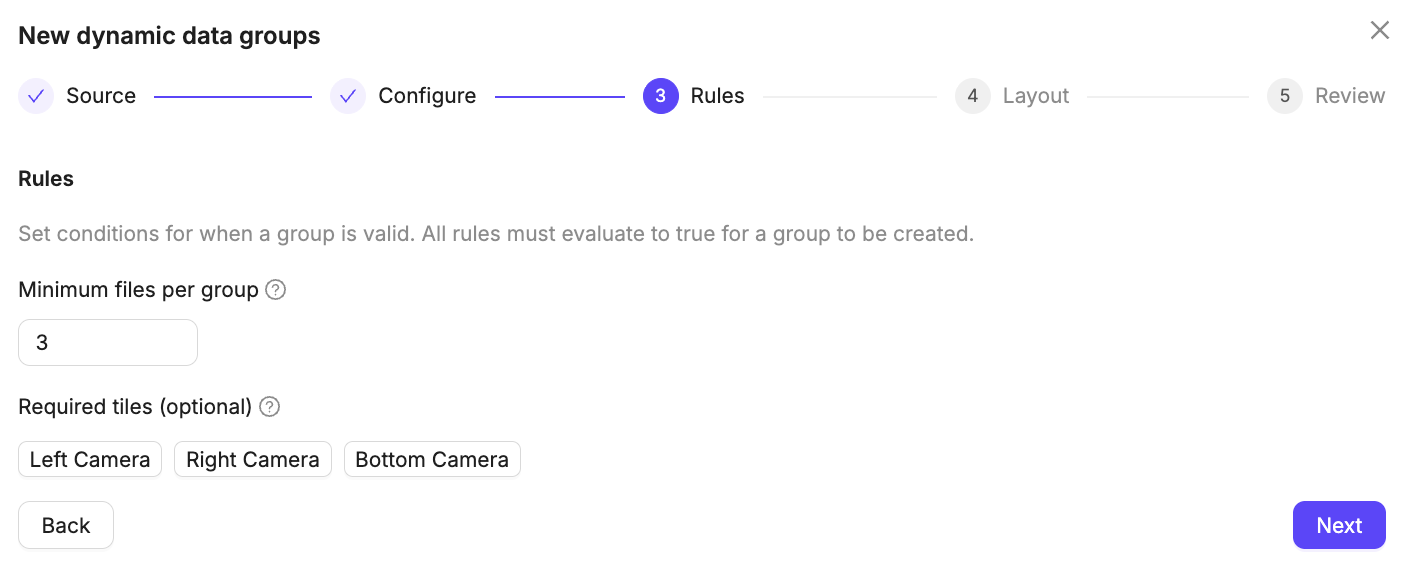
- Define rules (all rules must be met for a Data Group to be created):
- Minimum number of files per Data Group: The minimum number of tiles that must be matched to create a group. For example, if you define 5 tiles but only 3 matching files are found, you can decide whether the group should still be created.
- Required tiles: Specific tiles that must always be present, regardless of whether the minimum threshold is met. For example, you can mark a particular tile as required, ensuring groups are only created when that tile exists.
-
Define the Data Group layout. Select one of the following:
- Grid
- List
- Custom
- Side by side (rows): Tiles are placed side by side horizontally, with pairs stacked vertically.
- Stacked (columns): Tiles are stacked vertically, with pairs arranged side by side.
Selecting a layout type enables the Read-only toggle in the tile member editor (step 5). If you need to mark tiles as read-only, set the layout type before configuring individual tiles.
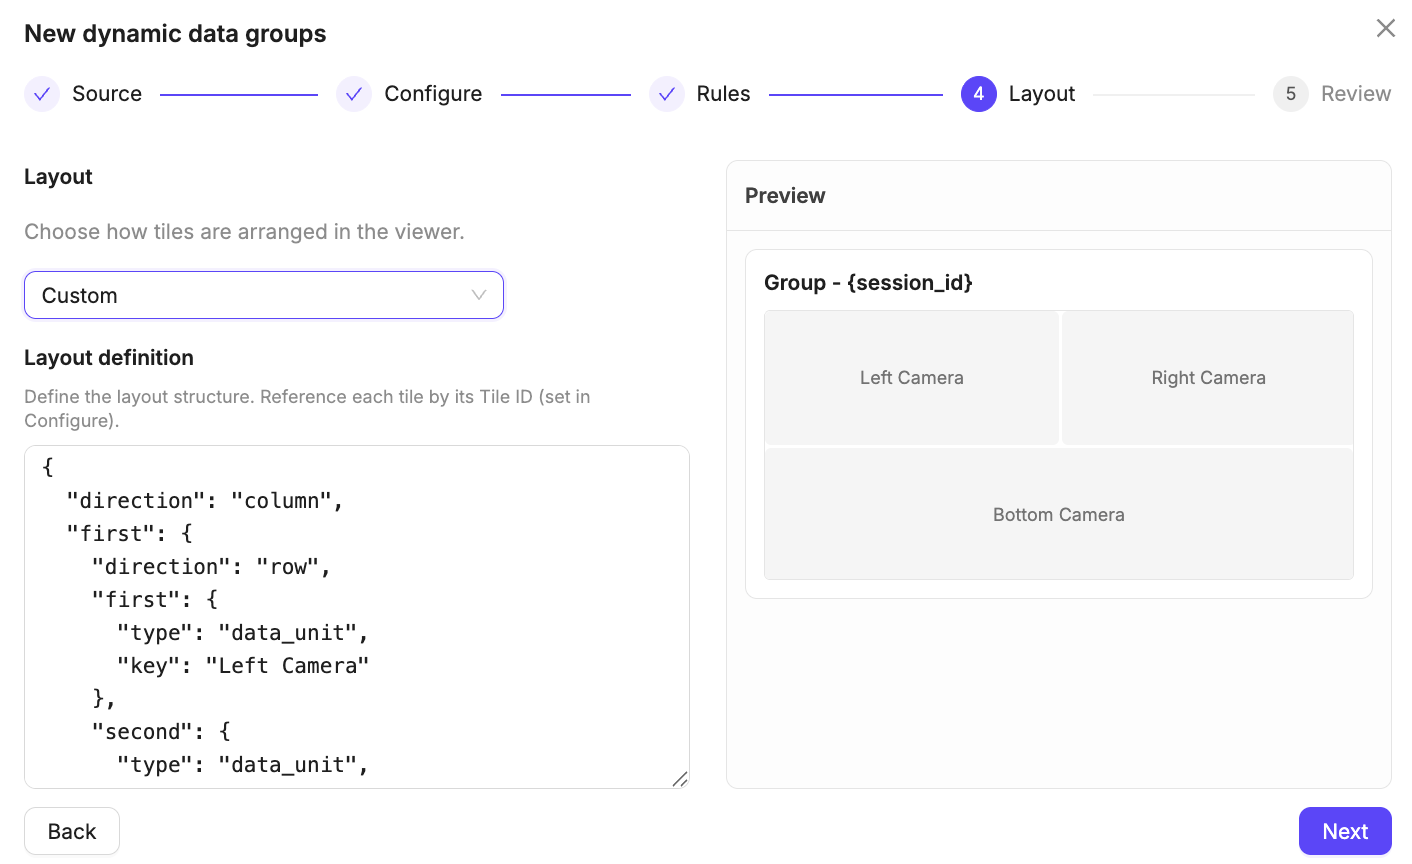
- Click Create.
A new folder with the same name as your source folder plus the suffix
_grouped(e.g.,my-folder_grouped) is created.
Group Newly Uploaded Files
For a standard (non-cloud-synced) source folder with a saved Auto Data Group configuration, select the root folder and open its Details tab. Under Data Grouping, click Run grouping to group newly uploaded files using the saved configuration. The Run grouping button does not appear for cloud-synced folders, subfolders, or folders without a saved Auto Data Group configuration.Label-Branch Overlay for Data Groups
This feature is only available to Workspace and Project Admins, and Team Managers in the REVIEW and COMPLETE Workflow stages.
- Open a Data Group asset in the annotation editor.
- Click the label-branch overlay button in the editor header.
- Select the branch you want to overlay.
The label-branch overlay button is only visible when your organization has the branch overlay feature enabled. If you do not see the button in the editor header, contact your Encord administrator.
Share Data Groups with Frame Information
When working with Data Groups that contain video files, you can share links that include specific frame information for each tile. This allows team members to view the exact frames you were working on when you shared the link.Frame-specific sharing is only available for Data Groups containing video files. For other data types, the standard sharing functionality applies.
- Open the Data Group in the Label Editor.
- Navigate to the specific frames you want to share across the different tiles.
- Click the Share button in the editor header.
- Ensure Include current frame in link is checked.
- Click Copy link.