Labeling Audio Files
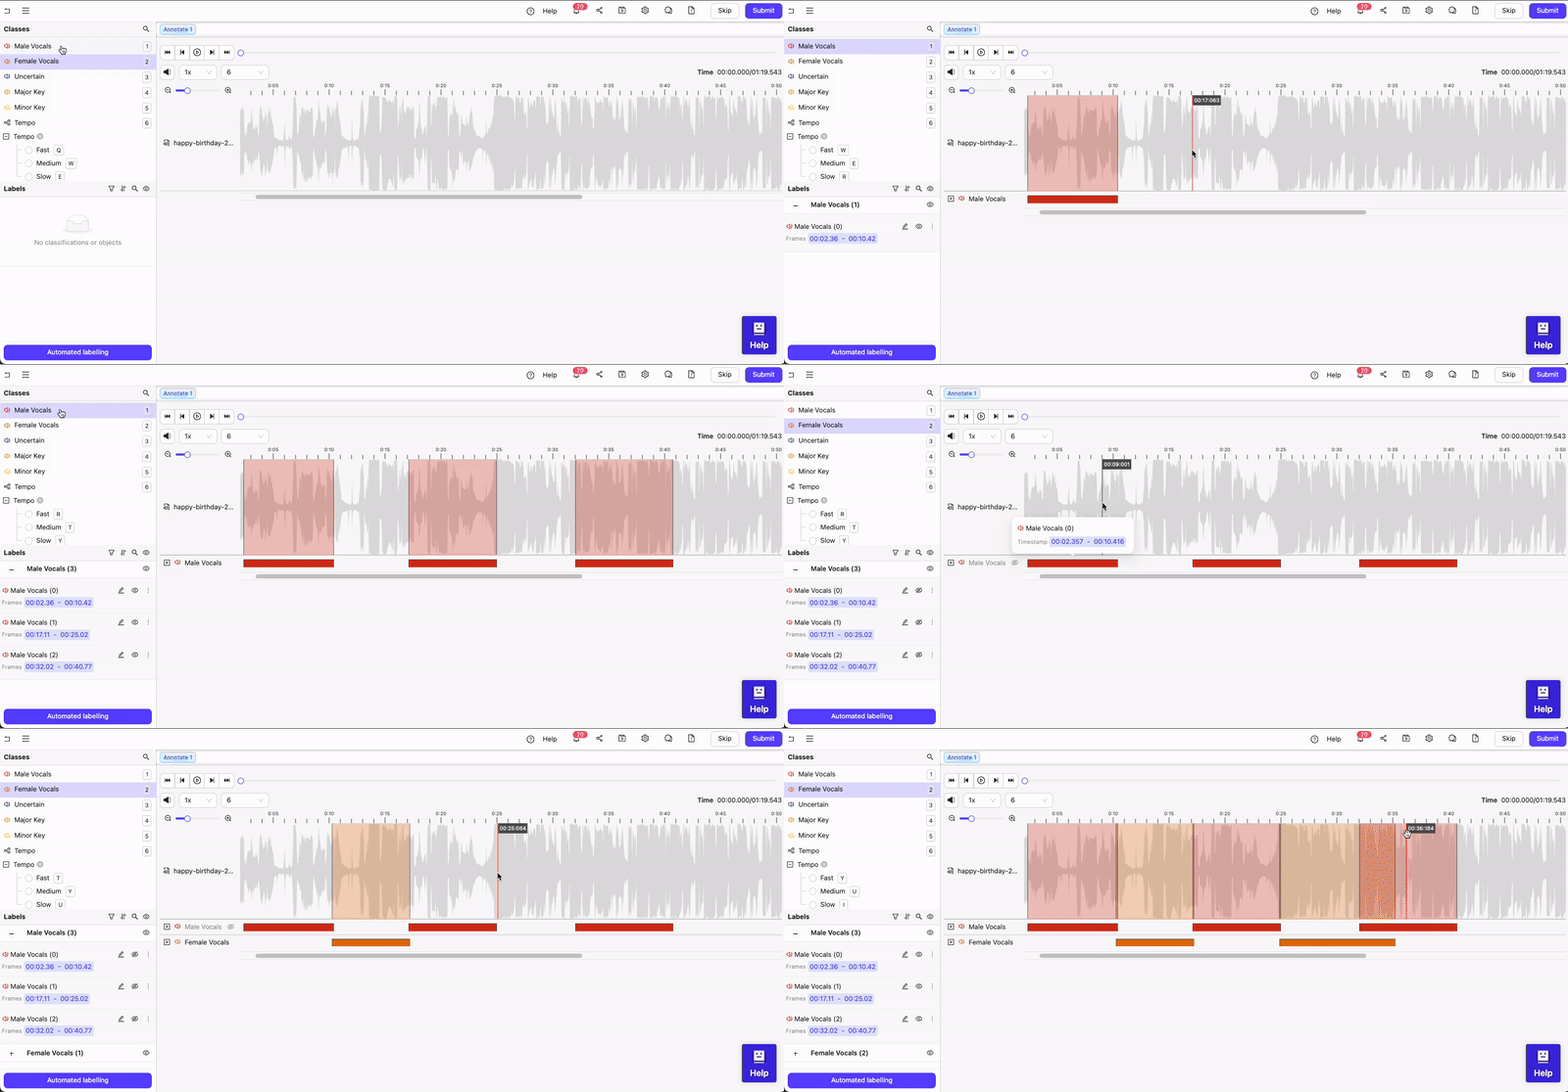
Navigate to the Queue tab of your Project and select the data unit you want to label. To label an audio region:- Select a Audio Region class from the left side menu.
- Click and drag your cursor along the waveform to apply the label between the desired start and end points. Repeat this as many times as necessary while the class is selected.
- If required, apply any attributes to the region.
- Repeat these steps for as many regions as necessary.

- Select the Classification from the left side menu.
- For radio buttons and checklists, select the value(s) you want to classification to have. For text classifications, enter the desired text.
Audio Transcription
- Select a Audio Region class from the left side menu.
- Click and drag your cursor along the waveform to apply the label between the desired start and end points.
- Apply the transcription attribute to the labeled audio region as text.
- Repeat these steps for as many regions as necessary.

Transcription Pane
The Audio Transcription Pane is available when your Ontology includes at least one Transcription attribute. To access it, click the icon at the top of the Label Editor. The Transcription Pane opens on the right side, displaying all transcriptions in chronological order.
Long Audio Files
When audio files in your cloud storage are longer than an hour, the Label Editor may take extra time to load their waveforms. To significantly reduce load times, you can generate a JSON file containing the waveform data and store it alongside your audio file.- Install audiowaveform.
- Use the following command to generate a JSON file of your waveform:
The name of the JSON file must exactly match the name of your audio file. Only the file extensions differ.
- Upload the JSON file to the location of your audio file.
The JSON file MUST reside in the same cloud storage location as your audio file.For example:
- Audio File Path in Bucket : “/my-bucket/all-audio/my-favorite-song.mp3”
- Audio Waveform File Path in Bucket: “/my-bucket/all-audio/my-favorite-song.json”

