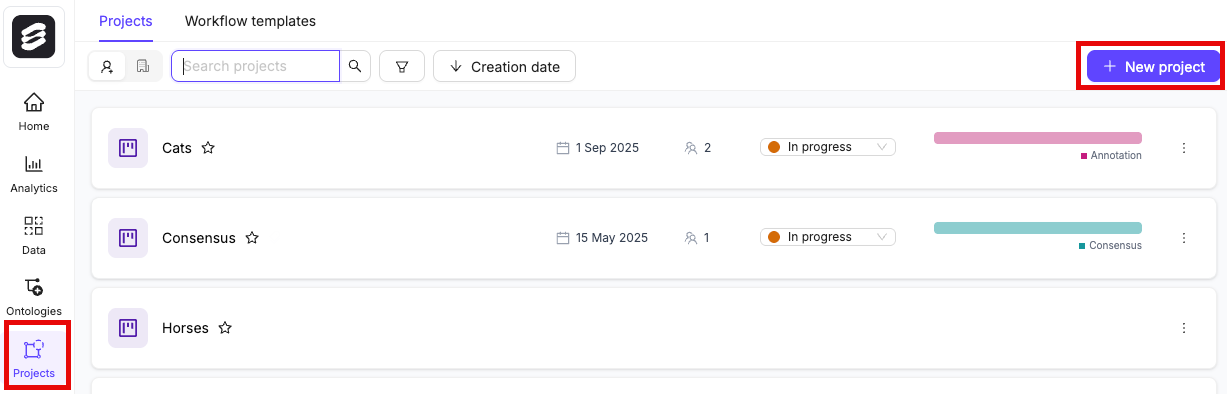
Custom Projects
To create a new annotation Project:- In the Encord platform, select Projects under Annotate.
- Click the + New project button to create a new Project.
Project Details
Give the Project a meaningful Project title and description.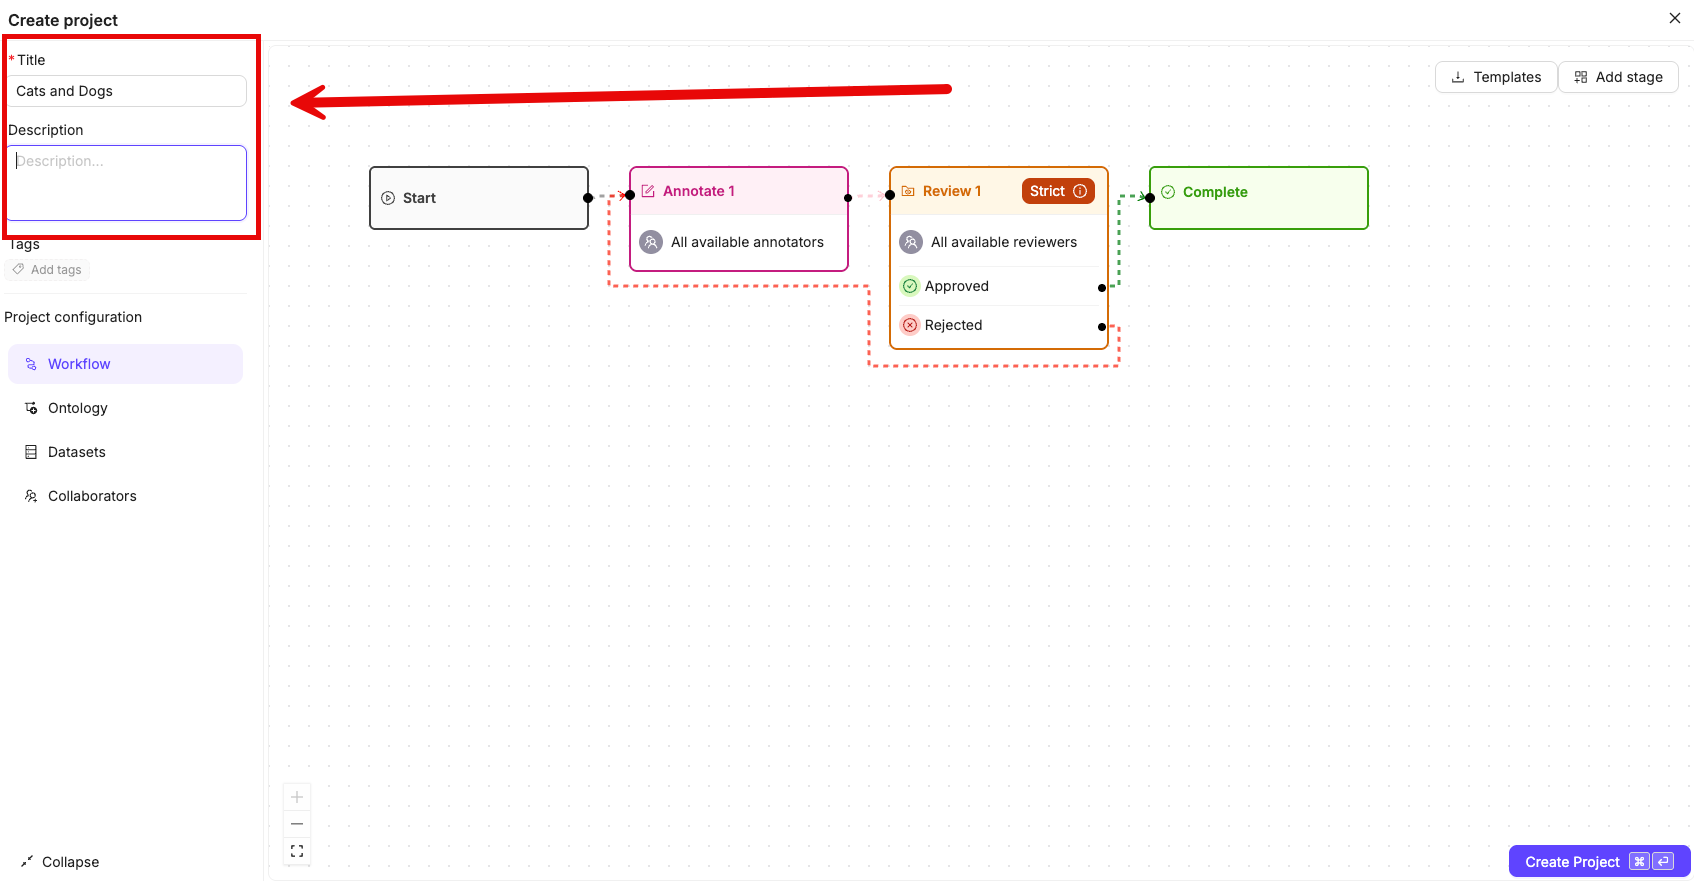
Add Project Tags
Projects only require a Title to be saved.
- Select Projects in the Encord platform.
- Click the + New annotation project button or use CONTROL / CMD + ENTER to create a new Project.
- Give the Project a meaningful title and description.
If you are part of an Workspace, an optional Project tags drop-down is visible. Project tags are useful for categorizing and finding your Projects. Select as many tags as are relevant for your Project.
- Apply any meaningful Project tags you need to the Project.
- Specify the Workflow you want to use for the Project.
- Click the Templates > Load from template to use a Workflow template.
- Select the template you want to use and click Load template.
- Click the Ontology button.
- Select an Ontology from the list, or create a new Ontology by clicking the New ontology button.
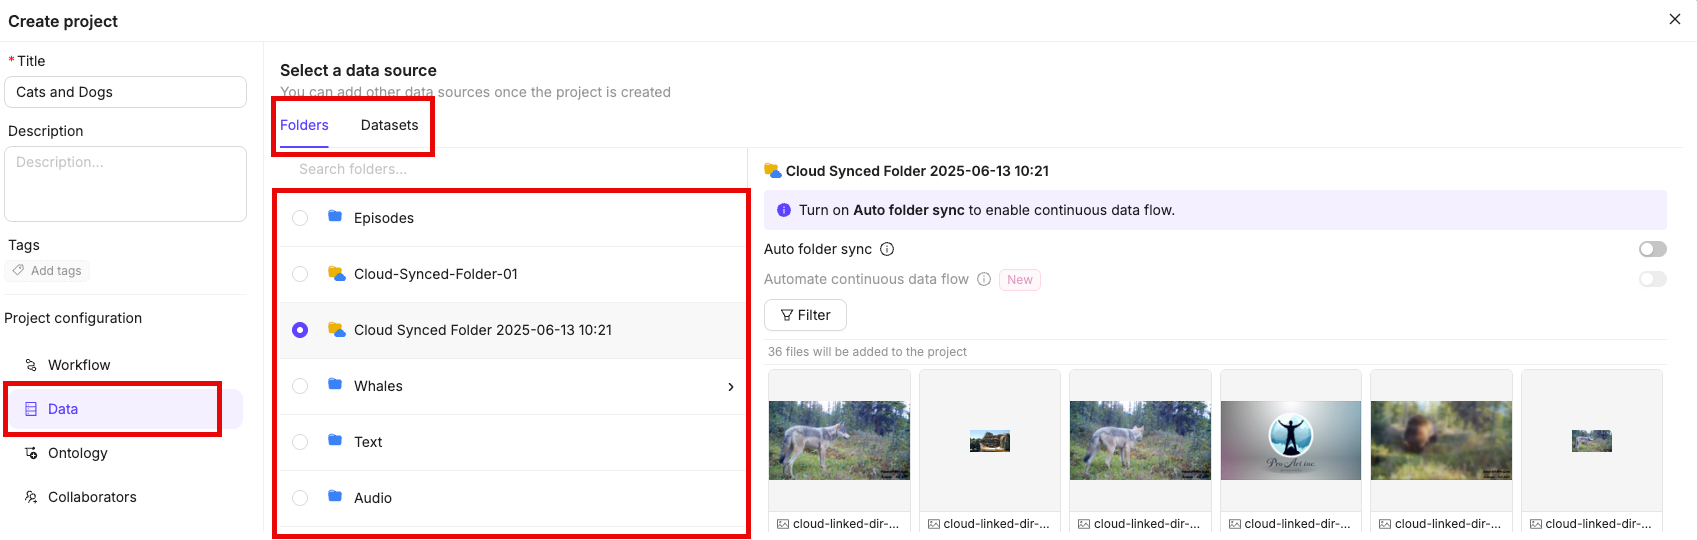
- Click the Data button.
- Select one or more data sources from the list.
- Click Collaborators.
- Specify the users and the roles they have in the Project.
- Click Create project to finish creating the Project.

Workflow
To configure your Workflow, ensure Workflow is selected in the Project Configuration. The Workflow determines how tasks move through your Project from annotation to completion. A simple Workflow containing one Annotation stage and one Review stage is provided by default. See our documentation on Workflows to:- Learn how to customize Workflows.
- Learn how to create Workflow templates that can be seamlessly added to any Project you create.
Data
- Click the Data button.
- The Project Data Management modal opens. Use this modal to browse, preview, and attach data sources to your Project.
-
Select your data source using the tabs in the left panel:
- Datasets: Browse and search available Datasets. Click a Dataset to preview its files in the center panel, then click Add to project.
- Folders: Browse and search available storage folders. Click a folder to preview its contents and configure options before adding it.
All files from the folders and Datasets you attach to the Project are available for annotation in the Project.
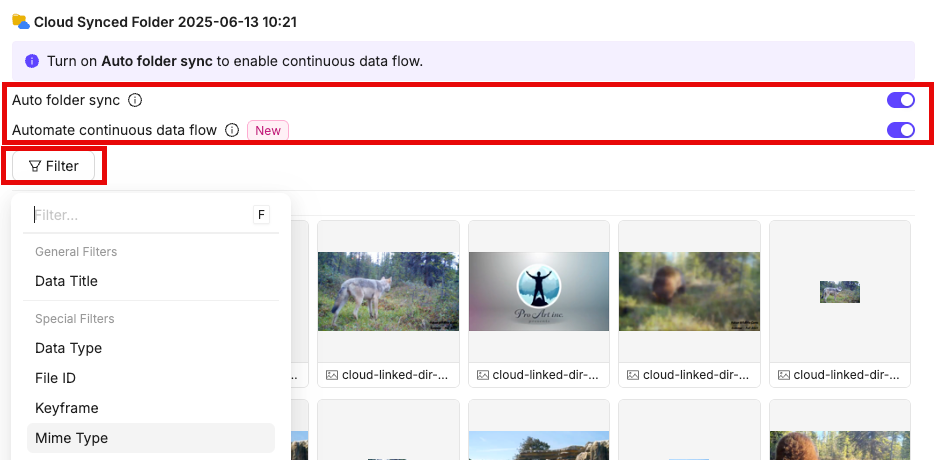
Continuous Data Flow
Continuous data flow lets new files added to a folder automatically appear in your Project without manual uploads. This is useful for teams with ongoing data collection pipelines who need their Projects to stay current with incoming data. You can configure Continuous Data Flow for a folder directly in the Project Data Management modal when adding or updating a folder:- The Continuous Data Flow toggle appears in the center panel when you select a folder.
- Enable the toggle to have new files added to the folder automatically enter the Project.
- If you apply a filter, new files pass through that filter before entering the Project.
- The toggle is unavailable when only a subset of folder items is selected. Select all items to enable Continuous Data Flow.
- Only Cloud-synced Folders support Continuous Data Flow. The toggle is unavailable for standard (non-synced) folders.
- Datasets that already have a backing folder display a Continuous data flow: On indicator in the center panel — new files appear automatically without any additional configuration.
Ontology
- Click the Ontology button.
- Browse or search the list of available Ontologies and click an Ontology to select it. The Ontology is highlighted to indicate your selection.
- Click Use this ontology to confirm your selection and attach the Ontology to the Project.
If the selected Ontology is used by other Projects, Encord prompts you to confirm the edit before saving any changes, since edits affect all linked Projects.

Collaborators
Add users to the Project and assign them roles such as Team Managers, Annotators, and Reviewers. As the Project creator, you are automatically assigned the role of Administrator.A full list of permissions and user-based access controls can be found here.
- Click the Collaborators button.
- Start typing the email address of a user you want to add to the Project.
- Select a role for the user from the drop-down menu.
- Click Add to project to add the user(s) to the Project.

Create Project
Once you are ready, click the Create Project button to finish creating your Project. For documentation on managing and administering your Project see our documentation here.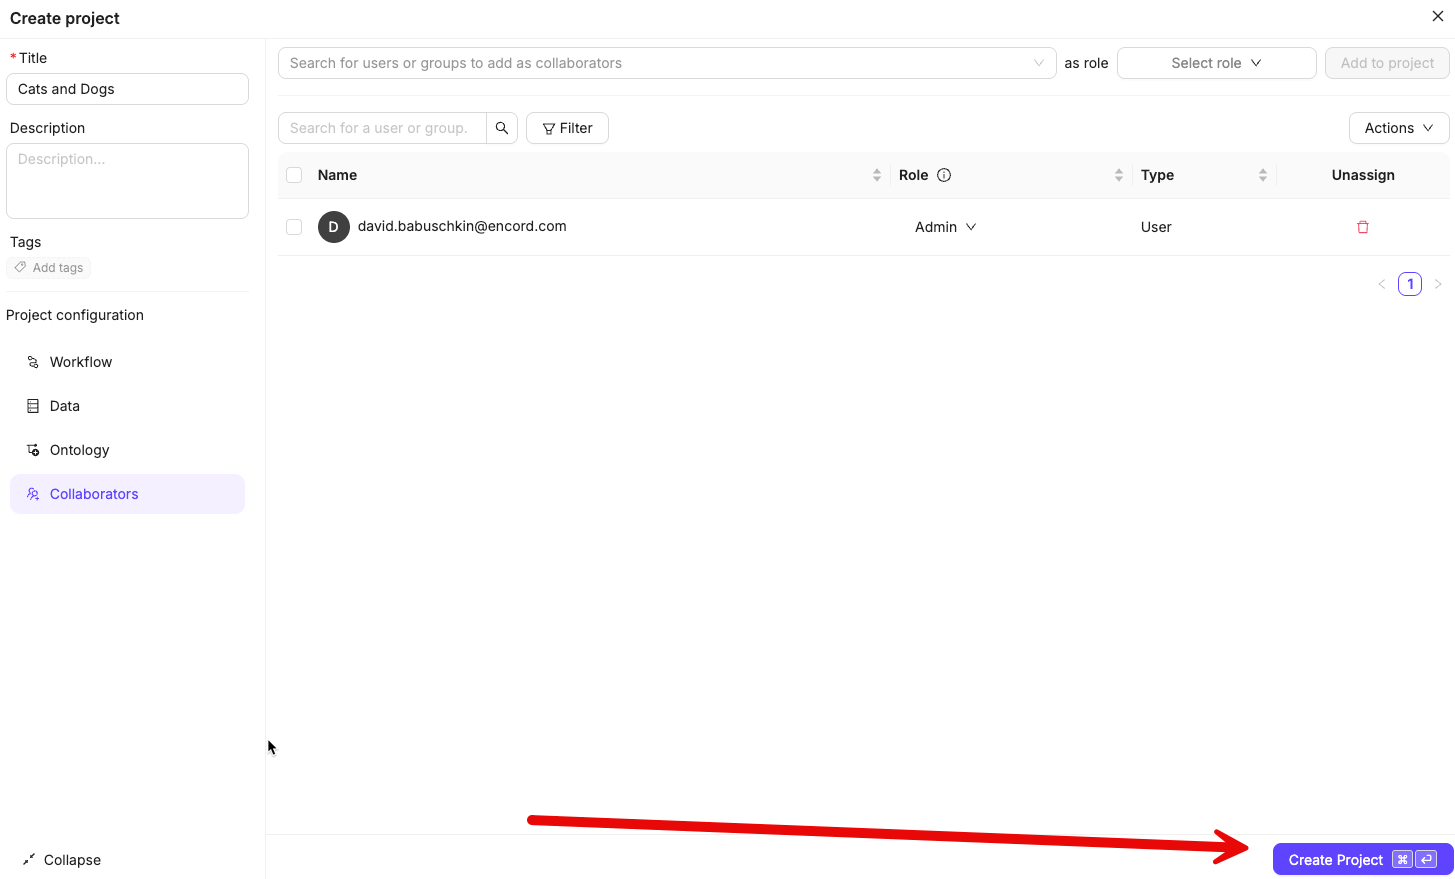
Create from a Template
Templates provide streamlined process to create your Projects with Ontologies, Workflows and Custom Layouts so you can start annotating immediately. Each template can be customized after creation.
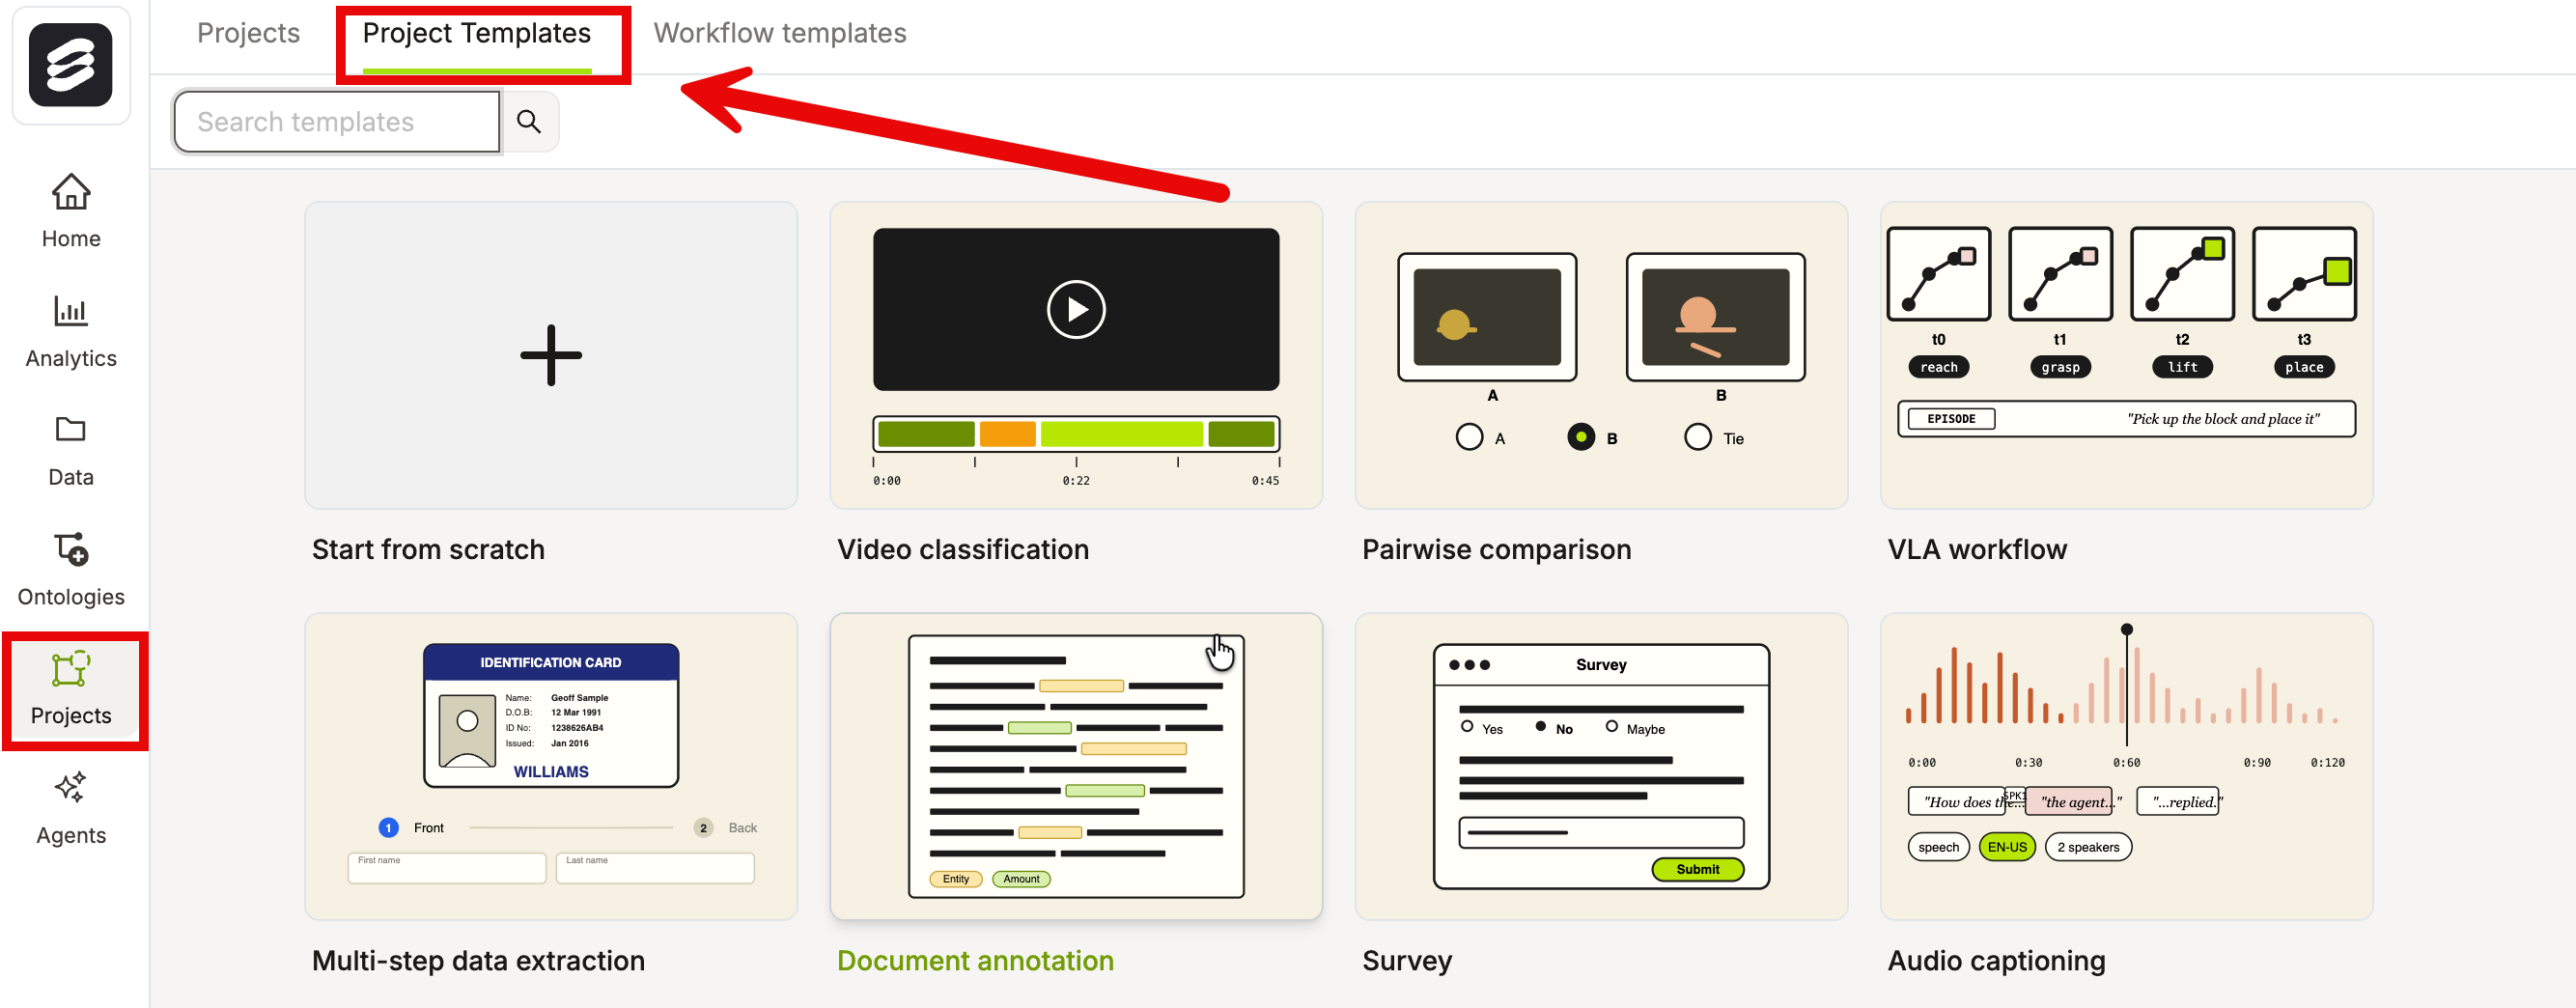
- Navigate to Projects > Project Templates.
- Browse or search the available templates.
- Click a template card. Encord creates the Project automatically and opens the Project Summary page with the Preview tab active, giving you an immediate visual preview of your new Project.
- Optionally edit the Project’s components to fit your needs.
Available Templates
| Template | Best for | Description |
|---|---|---|
| Video classification | Tracking scene actors across video with clip-level labels. | Includes bounding-box tracking of scene actors, with clip-level quality and event-type classifications. |
| Pairwise comparison | Side-by-side evaluation of two outputs. | Configured for comparing two items and recording a preference or score. |
| VLA workflow | Robotics training data: vision, language, and action labeling. | Pre-configured for vision-language-action (VLA) labeling. Includes target-object bounding boxes with category and instance attributes, and frame-level action classifications. Suitable for manipulation and navigation tasks. |
| Multi-step data extraction | Structured field extraction from identity documents across multiple review steps. | Runs extraction across two annotation steps: the first step captures front-of-card identity fields, the second captures back-of-card details. Use this as a pattern for any multi-step document extraction workflow. |
| Document annotation | Text region labeling in documents with entity and sentiment analysis. | Annotates text regions for sentiment and named entities, plus document-level type and language classifications. Suitable for contracts, reports, forms, and other structured documents. |
| Survey | Collecting structured viewer or reviewer feedback. | Captures overall impression, free-text feedback, and a recommendation rating in a structured survey format. Use for content review, data quality audits, or preference collection. |
| Audio captioning | Speaker-level transcription and audio quality assessment. | Annotates audio regions per speaker with a transcript field, and captures an overall audio quality rating. Use for ASR training data, podcast transcription, or audio QA workflows. |
| 2D object detection with SAM | Detecting vehicles, pedestrians, and cyclists with scene-level context. | Provides bounding-box classes for vehicles, pedestrians, and cyclists, along with scene-level classifications for scene type, weather, and time of day. Includes SAM-assisted labeling for faster segmentation. Use as a base for any autonomous driving or smart-city detection Project. |
| Real or generated | Classifying media as authentic or AI-generated. | Labels media as real or AI-generated, with a confidence rating and multi-select attributes for tell-tale signs (e.g. artifacts, unnatural lighting). Use for content moderation, synthetic data audits, or AI-detection benchmarking. |