DICOM customers might be more familiar with the term ‘labeling protocol’, which is equivalent to an Ontology.
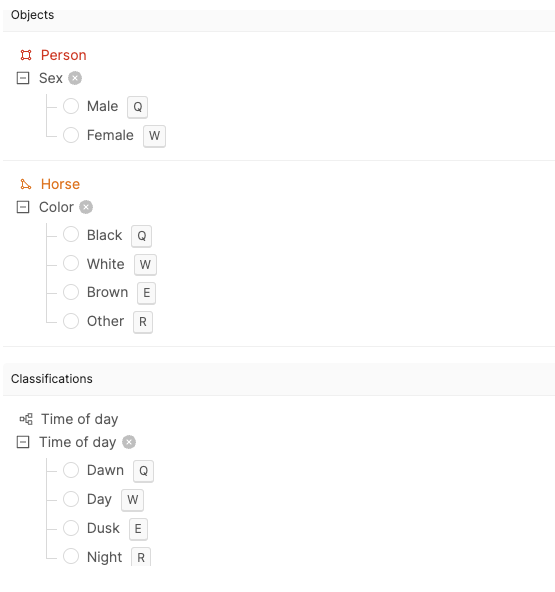
- Objects: Used to label specific locations in a frame, such as a car in a video frame.
- Classifications: Frame-level labels that do not have a specific location, such as indicating if an image is taken during the day or night.
- Attributes: These can be nested under objects, classifications, or other attributes to create detailed, hierarchical structures. For example, the object “horse” can have an attribute “color”.
Ontology Structure
Objects
Objects are configured with a title, an object annotation type, and optional attributes. You can also change their color. The following object annotation types are available:Classifications
Classifications are supported for all modalities
- Checklist: Allows multiple values. For example, “Weather” could be both cloudy and rainy.
- Radio: Allows a single value. For example, “Time of day” could be “Day” or “Night.”
- Text: Allows freeform input for each situation.
- Number: Allows freeform numerical inputs.
Radio buttons can nest up to 7 layers deep. Check boxes and text fields do not support nesting.

Global Classifications
Global Classifications apply to an entire file rather than a specific range of frames. To create one, enable the Global toggle when setting up a classification.Global Classifications are supported for all modalities.

Mark as Required
Any object, classification, or attribute can be marked as Required. This means annotators must include at least one instance of the required feature in each task before submitting.

Attributes
Attributes can be nested under objects or any classification with a Radio annotation type. To nest attributes, set the type to Radio, then click the Configure button next to the value where you want to add a new attribute.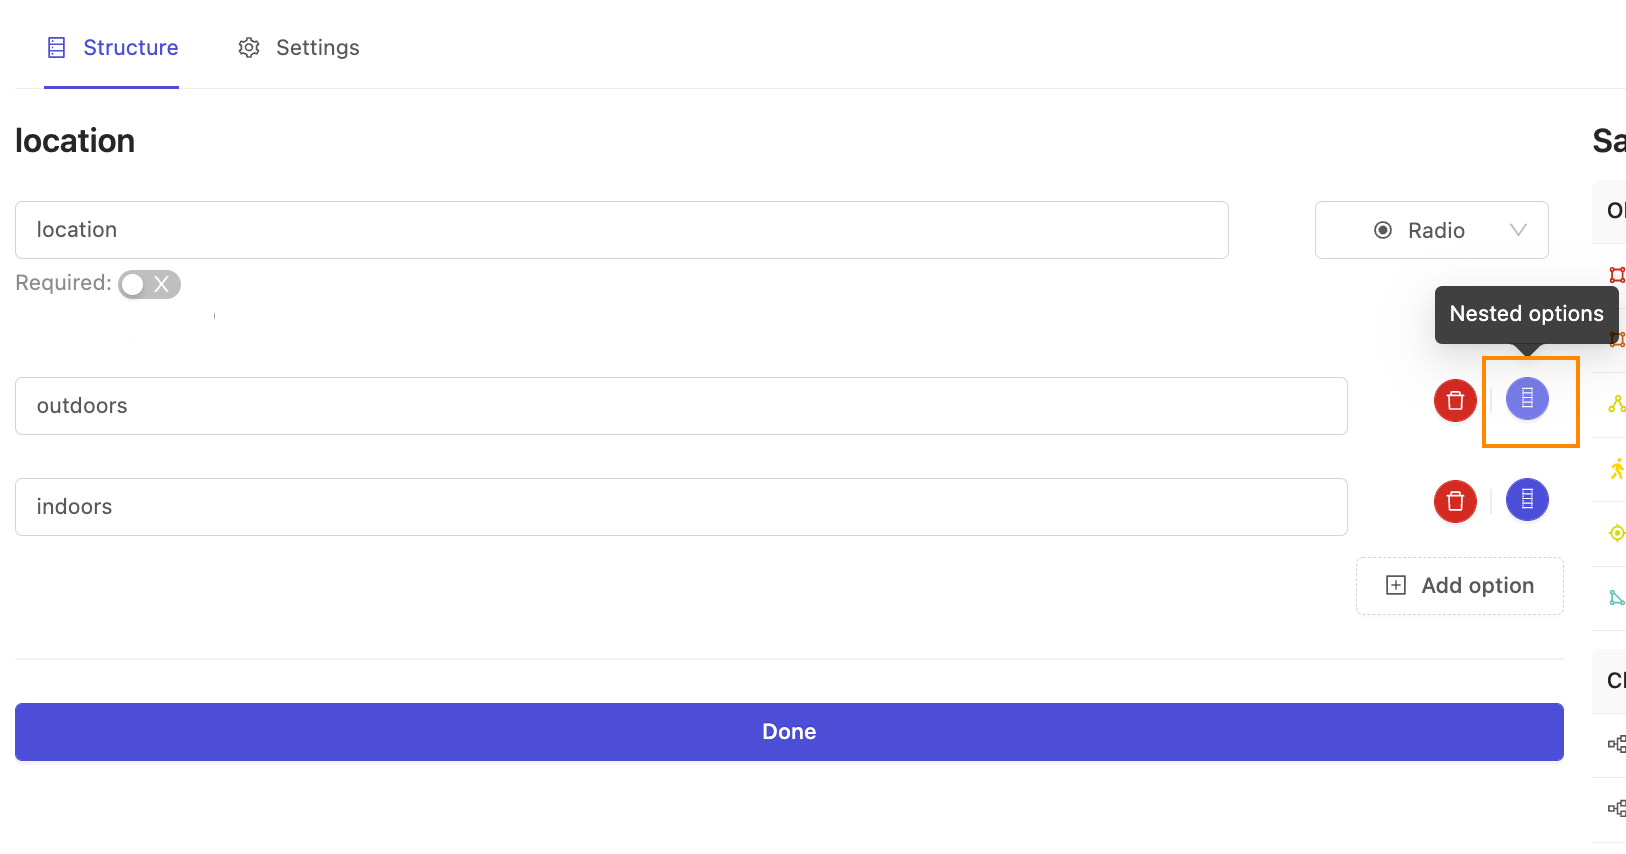
Nested Attributes
Ontologies support nested attributes on object and classification labels. This allows you to create hierarchical label structures. With nested attributes, you can define parent options that enable child options in a tree-based interface. This is particularly useful for creating complex taxonomies where certain sub-objects or sub-classifications only become relevant after selecting a parent category. For example, you might create a “Quality” classification with options like “Good” and “Bad”, where selecting “Good” enables additional severity options like “Minor” or “Major”. This hierarchical approach helps organize complex labeling workflows and ensures annotators only see relevant options based on their previous selections.Nested attributes are currently supported for radio buttons in object labels and classification labels.
Dynamic Attributes
Top-level attributes can be marked as Dynamic to allow their values to change over time in a video. This is useful for representing temporary states—for example, a person can be labeled as “moving” in one segment and “stationary” in another.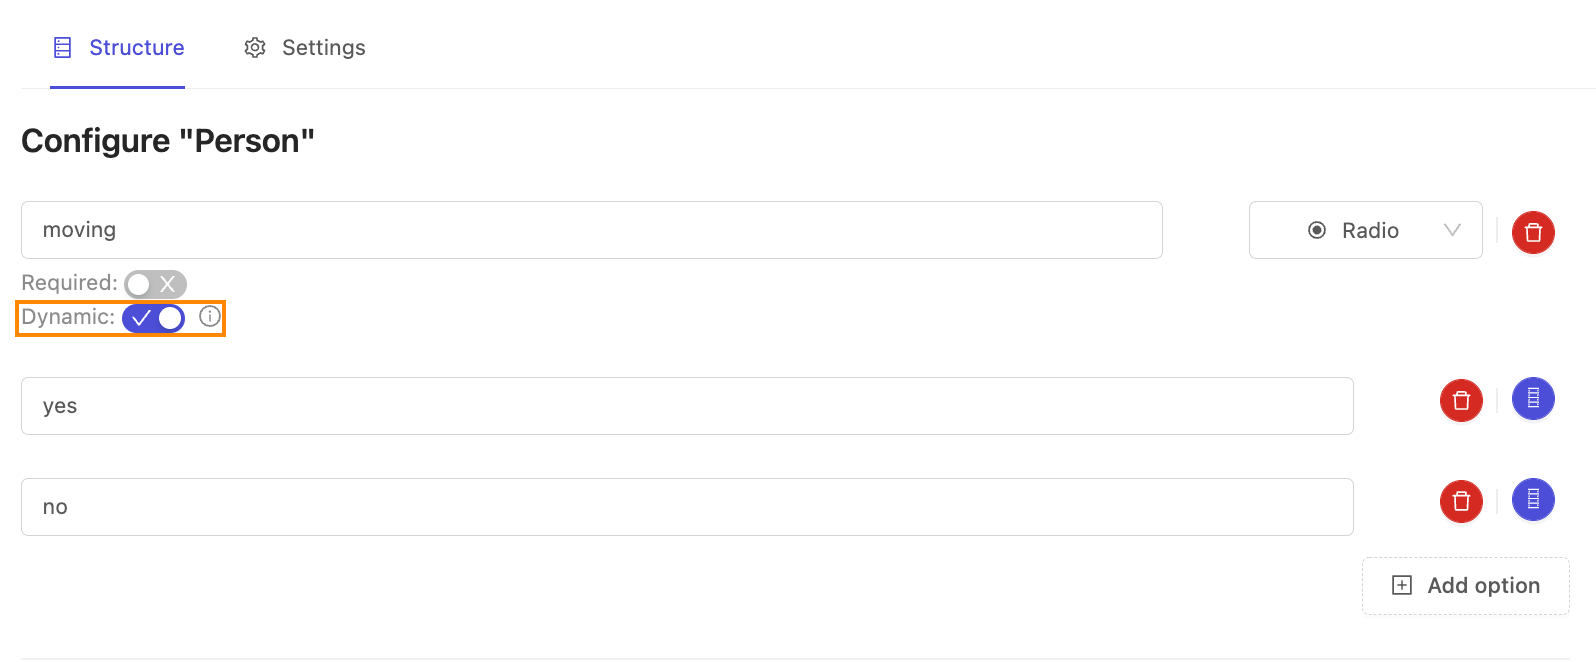
Relation Attributes
The Relation attribute lets you link objects and define their relationship using free-text, regardless of annotation type.Only one of the linked objects needs a Relation attribute for the link to be established. For example, to relate a chicken and a chicken wing, add a Relation attribute to either object in the Ontology.

Objects are linked in the Label Editor during annotation, not during Ontology creation.
- Create both instance labels. In this example a chicken and its wing have been labeled using bounding boxes.
- Click the Edit attributes button for the object with the Relation attribute - in this example the chicken wing.

- Click the Set relation… bar and select the instance you want to link the selected instance to. In this example the chicken and the wing appear on the same frame, and therefore appear under the This frame heading. Instances in different frames appear under the heading Rest.

- Click Done. The instances are now linked. This is shown in the Instance labels section with the name of the linked instance being displayed.

Apply to new occurrences
The Apply to new occurrences checkbox appears on the first instance of a label with a dynamic attribute. When selected, it applies the attribute value to all future labels of that instance.
Transcript Attributes
Transcript attributes are text fields for transcribing audio. Apply them to Audio Region objects and enter the transcription directly. For example, an Audio Region object called “Beautiful Voice” might use a Transcript attribute named “Lyrics” to transcribe song lyrics.Only Text attributes can be marked Transcript
Shared Classes
Shared classes are reusable Ontology components. You can create, edit and reuse object and classification label types using Shared classes. You can also view detailed version histories to track changes over time.Editing a shared class that is used in a Project does not introduce breaking changes. You can add attributes to a shared class, but you cannot delete. You can archive attributes.
Create a Shared Class
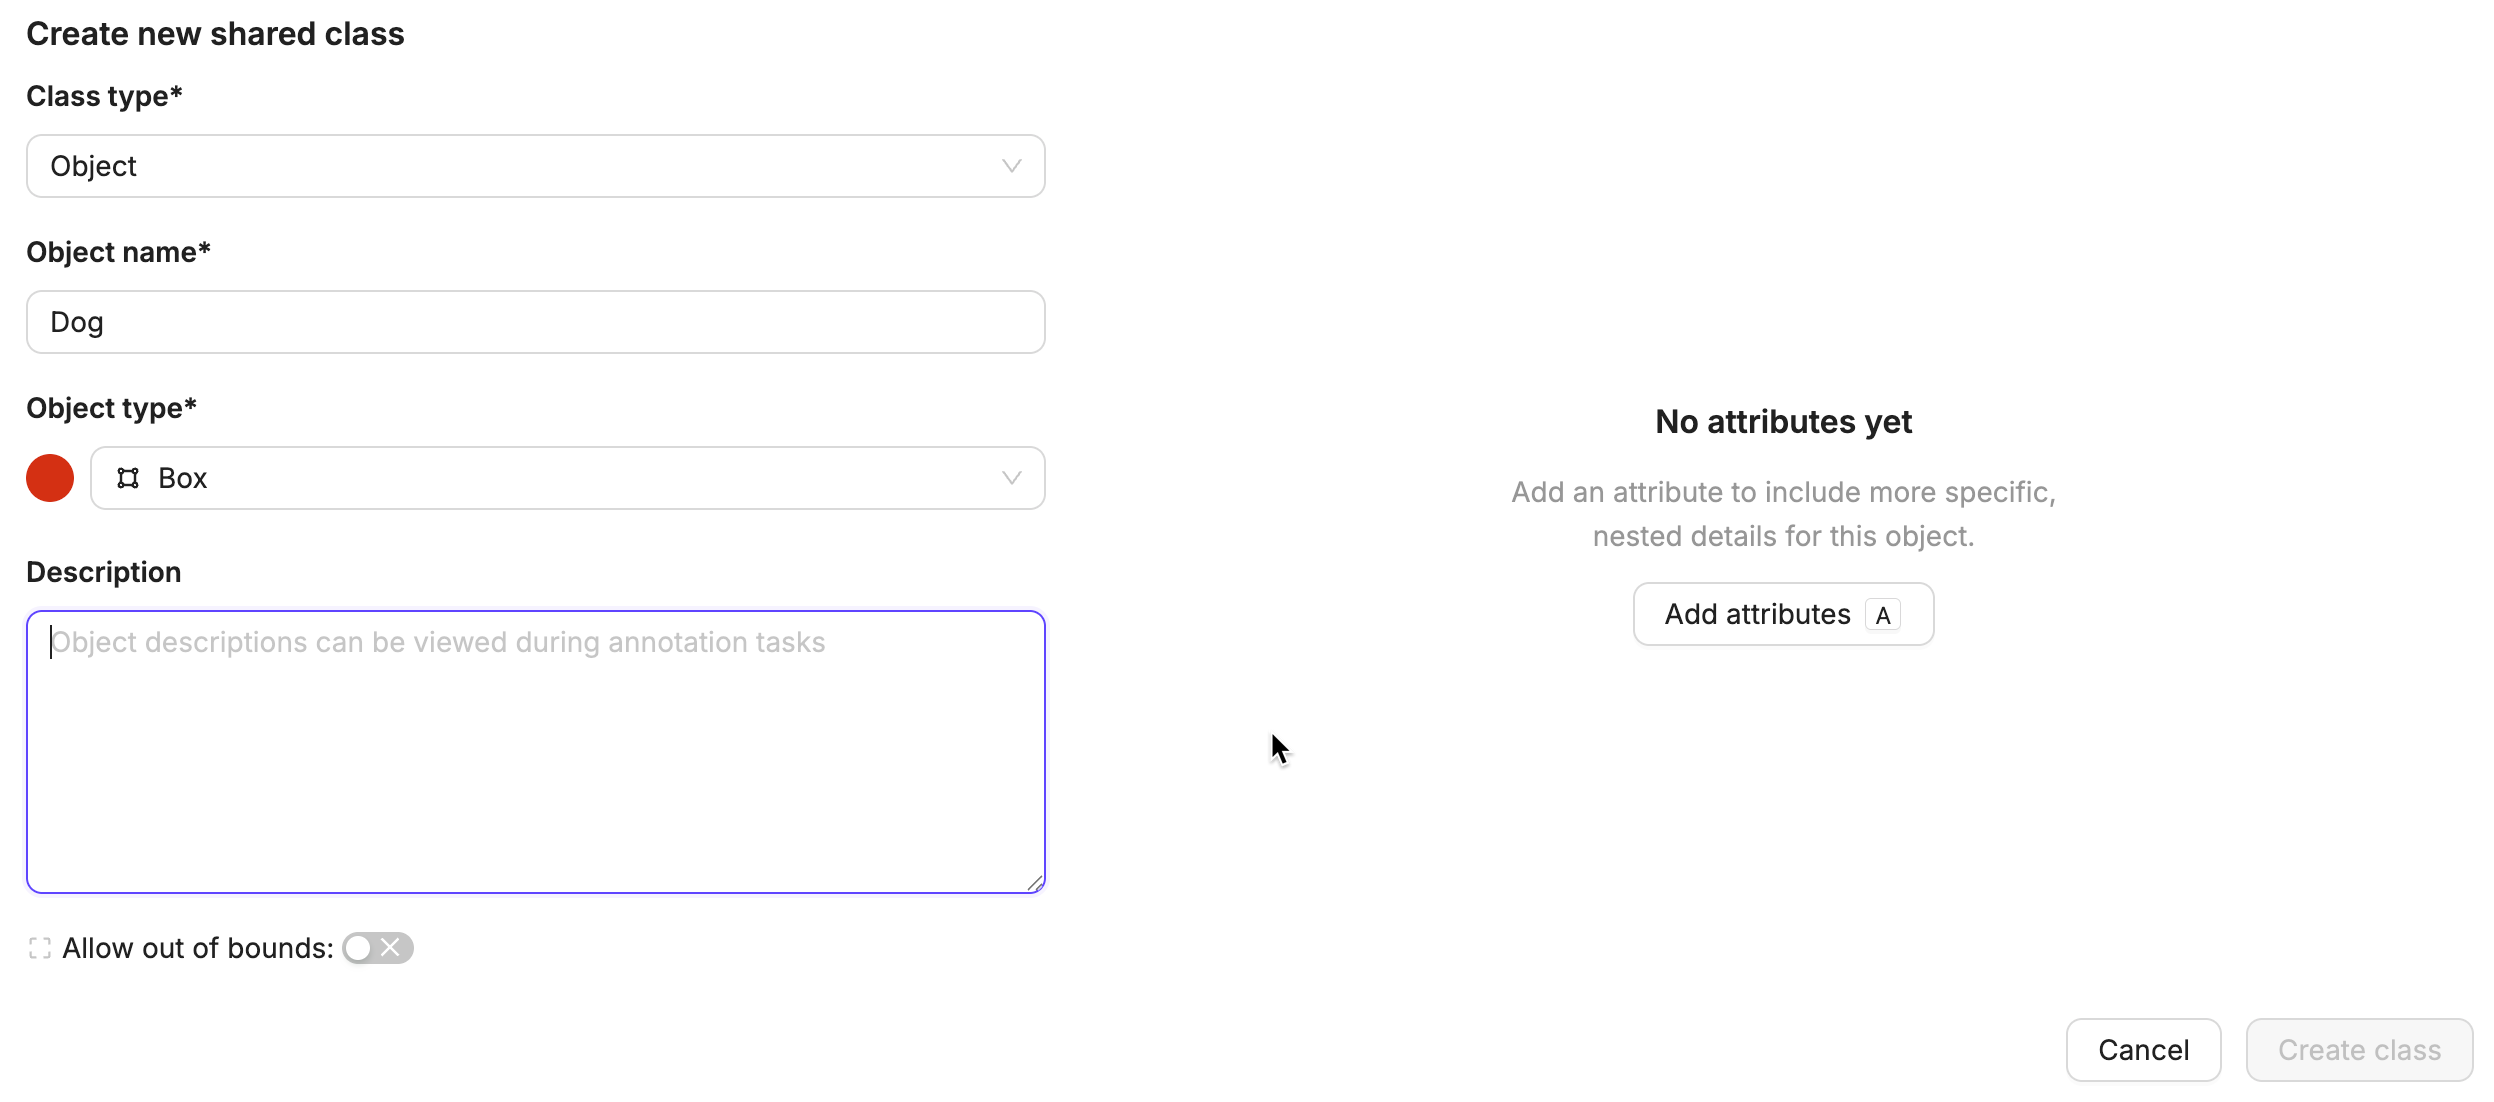
You can create shared Object and Classification label types in Ontologies > Shared classes.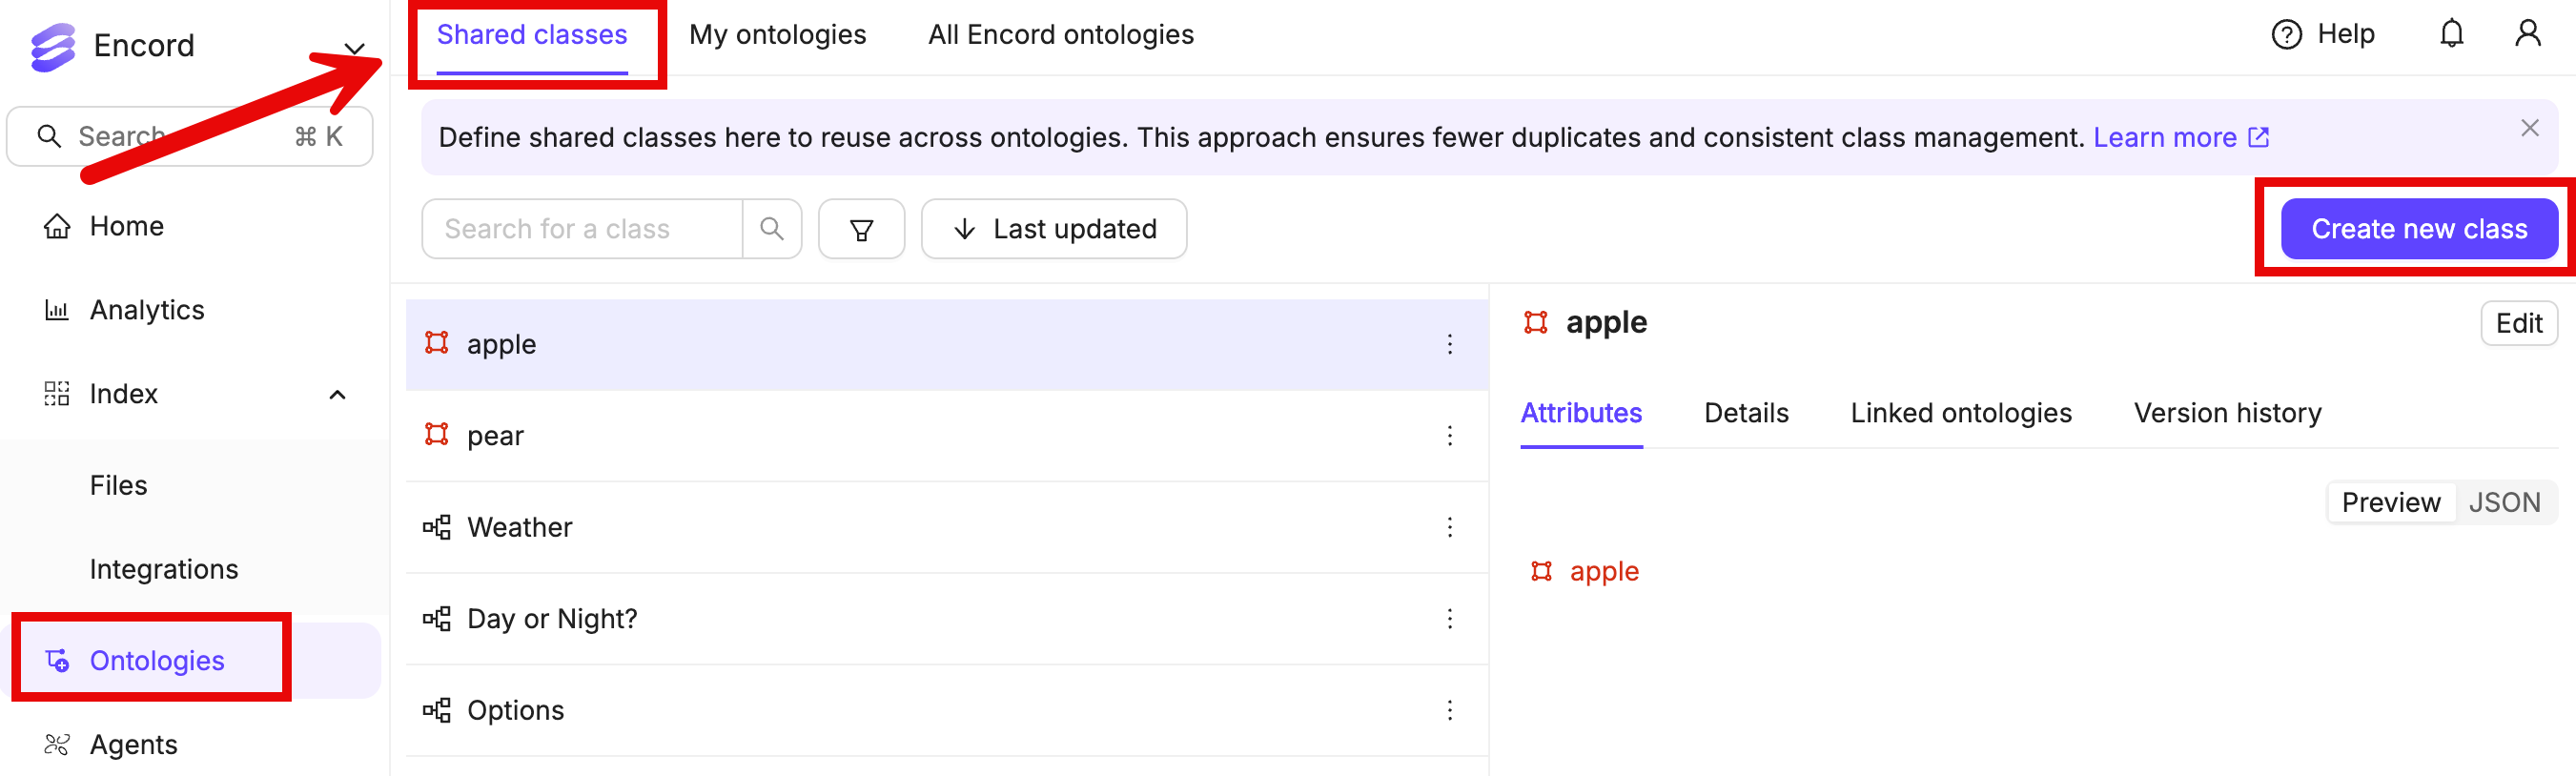
- Click Create new class.
- Select Object from the Class type field.
- Type a meaningful name for the shared class.
- Select the shared Object type to create. For example, select Box to create a bounding box object type.
- Click Add attributes > Add attribute.
- Specify the settings for your object type attributes.
- Rinse and repeat until your shared object is complete.
- Click Create class.
- Click Create new class.
- Select Classification from the Class type field.
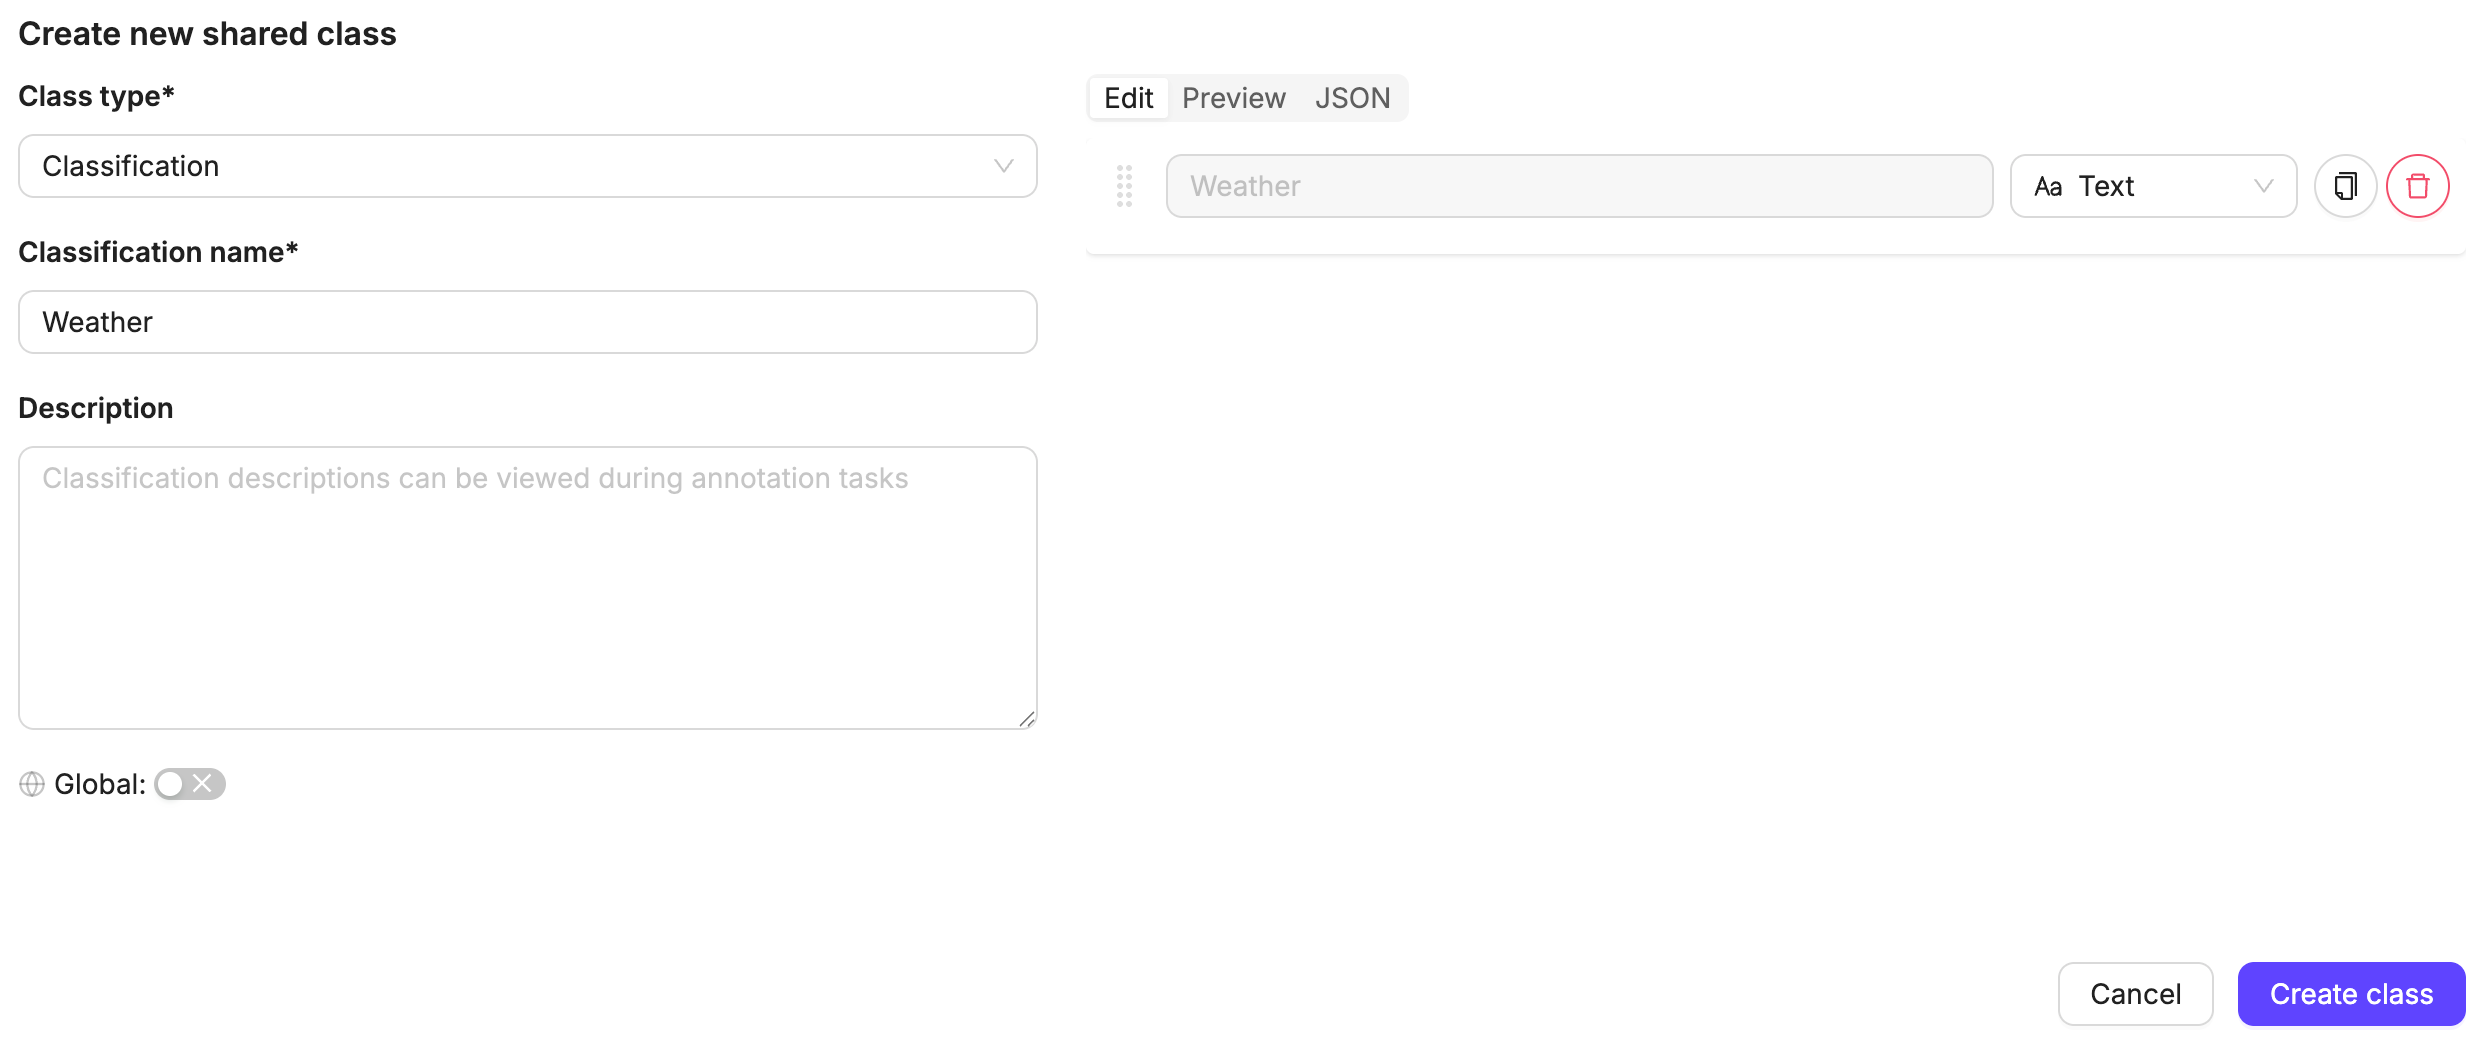
- Type a meaningful name for the shared class.
- Click Add attributes > Add attribute.
- Specify the settings for your classification attributes.
- Rinse and repeat until your shared classification is complete.
- Click Create class.
Archive Shared Classes
When you archive a shared class that is used in existing Ontologies, Encord shows you which Ontologies use that shared class before confirming the archive action. To archive a shared class:- Go to Ontologies > Shared classes.
- Click the three-dot menu next to the shared class you want to archive.
- Select Archive.
-
Review the confirmation modal that shows:
- The name of the shared class being archived
- A list of all Ontologies that currently use this shared class
- Click Archive to confirm the action.
The confirmation modal includes direct links to each Ontology that uses the shared class, allowing you to review the impact before proceeding with the archive.
Archiving a shared class removes it from future use but does not affect existing Ontologies that already use it. You can restore archived shared classes by selecting Restore from the same menu.
Edit Shared Classes
You can modify existing shared classes to add new attributes or update existing ones. When you edit a shared class, all existing attributes are preserved and displayed in the edit interface.When editing shared classes in your Ontology, the Global toggle is disabled to maintain consistency across projects. Once a shared class is created with a specific global setting, this setting cannot be changed during editing to prevent conflicts in Projects that already use the shared class.
- Go to Ontologies > Shared classes.
- Click on the shared class you want to edit.
- Click Edit class.
-
Make your desired changes:
- Add new attributes by clicking Add attribute
- Modify existing attributes by clicking on them
- Archive attributes that are no longer needed
- Click Save changes to apply your updates.
View Shared Class Version History
The version history displays a chronological list of all versions, with the most recent version at the top. Each version entry shows:- The user who made the changes
- The date and time of the modification
- Whether the version represents the initial creation or an edit
- Go to Ontologies > Shared classes.
- Click on a shared class to open its detail panel.
- Select the Version history tab.
View Version Changes
Each version entry can be expanded to show detailed information about what changed in that specific version. To view changes in a version:- In the Version history tab, click the expand arrow next to any version entry.
- Added, deleted, or modified objects, classifications, and attributes
- Changes to properties like colors, shapes, or requirement settings
- Renamed features with before and after names
- Reordered attributes or options
The version history automatically loads additional versions as you scroll down. Click Load more if you need to see older versions.
Version history is available for all shared classes and provides a complete audit trail of modifications made over time.
Allow Out of Bounds Labels
For bounding box object labels, you can enable the Allow out of bounds option. This permits annotators and reviewers to create bounding boxes that extend beyond the image boundaries in the Label Editor. This is particularly useful when objects are partially visible at the edges of images or when you need to capture the full extent of an object that extends beyond the frame. When enabled, annotators can:- Draw bounding boxes that start inside the image and extend beyond its edges
- Resize existing bounding boxes to extend beyond image boundaries
- Copy and paste bounding boxes that may extend outside the visible area
The Allow out of bounds option is only available for bounding box object labels and appears in the ontology form when you select the bounding box shape.