
STEP 1: Import Your Files to Encord
Create a Cloud Integration
Select your cloud provider.Create a Folder
You must create a folder in Index to store your files.- Navigate to Data > Files & Folders
- Click the + New folder button to create a new folder. Select the type of folder you want to create.
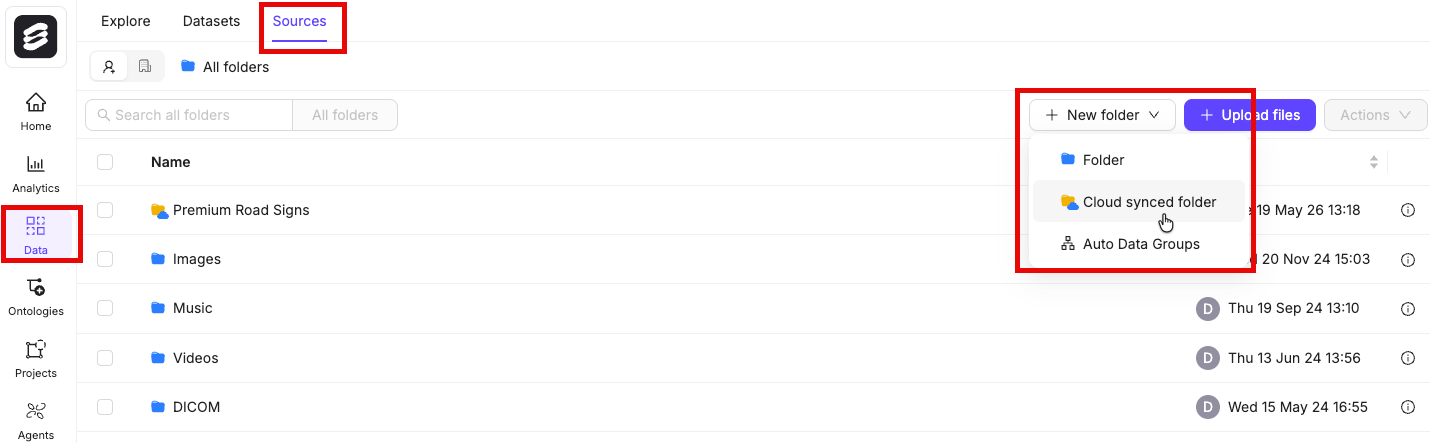
- Give the folder a meaningful name and description.
- Click Create to create the folder. The folder is listed in Files & Folders.
Create JSON or CSV for Registration
To register files from cloud storage with Encord, you must create a JSON or CSV file specifying the files you want to register. All types of data (videos, images, image groups, image sequences, and DICOM) from a private cloud are added to a Dataset in the same way, by using a JSON or CSV file. The file includes links to all images, image groups, videos and DICOM files in your cloud storage.- Up to 1 million URLs
- A maximum of 500,000 items (e.g. images, image groups, videos, DICOMs)
- URLs can be up to 16 KB in size
JSON Format
JSON Format
Create JSON file for Registration
For detailed information about the JSON file format used for import go here.The information provided about each of the following data types is designed to get you up and running as quickly as possible without going too deeply into the why or how. Look at the template for each data type, then the examples, and adjust the examples to suit your needs.skip_duplicate_urls is set to true, all object URLs that exactly match existing images/videos in the dataset are skipped.JSON for AWS
JSON for AWS
AWS JSON
Audio files
Audio files
Audio Files
The following is an example JSON file for uploading two audio files to Encord.- Template: Imports audio files with an Encord title.
- Audio Metadata: Imports one audio file with the
audiometadataflag. When theaudiometadataflag is present in the JSON file, we directly use the supplied metadata without performing any additional validation, and do not store the file on our servers. To guarantee accurate labels, it is crucial that the metadata you provide is accurate.
Text Files
Text Files
Single images
Single images
Single Images
For detailed information about the JSON file format used for import go here.The JSON structure for single images parallels that of videos.Template: Provides the proper JSON format to import images into Encord.Examples:- Data Imports the images only.
Image groups
Image groups
Image groups
For detailed information about the JSON file format used for import go here.- Image groups are collections of images that are processed as one annotation task.
- Images within image groups remain unaltered, meaning that images of different sizes and resolutions can form an image group without the loss of data.
- Image groups do NOT require ‘write’ permissions to your cloud storage.
- If
skip_duplicate_urlsis set totrue, all URLs exactly matching existing image groups in the dataset are skipped.
objectUrl_{position_number}).- Data: Imports the image groups only.
Image sequences
Image sequences
Image sequences
For detailed information about the JSON file format used for import go here.- Image sequences are collections of images that are processed as one annotation task and represented as a video.
- Images within image sequences may be altered as images of varying sizes and resolutions are made to match that of the first image in the sequence.
- Creating Image sequences from cloud storage requires ‘write’ permissions, as new files have to be created in order to be read as a video.
- Each object in the
image_groupsarray with thecreateVideoflag set totruerepresents a single image sequence. - If
skip_duplicate_urlsis set totrue, all URLs exactly matching existing image sequences in the dataset are skipped.
objectUrl_{position_number}).- Data: Imports the images groups only.
DICOM
DICOM
DICOM
For detailed information about the JSON file format used for import go here.- Each
dicom_serieselement can contain one or more DICOM series. - Each series requires a title and at least one object URL, as shown in the example below.
- If
skip_duplicate_urlsis set totrue, all object URLs exactly matching existing DICOM files in the dataset will be skipped.
.dcm file and does not have to be specific during the upload to Encord. - The first series contains only a single object URL, as it is composed of a single file.
- The second series contains 3 object URLs, as it is composed of three separate files.
- The third series contains 2 object URLs, as it is composed of two separate files.
DicomSeries file is created. This file represents the series file-set. Only DicomSeries are displayed in the Encord application. Multiple file types
Multiple file types
JSON for GCP
JSON for GCP
GCP JSON
Audio files
Audio files
Audio Files
The following is an example JSON file for uploading two audio files to Encord.- Example 1 imports audio files with an Encord title.
- Example 2 imports one audio file with the
audiometadataflag. When theaudiometadataflag is present in the JSON file, we directly use the supplied metadata without performing any additional validation, and do not store the file on our servers. To guarantee accurate labels, it is crucial that the metadata you provide is accurate.
Text Files
Text Files
Single images
Single images
Single Images
For detailed information about the JSON file format used for import go here.The JSON structure for single images parallels that of videos.Template: Provides the proper JSON format to import images into Encord.Examples:- Data Imports the images only.
- Image Metadata: Imports images with image metadata. This improves the import speed for your images.
Image groups
Image groups
Image groups
For detailed information about the JSON file format used for import go here.- Image groups are collections of images that are processed as one annotation task.
- Images within image groups remain unaltered, meaning that images of different sizes and resolutions can form an image group without the loss of data.
- Image groups do NOT require ‘write’ permissions to your cloud storage.
- If
skip_duplicate_urlsis set totrue, all URLs exactly matching existing image groups in the dataset are skipped.
objectUrl_{position_number}).- Data: Imports the image groups only.
Image sequences
Image sequences
Image sequences
For detailed information about the JSON file format used for import go here.- Image sequences are collections of images that are processed as one annotation task and represented as a video.
- Images within image sequences may be altered as images of varying sizes and resolutions are made to match that of the first image in the sequence.
- Creating Image sequences from cloud storage requires ‘write’ permissions, as new files have to be created in order to be read as a video.
- Each object in the
image_groupsarray with thecreateVideoflag set totruerepresents a single image sequence. - If
skip_duplicate_urlsis set totrue, all URLs exactly matching existing image sequences in the dataset are skipped.
objectUrl_{position_number}).- Data: Imports the images groups only.
DICOM
DICOM
DICOM
For detailed information about the JSON file format used for import go here.- Each
dicom_serieselement can contain one or more DICOM series. - Each series requires a title and at least one object URL, as shown in the example below.
- If
skip_duplicate_urlsis set totrue, all object URLs exactly matching existing DICOM files in the dataset will be skipped.
.dcm file and does not have to be specific during the upload to Encord. - The first series contains only a single object URL, as it is composed of a single file.
- The second series contains 3 object URLs, as it is composed of three separate files.
- The third series contains 2 object URLs, as it is composed of two separate files.
DicomSeries file is created. This file represents the series file-set. Only DicomSeries are displayed in the Encord application. Multiple file types
Multiple file types
JSON for Azure
JSON for Azure
Azure JSON
Audio files
Audio files
Audio Files
The following is an example JSON file for uploading two audio files to Encord.- Template: Imports audio files with an Encord title.
- Audio Metadata: Imports one audio file with the
audiometadataflag. When theaudiometadataflag is present in the JSON file, we directly use the supplied metadata without performing any additional validation, and do not store the file on our servers. To guarantee accurate labels, it is crucial that the metadata you provide is accurate.
Text Files
Text Files
Single images
Single images
Single Images
For detailed information about the JSON file format used for import go here.The JSON structure for single images parallels that of videos.Template: Provides the proper JSON format to import images into Encord.Examples:- Data Imports the images only.
- Image Metadata: Imports images with image metadata. This improves the import speed for your images.
Image groups
Image groups
Image groups
For detailed information about the JSON file format used for import go here.- Image groups are collections of images that are processed as one annotation task.
- Images within image groups remain unaltered, meaning that images of different sizes and resolutions can form an image group without the loss of data.
- Image groups do NOT require ‘write’ permissions to your cloud storage.
- If
skip_duplicate_urlsis set totrue, all URLs exactly matching existing image groups in the dataset are skipped.
objectUrl_{position_number}).- Data: Imports the image groups only.
Image sequences
Image sequences
Image sequences
For detailed information about the JSON file format used for import go here.- Image sequences are collections of images that are processed as one annotation task and represented as a video.
- Images within image sequences may be altered as images of varying sizes and resolutions are made to match that of the first image in the sequence.
- Creating Image sequences from cloud storage requires ‘write’ permissions, as new files have to be created in order to be read as a video.
- Each object in the
image_groupsarray with thecreateVideoflag set totruerepresents a single image sequence. - If
skip_duplicate_urlsis set totrue, all URLs exactly matching existing image sequences in the dataset are skipped.
objectUrl_{position_number}).- Data: Imports the images groups only.
DICOM
DICOM
DICOM
For detailed information about the JSON file format used for import go here.- Each
dicom_serieselement can contain one or more DICOM series. - Each series requires a title and at least one object URL, as shown in the example below.
- If
skip_duplicate_urlsis set totrue, all object URLs exactly matching existing DICOM files in the dataset will be skipped.
.dcm file and does not have to be specific during the upload to Encord. - The first series contains only a single object URL, as it is composed of a single file.
- The second series contains 3 object URLs, as it is composed of three separate files.
- The third series contains 2 object URLs, as it is composed of two separate files.
DicomSeries file is created. This file represents the series file-set. Only DicomSeries are displayed in the Encord application. Multiple file types
Multiple file types
JSON for OTC
JSON for OTC
OTC JSON
Audio files
Audio files
Audio Files
The following is an example JSON file for uploading two audio files to Encord.- Template: Imports audio files with an Encord title.
- Audio Metadata: Imports one audio file with the
audiometadataflag. When theaudiometadataflag is present in the JSON file, we directly use the supplied metadata without performing any additional validation, and do not store the file on our servers. To guarantee accurate labels, it is crucial that the metadata you provide is accurate.
Text Files
Text Files
Single images
Single images
Single Images
For detailed information about the JSON file format used for import go here.The JSON structure for single images parallels that of videos.Template: Provides the proper JSON format to import images into Encord.Examples:- Data Imports the images only.
- Image Metadata: Imports images with image metadata. This improves the import speed for your images.
Image groups
Image groups
Image groups
For detailed information about the JSON file format used for import go here.- Image groups are collections of images that are processed as one annotation task.
- Images within image groups remain unaltered, meaning that images of different sizes and resolutions can form an image group without the loss of data.
- Image groups do NOT require ‘write’ permissions to your cloud storage.
- If
skip_duplicate_urlsis set totrue, all URLs exactly matching existing image groups in the dataset are skipped.
objectUrl_{position_number}).- Data: Imports the image groups only.
Image sequences
Image sequences
Image sequences
For detailed information about the JSON file format used for import go here.- Image sequences are collections of images that are processed as one annotation task and represented as a video.
- Images within image sequences may be altered as images of varying sizes and resolutions are made to match that of the first image in the sequence.
- Creating Image sequences from cloud storage requires ‘write’ permissions, as new files have to be created in order to be read as a video.
- Each object in the
image_groupsarray with thecreateVideoflag set totruerepresents a single image sequence. - If
skip_duplicate_urlsis set totrue, all URLs exactly matching existing image sequences in the dataset are skipped.
objectUrl_{position_number}).- Data: Imports the images groups only.
DICOM
DICOM
DICOM
For detailed information about the JSON file format used for import go here.- Each
dicom_serieselement can contain one or more DICOM series. - Each series requires a title and at least one object URL, as shown in the example below.
- If
skip_duplicate_urlsis set totrue, all object URLs exactly matching existing DICOM files in the dataset will be skipped.
.dcm file and does not have to be specific during the upload to Encord. - The first series contains only a single object URL, as it is composed of a single file.
- The second series contains 3 object URLs, as it is composed of three separate files.
- The third series contains 2 object URLs, as it is composed of two separate files.
DicomSeries file is created. This file represents the series file-set. Only DicomSeries are displayed in the Encord application. Multiple file types
Multiple file types
JSON for AWS Multi-Region Access Point
JSON for AWS Multi-Region Access Point
Use a Multi-Region Access Point
When using a Multi-Region Access Point for your AWS S3 buckets the JSON file has to be slightly different from the examples provided. Instead of an object’s URL, objects are specified using the ARN of the Multi-Region Access Point followed by the object name. The example below shows how video files from a Multi-Region Access Point would be specified.CSV Format
CSV Format
Create CSV File for Registration
In the CSV file format, the column headers specify which type of data is being uploaded. You can add and single file format at a time, or combine multiple data types in a single CSV file.Details for each data format are given in the sections below.Videos
Videos
Videos
A CSV file containing videos should contain two columns with the following mandatory column headings:‘ObjectURL’ and ‘Video title’. All headings are case-insensitive.
-
The ‘ObjectURL’ column containing the
objectUrl. This field is mandatory for each file, as it specifies the full URL of the video resource. -
The ‘Video title’ column containing the
video_title. If left blank, the original file name is used.
| ObjectUrl | Video title |
|---|---|
| path/to/storage-location/frame1.mp4 | Video 1 |
| path/to/storage-location/frame2.mp4 | Video 2 |
| path/to/storage-location/frame3.mp4 | |
| path/to/storage-location/frame4.mp4 | Video 3 |
Single images
Single images
‘ObjectURL’ and ‘Image title’. All headings are case-insensitive.
-
The ‘ObjectURL’ column containing the
objectUrl. This field is mandatory for each file, as it specifies the full URL of the image resource. -
The ‘Image title’ column containing the
image_title. If left blank, the original file name is used.
| ObjectUrl | Image title |
|---|---|
| path/to/storage-location/frame1.jpg | Image 1 |
| path/to/storage-location/frame2.jpg | Image 2 |
| path/to/storage-location/frame3.jpg | |
| path/to/storage-location/frame4.jpg | Image 3 |
Image groups
Image groups
Image groups
A CSV file containing image groups should contain three columns with the following mandatory headings:‘ObjectURL’, ‘Image group title’, and ‘Create video’. All three headings are case-insensitive.
-
The ‘ObjectURL’ column containing the
objectUrl. This field is mandatory for each file, as it specifies the full URL of the resource. -
The ‘Image group title’ column containing the
image_group_title. This field is mandatory, as it determines which image group a file will be assigned to.
| ObjectUrl | Image group title | Create video |
|---|---|---|
| path/to/storage-location/frame1.jpg | Group 1 | false |
| path/to/storage-location/frame2.jpg | Group 1 | false |
| path/to/storage-location/frame3.jpg | Group 2 | false |
| path/to/storage-location/frame4.jpg | Group 2 | false |
Image sequences
Image sequences
Image sequences
A CSV file containing image sequences should contain three columns with the following mandatory headings: ‘ObjectURL’, ‘Image group title’, and ‘Create video’. All three headings are case-insensitive.-
The ‘ObjectURL’ column containing the
objectUrl. This field is mandatory for each file, as it specifies the full URL of the resource. -
The ‘Image group title’ column containing the
image_group_title. This field is mandatory, as it determines which image sequence a file will be assigned to. The dimensions of the image sequence are determined by the first file in the sequence. - The ‘Create video’ column. This can be left blank, as the default value is ‘true’.
| ObjectUrl | Image group title | Create video |
|---|---|---|
| path/to/storage-location/frame1.jpg | Sequence 1 | true |
| path/to/storage-location/frame2.jpg | Sequence 1 | true |
| path/to/storage-location/frame3.jpg | Sequence 2 | true |
| path/to/storage-location/frame4.jpg | Sequence 2 | true |
DICOM
DICOM
-
The ‘ObjectURL’ column containing the
objectUrl. This field is mandatory for each file, as it specifies the full URL of the resource. -
The ‘Series title’ column containing the
dicom_title. When two files are given the same title they are grouped into the same DICOM series. If left blank, the original file name is used.
| ObjectUrl | Series title |
|---|---|
| path/to/storage-location/frame1.dcm | dicom series 1 |
| path/to/storage-location/frame2.dcm | dicom series 1 |
| path/to/storage-location/frame3.dcm | dicom series 2 |
| path/to/storage-location/frame4.dcm | dicom series 2 |
| path/to/storage-location/frame5.dcm | dicom series 3 |
Multiple file types
Multiple file types
Multiple file types
You can upload multiple file types with a single CSV file by using a new header each time there is a change of file type. Three headings will be required if image sequences are included.The example below shows a CSV file for the following:- Two image sequences composed of 2 files each.
- One image group composed of 2 files.
- One single image.
- One video.
| ObjectUrl | Image group title | Create video |
|---|---|---|
| path/to/storage-location/frame1.jpg | Sequence 1 | true |
| path/to/storage-location/frame2.jpg | Sequence 1 | true |
| path/to/storage-location/frame3.jpg | Sequence 2 | true |
| path/to/storage-location/frame4.jpg | Sequence 2 | true |
| path/to/storage-location/frame5.jpg | Group 1 | false |
| path/to/storage-location/frame6.jpg | Group 1 | false |
| ObjectUrl | Image title | Create video |
| path/to/storage-location/frame1.jpg | Image 1 | false |
| ObjectUrl | Image title | Create video |
| full/storage/path/video.mp4 | Video 1 | false |
Import your data

Import local data
Import local data
Import Local Data
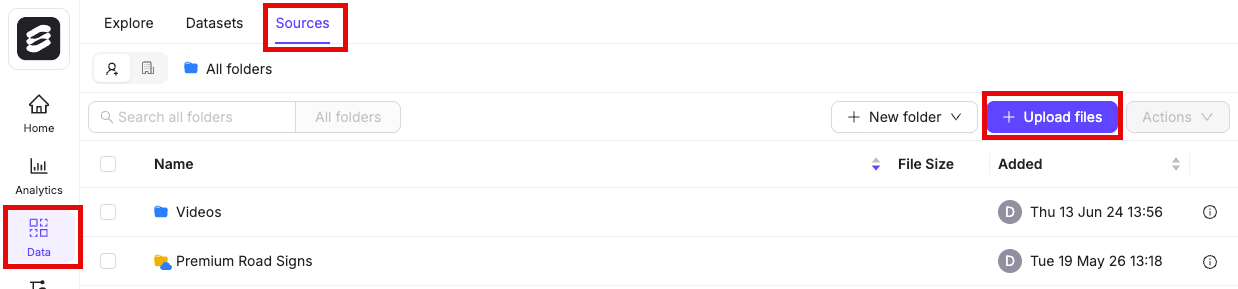
- Navigate to Data > Files & Folders in the Encord platform.
- Click into a Folder.
- Click + Upload files. A dialog appears.
-
Click one of the following:
- Upload: Upload images, videos, and audio files.

- Batch images as: Upload image batches as image groups or image sequences.

- DICOM/NifTi: Upload DICOM or NifTi series.
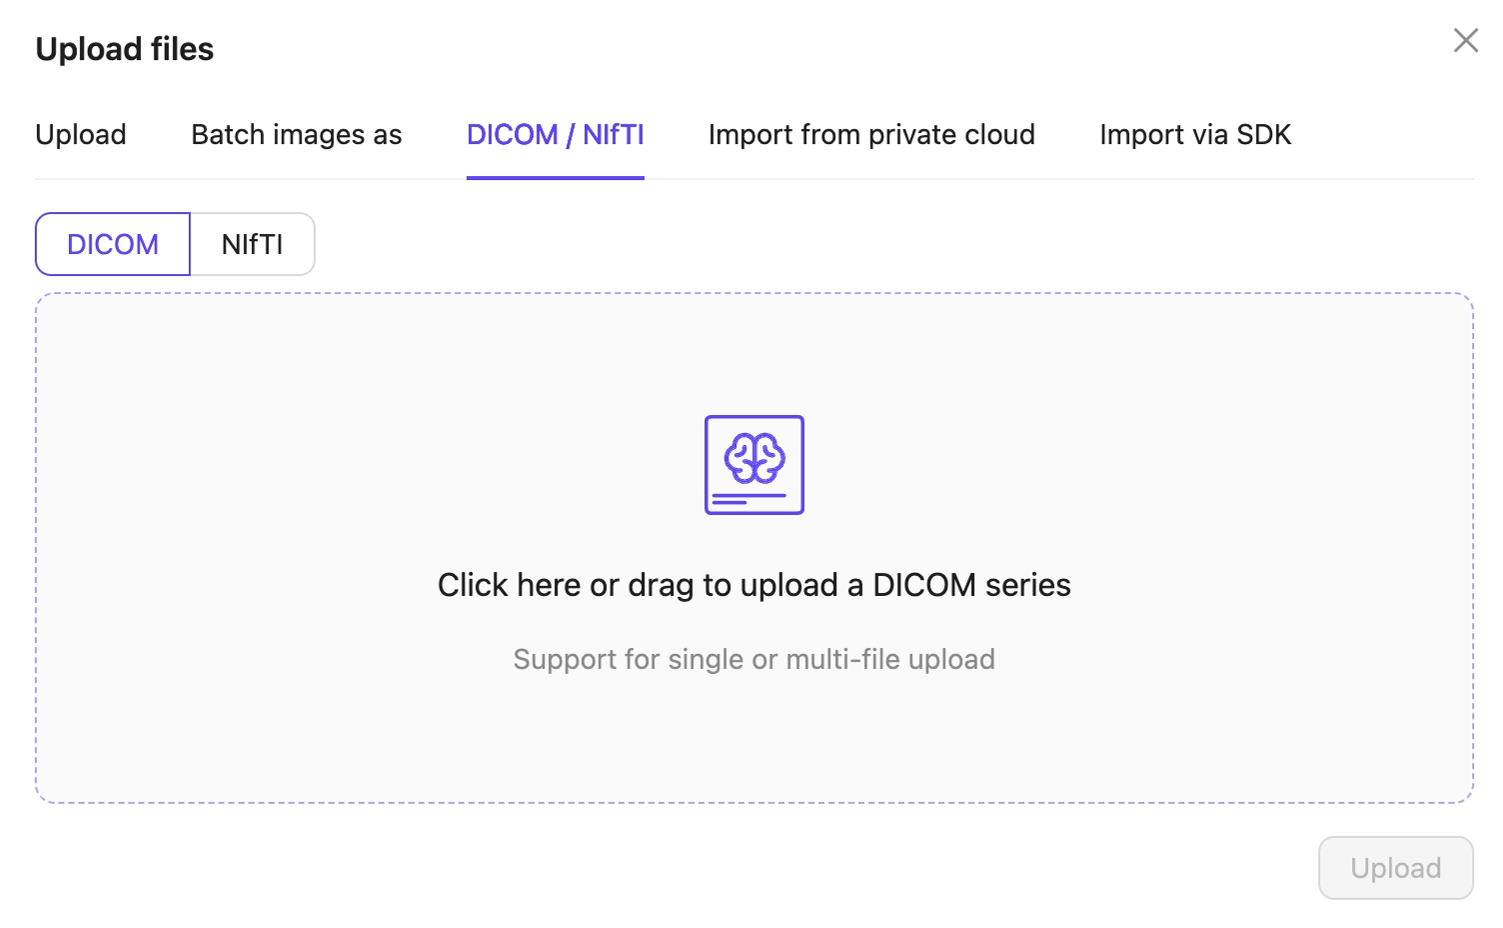
- Upload: Upload images, videos, and audio files.
- Click Upload after selecting your images or series. Your files upload into the Folder in Encord.
STEP 2: Set Up Your Project
Create a Dataset
A Dataset is a subset of files that can be attached to one or more Projects for annotation.- Click the New dataset button in the Datasets section in Annotate.
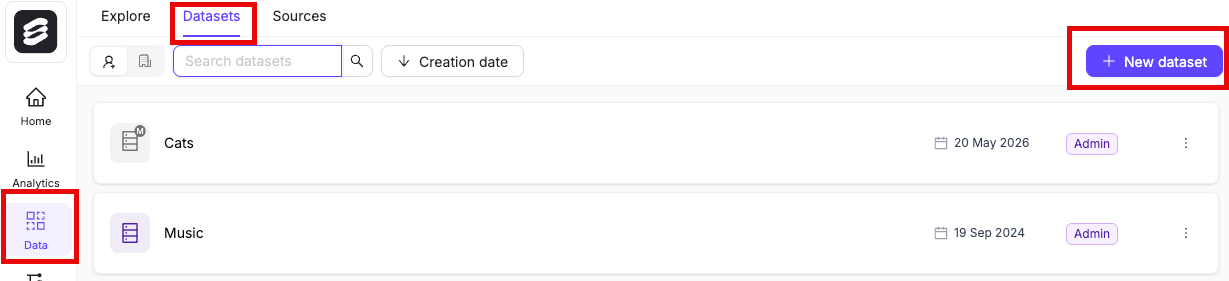
- Give your Dataset a meaningful title and description. A clear title and description keeps your data organized.
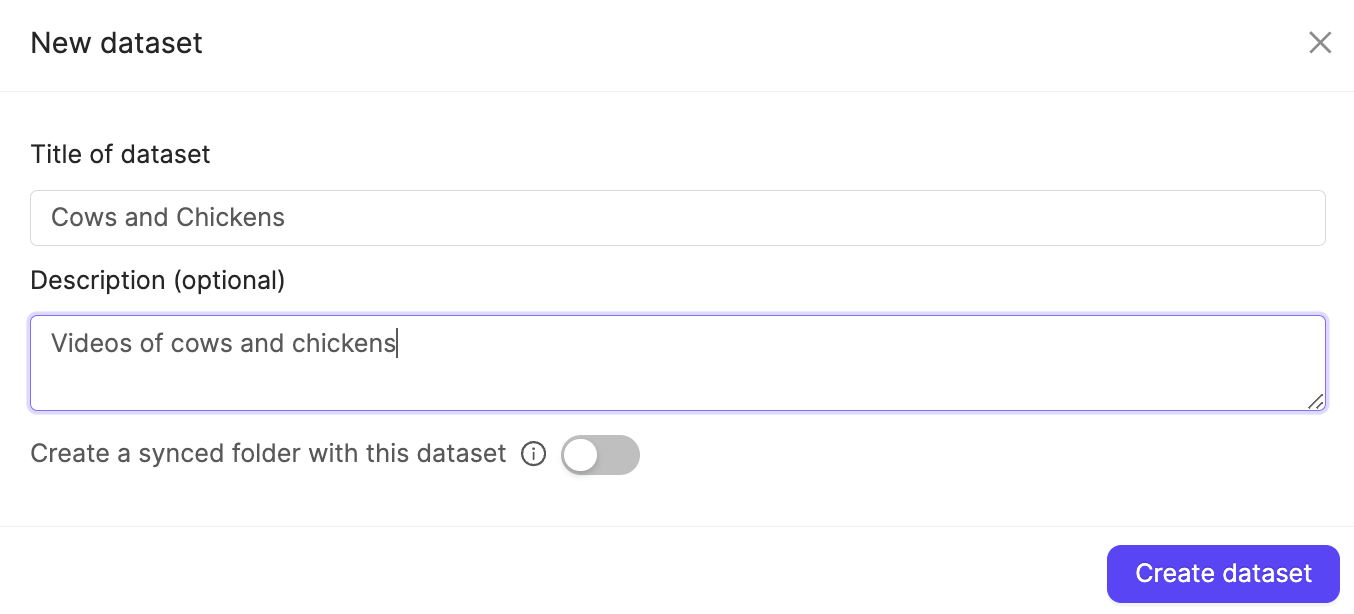
- Click Create dataset to create the Dataset.
Attach files
- Navigate to the Datasets section under the Annotate heading.
- Click the Dataset you want to attach data to.
- Click +Attach existing files.

- Select the folders containing the files you want to attach to the Dataset. To select individual files, double-click a folder to see its contents, and select the files you want to add to the Dataset.
- Click Attach data to attach the selected files to the Dataset.
Create an Ontology
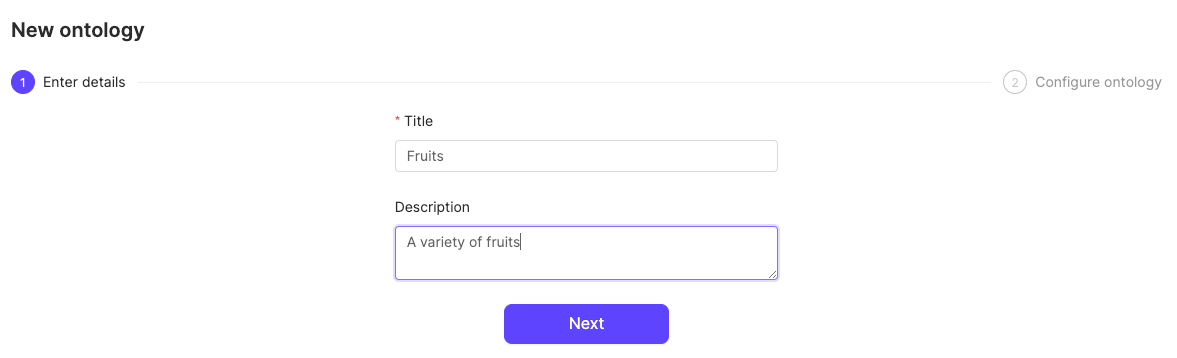
An Ontology is a structured framework that defines the categories, labels, and relationships used to annotate data consistently and accurately. Ontologies define what you want labeled.- Click the New ontology button in the Ontologies section to create a new Ontology.

- Give your Ontology a meaningful title and description. A clear title and description keeps your Ontologies organized.
- Click Next to continue.
- Define your Ontology structure. See our documentation on Ontology structure for more information on the various types of objects, classifications, and attributes.
- Click the Add object button.
-
Do one of the following:
- Select a Shared class
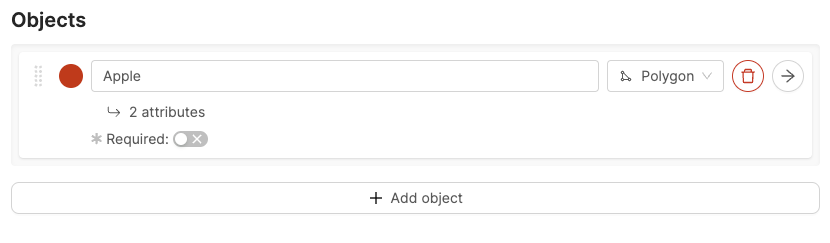
- Click New Object
Shared classes cannot be edited while creating an Ontology. To edit a shared class go to the Ontologies > Shared classes page. - To create a new object, give the object a name. For example “Apple”.
- Select a shape for the object. For example polygon.
- Optionally, enable the Required toggle to mark the object as Required.
- Optionally, add attributes to the object.
- Repeat these steps for as many objects as necessary.

- Click the arrow icon next to an object to add attributes to the object.
- Give the attribute a name. For example “Color”.
- Click the attribute type to change the attribute type. The default attribute type is a text field.
- Click Add option to add an option, if you have chosen a radio button or checklist attribute.
- Enter a name for the attribute option. For example, the attribute “Color” can have the options “Red”, “Green”, and “Yellow”.
- Click the Back to parent button to return the Ontology creation view.
- Click Add classification.
-
Do one of the following:
- Select a Shared class
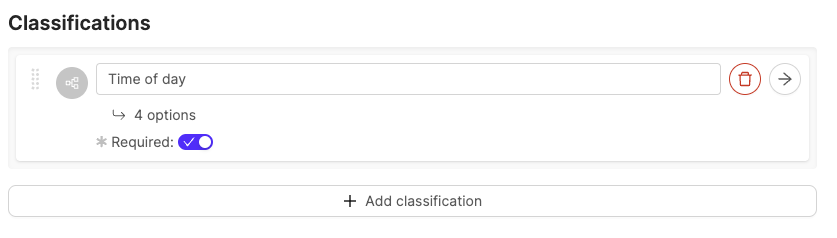
- Click New classification
Shared classes cannot be edited while creating an Ontology. To edit a shared class go to the Ontologies > Shared classes page. - For a new classification, give the classification a name. For example, “Time of day”.
- Optionally, configure the classification. The default classification type is a text field.
- Optionally, enable the Required toggle to mark the object as Required.
- Repeat these steps for as many classifications as necessary.
- Click the arrow icon next to an object to configure the classification.

- Click the classification type to change the classification type. The default classification type is a text field.
- Click Add option to add an option if you have selected a radio button or check list classification.
- Enter a name for the classification option. For example, the classification “Time of day” can have the options “Night” and “Day”.
- Click the Back to parent button to return the Ontology creation view.
Create an Agent
Agents enable you to set up custom actions like pre-labeling, leveraging foundation models such as GPT-4, automated quality assurance, or other tailored actions to suit your workflow. Use the Encord SDK to configure your Advanced Custom Agent. The Agent executes the configured SDK script for all tasks that are routed through the Agent stage in your Workflow.General Example
General Example
Agent 1 and with a pathway called continue to Review.Ensure that you:- Replace
<private_key_path>with the path to your private key. - Replace
<project_hash>with the hash of your Project. - Insert your custom logic where the comment instructs you to do so.
Pre-Classification of Images Using GPT 4o
Pre-Classification of Images Using GPT 4o

- Replace
<private_key_path>with the hash of your private key. - Replace
<project_hash>with the hash of your Project. - Replace
Agent 1with the name of your Agent stage.
Pre-Labeling Videos Using a Mock Model
Pre-Labeling Videos Using a Mock Model
Annotate 1). Below is an example of a Workflow where the Pre-Labeling agent can be effectively utilized.
- Replace
<project_hash>with the hash of your Project. - Replace the mock model with your own model, and adapt the rest of the script according to your needs.
- If you choose to give your python file a different name, ensure you replace all references to
prelabel_video.pywith your new file name.
Create a Workflow
Workflows allow you to design and manage the flow of tasks through various stages of a Project. You have control over how tasks progress and how different stages interact.Video tutorial - Creating workflow templates
Video tutorial - Creating workflow templates


- Collaborators are added based on their role within the project - select the role you would like the collaborator(s) to have.
- Start typing the email of a user you would like to add into the area highlighted on the image below, and select the user from the list that appears. Repeat this for every user that will have the same role.
- When you are done selecting users for this role, click Add.


- All workflows must begin with the Start stage.
- All workflows must contain an Annotate stage.
- Add routers to your Project to determine different pathways through your Workflow a task can take.
- Add as many Review stages as necessary.
- All workflows must end at a Complete stage.
- Link all components on the canvas by clicking and dragging from one connection point to another.


- Click an Annotate card on the canvas to start editing the annotation stage.
- Give the stage a descriptive name.
- Add annotators. If you’d like to specify annotators for this stage, add them as collaborators. For full details on how collaborators can work on tasks at each stage, see our section on managing collaborators.
- Optionally, add a Webhook to receive notifications when labels are submitted at this stage.
- Click a Review card on the canvas to start editing the review stage.
- Give the stage a descriptive name.
- Add reviewers. If you want to specify reviewers for this stage, add them as collaborators. For full details on how collaborators can work on tasks at each stage, see our section on managing collaborators.
- Click a Router card on your canvas. See the router section for more details on how different types of routers can be configured.
- Optionally, add a Webhook to the Complete stage to receive a notification when a task has been completed.
- Optionally, add User assignment restrictions if users in this node should be prevented from being assigned to tasks they completed in the nodes listed.
Create a Project
Projects in Encord bring together Datasets, Ontologies, and Workflows. Datasets are labeled according to the Ontology, while the Workflow defines how tasks progress through the Project from start to finish.- Select Projects in the Encord platform.
- Click the + New annotation project button or use CONTROL / CMD + ENTER to create a new Project.
- Give the Project a meaningful title and description.
- Apply any meaningful Project tags you need to the Project.
- Specify the Workflow you want to use for the Project.
- Click the Templates > Load from template to use a Workflow template.
- Select the template you want to use and click Load template.
- Click the Ontology button.
- Select an Ontology from the list, or create a new Ontology by clicking the New ontology button.
- Click the Datasets button.
- Select one or more Datasets from the list, or create a new Dataset by clicking the New Dataset button.
- Click Collaborators.
- Specify the users and the roles they have in the Project.
- Click Create project to finish creating the Project.
Add users to the Project
After creating a Project, invite users to act as annotators, reviewers, team managers, and admins. Collaborators can be added as individuals, or as part of user groups.Invite individuals
Invite individuals
- Navigate to Projects in the Encord app.

- Select the Project you want to add users to.
- Navigate to the Settings tab.
- Navigate to the Team pane.
- Click Invite collaborators.

- Select the desired role for the users.
- Enter the users’ email addresses and choose the users to assign the selected role.
- Click Add to include the selected users in the Project.

- Repeat this process for each required user role.
Invite user groups
Invite user groups
- Navigate to Projects in the Encord app.
- Select the Project you want to add users to.
- Navigate to the Settings tab.
- Navigate to the Team pane.
- Select the Groups tab.
- Click Manage.

- Select a group from the dropdown.
- Select the role you want the user group to have.
- Click Add to add the user group to the Project.

- Repeat this process for each required user group and role.
STEP 3: Label your Data
Now you are ready to label your data. We recommend you and your team watch these introductory videos.Video tutorial - Introduction to image annotation
Video tutorial - Introduction to image annotation
Video tutorial - Introduction to video annotation
Video tutorial - Introduction to video annotation
STEP 4: Export your Labels
- Click Export while in a Project. The Export labels dialog appears.
-
Specify the following:
- Format: Specify the format to export the labels (JSON or COCO).
- Stage: Specify the Workflow stage to export the labels from.
- Generate signed URLs: Specify whether to generate signed URLs for the data units that have labels.
Enabling this option can significantly increase export times.- Save as new version: Specify to version the labels.
- Provide a meaningful name for the label version.
- Labels to include: Specify the labels to include. You can export all labels or select specific object or classification labels to export.
- Click Export. A Labels export in progress toast message appears.