Documentation Index
Fetch the complete documentation index at: https://docs.encord.com/llms.txt
Use this file to discover all available pages before exploring further.
At least one data integration is required to register cloud data to Encord. Encord can integrate with the following cloud service providers:
Register Cloud Data to Files
STEP 1: Create a JSON or CSV File for Registration
Before registering your cloud data to Encord you must first create a JSON or CSV file specifying the files you want to register.JSON Format
The JSON file format is a JSON object with top-level keys specifying the type of data and object URLs of the files you want to upload to Encord. You can add one data type at a time, or combine multiple data types in one JSON. The supported top-level keys are:videos, audio, image_groups, images, dicom_series, nifti, scenes, and data_groups. The details for each data format are given in the sections below.
Encord enforces the following upload limits for each JSON file used for file registration:
- Up to 1 million URLs
- A maximum of 500,000 items (e.g. images, image groups, videos, DICOMs)
- URLs can be up to 16 KB in size
Videos
Videos
Videos
Each object in the videos array is a JSON object with the keyobjectUrl specifying the full URL of where to find the video resource. The title field is optional. If omitted, the video file path and name are used as the default title. For example, if the file is located at https://encord-solutions-bucket.s3.eu-west-2.amazonaws.com/path/to/my/bucket/video23.mp4, the title defaults to /path/to/my/bucket/video23.mp4.videoMetadata must be specified when a Strict client-only
access
integration is used. In all other cases,
videoMetadata is optional, but
including it significantly reduces import times.| Key or Flag | Required? | Default value |
|---|---|---|
| ”objectUrl” | Yes | |
| ”title” | No | the file’s path + title |
| ”videoMetadata” | No | |
| ”clientMetadata” | No | |
| ”createVideo” | No | false |
Keys / Flags that are not required can be omitted from the JSON file entirely.
Video Metadata
The JSON format allows you to specifyvideoMetadata for video files. videoMetadata is essential information used by the Label Editor and is crucial for aligning annotations to the correct frame.When the
videoMetadata flag is present in the JSON file, we directly use the
supplied metadata without performing any additional validation, and do not
store the file on our servers. To guarantee accurate labels, it is crucial
that the metadata you provide is accurate.videoMetadata must be specified when a Strict client-only
access
integration is used. In all other cases, videoMetadata is optional.- fps: Frames per second.
- duration: Duration of the video (in seconds).
- width / height: Dimensions of the video (in pixels).
- file_size: The size of the file (in bytes).
- mime_type: Specifies the file type extension according to the MIME standard.
ffmpeg -i 'video_title.mp4'to retrieve fps, duration, width, and height - as highlighted below.

ls -l 'video_title.mp4'to retrieve the file size - as highlighted below.

Audio files
Audio files
Audio Files
Each object in the audio file array is a JSON object with the keyobjectUrl specifying the full URL of where to find the audio resource. The title field is optional. If omitted, the audio file path and name are used as the default title. For example, if the file is located at https://encord-solutions-bucket.s3.eu-west-2.amazonaws.com/path/to/my/bucket/song23.mp3, the title defaults to /path/to/my/bucket/song23.mp3.Audio metadata is distinct from client metadata.
clientMetadata allows you to add metadata that can be used for filtering
your data in Index. You can use text to import transcripts for your audio
file.audioMetadata must be specified when a Strict client-only
access
integration is used. In all other cases,
audioMetadata is optional, but
including it significantly reduces import times.| Key or Flag | Required? | Default value |
|---|---|---|
| ”objectUrl” | Yes | |
| ”title” | No | The file’s path + title |
| ”clientMetadata” | No | |
| ”audioMetadata” | No |
Keys / Flags that are not required can be omitted from the JSON file entirely.
Audio Metadata
The JSON format allows you to specifyaudioMetadata for audio files. This is optional information.When the
audioMetadata flag is present in the JSON file, we directly use the
supplied metadata without performing any additional validation, and do not
store the file on our servers. It is crucial that the metadata you provide is
accurate.- duration_seconds: float - Audio duration in seconds.
- file_size: int - Size of the audio file in bytes.
- mime_type: str - MIME type of the audio file (for example:
audio/mpegoraudio/wav). - sample_rate: int - Sample rate (int) in Hz.
- bit_depth: int - Size of each sample (int) in bits.
- codec: str - Codec (for example: mp3, pcm).
- num_channels: int - Number of channels.
PDFs
PDFs
PDFs
Each object in the PDF array is a JSON object with the keyobjectUrl specifying the full URL of where to find the PDF. The title field is optional. If omitted, the PDF path and name are used as the default title. For example, if the file is located at https://encord-solutions-bucket.s3.eu-west-2.amazonaws.com/path/to/my/bucket/my-document.pdf, the title defaults to /path/to/my/bucket/my-document.pdf.PDF metadata is distinct from client metadata.
clientMetadata allows you to add metadata that can be used for filtering
your data in Index.PDF Metadata must be specified when a Strict client-only
access
integration is used. In all other cases,
pdfMetadata is optional, but
including it significantly reduces import times.| Key or Flag | Required? | Default value |
|---|---|---|
| ”objectUrl” | Yes | |
| ”title” | No | The file’s path + title |
| ”clientMetadata” | No | |
| ”pdfMetadata” | No |
Keys / Flags that are not required can be omitted from the JSON file entirely.
PDF Metadata
The JSON format allows you to specifypdfMetadata for documents. This is optional information.When the
pdfMetadata flag is present in the JSON file, we directly use the
supplied metadata without performing any additional validation, and do not
store the file on our servers. It is crucial that the metadata you provide is
accurate.- file_size: int - Size of the pdf file in bytes.
- num_pages: int - The number of pages in the PDF document.
Text Files
Text Files
Text Files
Each object in the text file array is a JSON object with the keyobjectUrl specifying the full URL of where to find the text file. The title field is optional. If omitted, the text file path and name are used as the default title. For example, if the file is located at https://encord-solutions-bucket.s3.eu-west-2.amazonaws.com/path/to/my/bucket/my-file.html, the title defaults to /path/to/my/bucket/my-file.html.Text files include .txt, .html, .md, .xml, and more.
Text metadata is distinct from client metadata.
clientMetadata allows you to add metadata that can be used for filtering
your data in Index.textMetadata must be specified when a Strict client-only
access
integration is used. In all other cases,
textMetadata is optional, but
including it significantly reduces import times.| Key or Flag | Required? | Default value |
|---|---|---|
| ”objectUrl” | Yes | |
| ”title” | No | The file’s path + title |
| ”clientMetadata” | No | |
| ”textMetadata” | No |
Keys / Flags that are not required can be omitted from the JSON file entirely.
Text Metadata
The JSON format allows you to specifytextMetadata for documents. This is optional information.When the
textMetadata flag is present in the JSON file, we directly use the
supplied metadata without performing any additional validation, and do not
store the file on our servers. It is crucial that the metadata you provide is
accurate.- file_size: int - Size of the text file in bytes.
- mime_type: str - MIME type of the text file (for example:
application/xmlortext/plain).
Single images
Single images
Single Images
The JSON structure for single images parallels that of videos. Thetitle field is optional. If omitted, the image file path and name are used as the default title. For example, if the file is located at https://encord-solutions-bucket.s3.eu-west-2.amazonaws.com/path/to/my/bucket/image23.jpg, the title defaults to /path/to/my/bucket/image23.jpg.| Key or Flag | Required? | Default value |
|---|---|---|
| ”objectUrl” | Yes | |
| ”title” | No | The file’s path + title |
| ”imageMetadata”* | No | |
| ”clientMetadata” | No | |
| ”createVideo” | No | false |
imageMetadata must be specified when a Strict client-only
access
integration is used. In all other cases,
imageMetadata is optional, but
including it significantly reduces import times.Keys / Flags that are not required can be omitted from the JSON file entirely.
Image Metadata
The JSON format allows you to specifyimageMetadata for image files. imageMetadata contains essential information used by the Label Editor and is crucial for aligning annotations to the correct image properties.imageMetadata must be specified when a Strict client-only
access
integration is used. In all other cases, imageMetadata is optional.Image groups
Image groups
Image groups
- Image groups are collections of images that are processed as one annotation task.
- Images within image groups remain unaltered, meaning that images of different sizes and resolutions can form an image group without the loss of data.
- Image groups do not require ‘write’ permissions to your cloud storage.
- Custom client metadata is defined per image group, not per image. See our documentation here to learn how to add
clientMetadatato images in an image group.
| Key or Flag | Required? | Default value | Note |
|---|---|---|---|
| ”objectUrl_“ | Yes | is the number the file occupies in the sequence, starting from 0 | |
| ”title” | No | ||
| ”clientMetadata” | No | ||
| ”createVideo” | No | false |
The position of each image within the sequence needs to be specified in the
key - e.g.
objectUrl_{position_number} as seen in the example below.Keys / Flags that are not required can be omitted from the JSON file entirely.
Image sequences
Image sequences
Image Sequences
- Image sequences are collections of images that are processed as one annotation task and represented as a video.
- Images within image sequences may be altered as images of varying sizes are resolutions are made to match that of the first image in the sequence.
- Creating Image sequences from cloud storage requires ‘write’ permissions, as new files have to be created in order to be read as a video.
- Each object in the
image_groupsarray with thecreateVideoflag set totruerepresents a single image sequence. - Custom client metadata is defined per image sequence, not per image.
| Key or Flag | Required? | Default value |
|---|---|---|
| ”objectUrl” | Yes | |
| ”title” | No | |
| ”clientMetadata” | No | |
| ”createVideo” | no | false |
The position of each image within the sequence needs to be specified in the
key - e.g
objectUrl_{position_number}. See the example below.Keys / Flags that are not required can be omitted from the JSON file entirely.
DICOM
DICOM
DICOM
- Each
dicom_serieselement can contain one or more DICOM series. - Each series requires a title and at least one object URL, as shown in the following example.
| Key or Flag | Required? | Default value | Note |
|---|---|---|---|
"objectUrl_{position_number}" | Yes | {position_number} is the number the file occupies in the sequence, starting from 0 | |
"title" | Yes | ||
"clientMetadata" | No |
Keys / Flags that are required, such as
clientMetadata, can be omitted from
the JSON file entirely. clientMetadata is distinct from patient metadata,
which is included in the .dcm file and does not have to be specific during
the upload to Encord.- The first series contains only a single object URL, as it is composed of a single file.
- The second series contains 3 object URLs, as it is composed of three separate files.
- The third series contains 2 object URLs, as it is composed of two separate files.
For each DICOM upload, an additional
DicomSeries file is created. This file
represents the series file-set. Only DicomSeries are displayed in the Encord
application.Data groups
Data groups
Data Groups
- Data groups let you combine multiple data items from the cloud upload into a single annotation task with a multi-pane layout.
- The contents of the group are created by specifying
titleRef(matching thetitlefield of another item) orurlRef(matching theobjectUrlof another item). The referenced items must be defined in the same JSON file.
| Layout type | Description |
|---|---|
"default-grid" | Arranges items in an auto-generated grid. layoutContents is an array of refs. |
"default-list" | Arranges items in a carousel. layoutContents is an array of refs. |
"custom" | Uses a custom split-pane layout. layoutContents is an object with named keys, and a layout tree must be provided. |
Custom Layout
Thelayout field is a custom layout defined with a recursive binary split tree. Each node is one of:data_unit: A single pane displaying one data item. Requires akeymatching a key inlayoutContents.data_unit_list: A carousel pane displaying multiple data items. Requireskeys(array of keys fromlayoutContents). Optional fields:carouselPosition("left","right","top","bottom"; default"left") andcarouselSize(10-70; default 20).- Grid node: Splits the area into two children. Requires
direction("row"or"column"),first,second, andsplitPercentage(5-95).
Settings
The optionalsettings object supports:| Key | Type | Default | Description |
|---|---|---|---|
fixedLayout | bool | false | Prevents users from changing the layout in the Label Editor. |
hasMultilayerLabels | bool | false | When true, labels are placed on all elements in the data group. |
tileSettings | object | Per-tile settings keyed by layoutContents key. Each tile can have a title (string) and isReadOnly (bool, default false). |
Scenes
Scenes
Scenes
Scenes are used for point cloud (PCD/LiDAR) data and can combine multiple sensor streams (cameras, LiDAR) into a single annotation task.For full details on the scene JSON format, supported streams, frames of reference, and examples, see the Add Point Cloud Data documentation.Use a Multi-Region Access Point
When using a Multi-Region Access Point for your AWS S3 buckets the JSON file has to be slightly different from the examples provided. Instead of an object’s URL, objects are specified using the ARN of the Multi-Region Access Point followed by the object name. The example below shows how video files from a Multi-Region Access Point would be specified.MRAP Example
CSV Format
In the CSV file format, the column headers specify which type of data is being uploaded. You can add and single file format at a time, or combine multiple data types in a single CSV file. Details for each data format are given in the sections below.Encord supports up to 10,000 entries for upload in the CSV file.
Videos
Videos
Videos
A CSV file containing videos should contain two columns with the following mandatory column headings:‘ObjectURL’ and ‘Video title’. All headings are case-insensitive.
-
The ‘ObjectURL’ column containing the
objectUrl. This field is mandatory for each file, as it specifies the full URL of the video resource. -
The ‘Video title’ column containing the
video_title. If left blank, the original file name is used.
| ObjectUrl | Video title |
|---|---|
| path/to/storage-location/frame1.mp4 | Video 1 |
| path/to/storage-location/frame2.mp4 | Video 2 |
| path/to/storage-location/frame3.mp4 | |
| path/to/storage-location/frame4.mp4 | Video 3 |
Single images
Single images
A CSV file containing single images should contain two columns with the following mandatory headings:
‘ObjectURL’ and ‘Image title’. All headings are case-insensitive.
‘ObjectURL’ and ‘Image title’. All headings are case-insensitive.
-
The ‘ObjectURL’ column containing the
objectUrl. This field is mandatory for each file, as it specifies the full URL of the image resource. -
The ‘Image title’ column containing the
image_title. If left blank, the original file name is used.
| ObjectUrl | Image title |
|---|---|
| path/to/storage-location/frame1.jpg | Image 1 |
| path/to/storage-location/frame2.jpg | Image 2 |
| path/to/storage-location/frame3.jpg | |
| path/to/storage-location/frame4.jpg | Image 3 |
Image groups
Image groups
Image groups
A CSV file containing image groups should contain three columns with the following mandatory headings:‘ObjectURL’, ‘Image group title’, and ‘Create video’. All three headings are case-insensitive.
-
The ‘ObjectURL’ column containing the
objectUrl. This field is mandatory for each file, as it specifies the full URL of the resource. -
The ‘Image group title’ column containing the
image_group_title. This field is mandatory, as it determines which image group a file will be assigned to.
| ObjectUrl | Image group title | Create video |
|---|---|---|
| path/to/storage-location/frame1.jpg | Group 1 | false |
| path/to/storage-location/frame2.jpg | Group 1 | false |
| path/to/storage-location/frame3.jpg | Group 2 | false |
| path/to/storage-location/frame4.jpg | Group 2 | false |
Image groups do not require ‘write’ permissions.
Image sequences
Image sequences
Image sequences
A CSV file containing image sequences should contain three columns with the following mandatory headings: ‘ObjectURL’, ‘Image group title’, and ‘Create video’. All three headings are case-insensitive.-
The ‘ObjectURL’ column containing the
objectUrl. This field is mandatory for each file, as it specifies the full URL of the resource. -
The ‘Image group title’ column containing the
image_group_title. This field is mandatory, as it determines which image sequence a file will be assigned to. The dimensions of the image sequence are determined by the first file in the sequence. - The ‘Create video’ column. This can be left blank, as the default value is ‘true’.
| ObjectUrl | Image group title | Create video |
|---|---|---|
| path/to/storage-location/frame1.jpg | Sequence 1 | true |
| path/to/storage-location/frame2.jpg | Sequence 1 | true |
| path/to/storage-location/frame3.jpg | Sequence 2 | true |
| path/to/storage-location/frame4.jpg | Sequence 2 | true |
Image sequences require ‘write’ permissions against your storage bucket to save the compressed video.
DICOM
DICOM
A CSV file containing DICOM files should contain two columns with the following mandatory headings: ‘ObjectURL’ and ‘Dicom title’. Both headings are case-insensitive.
-
The ‘ObjectURL’ column containing the
objectUrl. This field is mandatory for each file, as it specifies the full URL of the resource. -
The ‘Series title’ column containing the
dicom_title. When two files are given the same title they are grouped into the same DICOM series. If left blank, the original file name is used.
| ObjectUrl | Series title |
|---|---|
| path/to/storage-location/frame1.dcm | dicom series 1 |
| path/to/storage-location/frame2.dcm | dicom series 1 |
| path/to/storage-location/frame3.dcm | dicom series 2 |
| path/to/storage-location/frame4.dcm | dicom series 2 |
| path/to/storage-location/frame5.dcm | dicom series 3 |
Multiple file types
Multiple file types
Multiple file types
You can upload multiple file types with a single CSV file by using a new header each time there is a change of file type. Three headings will be required if image sequences are included.The example below shows a CSV file for the following:- Two image sequences composed of 2 files each.
- One image group composed of 2 files.
- One single image.
- One video.
| ObjectUrl | Image group title | Create video |
|---|---|---|
| path/to/storage-location/frame1.jpg | Sequence 1 | true |
| path/to/storage-location/frame2.jpg | Sequence 1 | true |
| path/to/storage-location/frame3.jpg | Sequence 2 | true |
| path/to/storage-location/frame4.jpg | Sequence 2 | true |
| path/to/storage-location/frame5.jpg | Group 1 | false |
| path/to/storage-location/frame6.jpg | Group 1 | false |
| ObjectUrl | Image title | Create video |
| path/to/storage-location/frame1.jpg | Image 1 | false |
| ObjectUrl | Image title | Create video |
| full/storage/path/video.mp4 | Video 1 | false |
STEP 2: Register Your Cloud Data
- Navigate to Files section of Index in the Encord platform.
- Click into a Folder.
- Click + Upload files. A dialog appears.
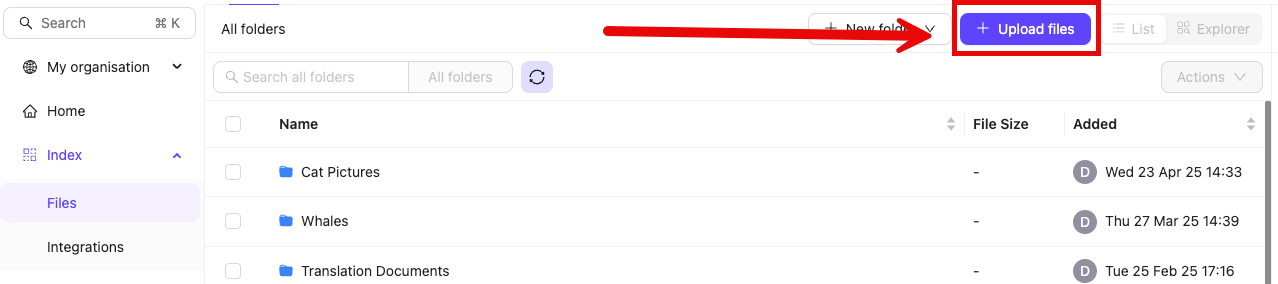
- Click Import from cloud data.

Custom Metadata
Custom metadata can only be added through JSON uploads in the Encord Platform or using the Encord SDK.
- Filtering and sorting in Index and Active.
- Creating custom Label Editor layouts based on metadata.
clientMetadata field (examples show how this is done) of your JSON file.
There is no limit on the number of custom metadata fields on a data unit. However, we enforce a 10MB limit on the custom metadata for each data item. Internally, we store custom metadata as a PostgreSQL
jsonb type. Read the relevant PostgreSQL documentation about the jsonb type and its behaviors. For example, jsonb type does not preserve key order or duplicate keys.Metadata Schema
Metadata schemas, including custom embeddings, can only be imported through the Encord SDK.
- Scalars: Methods for filtering.
- Enums: Methods with options for filtering.
- Embeddings: Method for embedding plot visualization, similarity search, and natural language search.
Custom metadata
Custom metadata refers to any additional information you attach to files, allowing for better data curation and management based on your specific needs. It can include any details relevant to your workflow, helping you organize, filter, and retrieve data more efficiently. For example, for a video of a construction site, custom metadata could include fields like"site_location": "Algiers", "project_phase": "foundation", or "weather_conditions": "sunny". This enables more precise tracking and management of your data.
Before importing any files with custom metadata to Encord, we recommend that you import a metadata schema. Encord uses metadata schemas to validate custom metadata uploaded to Encord and to instruct Index and Active how to display your metadata.
Metadata schema table
Useadd_scalar to add a scalar key to your metadata schema.
| Scalar Key | Description | Display Benefits |
|---|---|---|
| boolean | Binary data type with values “true” or “false”. | Filtering by binary values |
| datetime | ISO 8601 formatted date and time. | Filtering by time and date |
| number | Numeric data type supporting float values. | Filtering by numeric values |
| uuid | UUIDv4 formatted unique identifier for a data unit. | Filtering by customer specified unique identifier |
| varchar | Textual data type. Formally string. string can be used as an alias for varchar, but we STRONGLY RECOMMEND that you use varchar. | Filtering by string. |
| text | Text data with unlimited length (example: transcripts for audio). Formally long_string. long_string can be used as an alias for text, but we STRONGLY RECOMMEND that you use text. | Storing and filtering large amounts of text. |
add_enum and add_enum_options to add an enum and enum options to your metadata schema.
| Key | Description | Display Benefits |
|---|---|---|
| enum | Enumerated type with predefined set of values. | Facilitates categorical filtering and data validation |
add_embedding to add an embedding to your metadata schema.
| Key | Description | Display Benefits |
|---|---|---|
| embedding | 1 to 4096 for Index. 1 to 2000 for Active. | Filtering by embeddings, similarity search, 2D scatter plot visualization (Coming Soon) |
add_geospatial to add a new geospatial type to the metadata schema.
| Key | Description | Display Benefits |
|---|---|---|
| geospatial | Geospatial data that contains latitude and longitude information. Latitude values are between +90 (North) to -90 (South). Longitude values are between +180 (West) to -180 (East). | Filtering data by using a geospatial map. |
- Geospatial custom metadata is supported only in Index.
- Geospatial custom metadata can be applied to all data unit types and on individual frames in videos.
Import your metadata schema to Encord
Verify your schema
After importing your schema to Encord we recommend that you verify that the import is successful. Run the following code to verify your metadata schema imported and that the schema is correct.Update Custom Metadata (JSON)
When updating custom metadata using a JSON file, you MUST specify"skip_duplicate_urls": true and "upsert_metadata": true.
Specifying the "skip_duplicate_urls": true and "upsert_metadata": true flags in the JSON file does the following:
- New files registered with Encord and custom metadata for those files is added.
- Existing files have their existing custom metadata overwritten with the custom metadata specified in the JSON file.
- Create a registration JSON file with the updated custom metadata. Include the
"skip_duplicate_urls": trueand"upsert_metadata": trueflags.
- Custom metadata updates require
"skip_duplicate_urls": trueto function. It does not work if"skip_duplicate_urls": false. - Only custom metadata for pre-existing files is updated. Any new files present in the JSON are uploaded.
Update custom metadata example
- Register your files with Encord using the new JSON file.
Custom Embeddings
Metadata schemas, including custom embeddings, can only be imported through the Encord SDK.
To learn how to use custom embeddings in Encord, see our documentation here.
Step 1: Create a New Embedding Type
A key is required in your custom metadata schema for your embeddings. You can use any string as the key for your embeddings. We strongly recommend that you use a string that is meaningful. If you do not include a key in your metadata schema, your imported embeddings are treated as strings. Useadd_embedding to add an embedding to your metadata schema.
| Key | Description | Display Benefits |
|---|---|---|
| embedding | 1 to 4096 for Index. 1 to 2000 for Active | Filtering by embeddings, similarity search, 2D scatter plot visualization (Coming Soon) |
Step 2: Upload Embeddings
With the key in the custom metadata schema ready, we can now import our embeddings. Custom embedding sizes are flexible and can be set anywhere between 1 and 4096. You can import embeddings after you have added your data or during your data registration.Your key frames (frames specified with or without embeddings) always appear in Index, regardless of what sampling rate you specify.
config is not specified, the sampling_rate is 1 frame per second, and the keyframe_mode is frame.
Specifying a
sampling_rate of 0 only imports the first frame and all keyframes of your video into Index.Import while registering videos
Import while registering videos
Import while importing videos
This JSON file imports embeddings while registering your data with Index from a cloud integration.config is optional when importing your custom embeddings:config is not specified, the sampling_rate is 1 frame per second, and the keyframe_mode is frame.Specifying a
sampling_rate of 0 only imports the first frame and all keyframes of your video into Index.Update specific videos
Update specific videos
Update specific videos
Import while registering data units
Import while registering data units
Import while importing data units
This JSON file imports embeddings while registering your data with Index from a cloud integration.Update specific data units
Update specific data units
Import specific data units
The custom embeddings format for images, text files, PDFs, and audio files follows the same format as importing custom metadata.How To Increase File Registration Speed
To speed up file registration with Encord, you can include metadata for each file in the upload JSON. This metadata is used directly without additional validation and is not stored on our servers. Ensuring accuracy in the metadata you provide is essential to maintain precise labels.-
imageMetadatafor images:mimeType: MIME type of the image (e.g.,image/jpeg).fileSize: Size of the file in bytes.width: Width of the image in pixels.height: Height of the image in pixels.
-
audioMetadatafor audio files:duration_seconds(float): Audio duration in seconds.file_size(int): Size of the audio file in bytes.mime_type(str): MIME type (e.g.,audio/mpeg,audio/wav).sample_rate(int): Sample rate in Hz.bit_depth(int): Size of each sample in bits.codec(str): Codec used (e.g.,mp3,pcm).num_channels(int): Number of audio channels.
-
videoMetadatafor videos:fps: Frames per second.duration: Duration in seconds.width/height: Dimensions in pixels.file_size: File size in bytes.mime_type: File type (MIME standard).
Check Data Registration Status
You can check the progress of the processing job by clicking the bell icon in the top right corner of the Encord app.- A spinning progress indicator shows that the processing job is still in progress.
- If successful, the processing completes with a green tick icon.
- If unsuccessful, there is a red cross icon, as seen below.

- Your provider permissions are set correctly
- The object data format is supported
- The upload JSON or CSV file is correctly formatted.
You only see failed uploads if the Ignore individual file errors toggle was not enabled during cloud data registration.
Helpful Scripts and Examples
Use the following examples and helpful scripts to quickly learn how to create JSON and CSV files formatted for uploading cloud data to Encord, by constructing the URLs from the specified path in your private storage.AWS S3
AWS S3
AWS S3 object URLs can follow a few set patterns: Here’s a python script which creates a JSON file for single images by constructing the URLs from the specified path in a given S3 bucket. You’ll need to configure the following variables to match your setup.And the script itself:
- Virtual-hosted style:
https://<bucket-name>.s3.<region>.amazonaws.com/<key-name> - Path-style:
https://s3.<region>.amazonaws.com/<bucket-name>/<key-name> - S3 protocol:
S3://<bucket-name>/<key-name> - Legacy: those without regions or those with
S3-<region>in the URL
Here’s a python script which creates a JSON file for single images by constructing the URLs from the specified path in a given S3 bucket. You’ll need to configure the following variables to match your setup.- region: the AWS region where your S3 bucket is.
- aws_profile: the name of the profile in the AWS ~/.aws/credentials file. See AWS Credentials Documentation to properly set up the credentials file.
- bucket_name: the name of your S3 bucket you want to pull files from.
- s3_directory: the path to the directory in the S3 bucket where your files are stored.
my-bucket is the bucket name,
us-west-2 is the region, and images/dogs is the S3 directory:GCP Storage
GCP Storage
The following Python scripts generate a JSON file for uploading cloud data to Encord, specifically for a designated GCP Storage bucket. The resulting JSON file includes images, videos, audio, pdfs, and text files.There are two scripts below. The first script only shares the assets’ links and optional client metadata. The second, recommend approach also includes asset metadata for quicker file uploads (as well as preventing ingestion costs from your cloud provider).Before using the scripts, make sure to:
- Specify your bucket name in the
bucket_namevariable. - Decide which GCP authentication method to use. There are 3 options:
- Option 1: Hard code the service account authentication JSON.
- Option 2: Create a
.jsonfile on your computer and provide the path to the service account authentication JSON. - Option 3: If you are already authenticated with gcloud CLI the script gets the credentials from your environment.
- Optionally, modify the name of the output file, currently set to
json_upload_for_encord.json.